
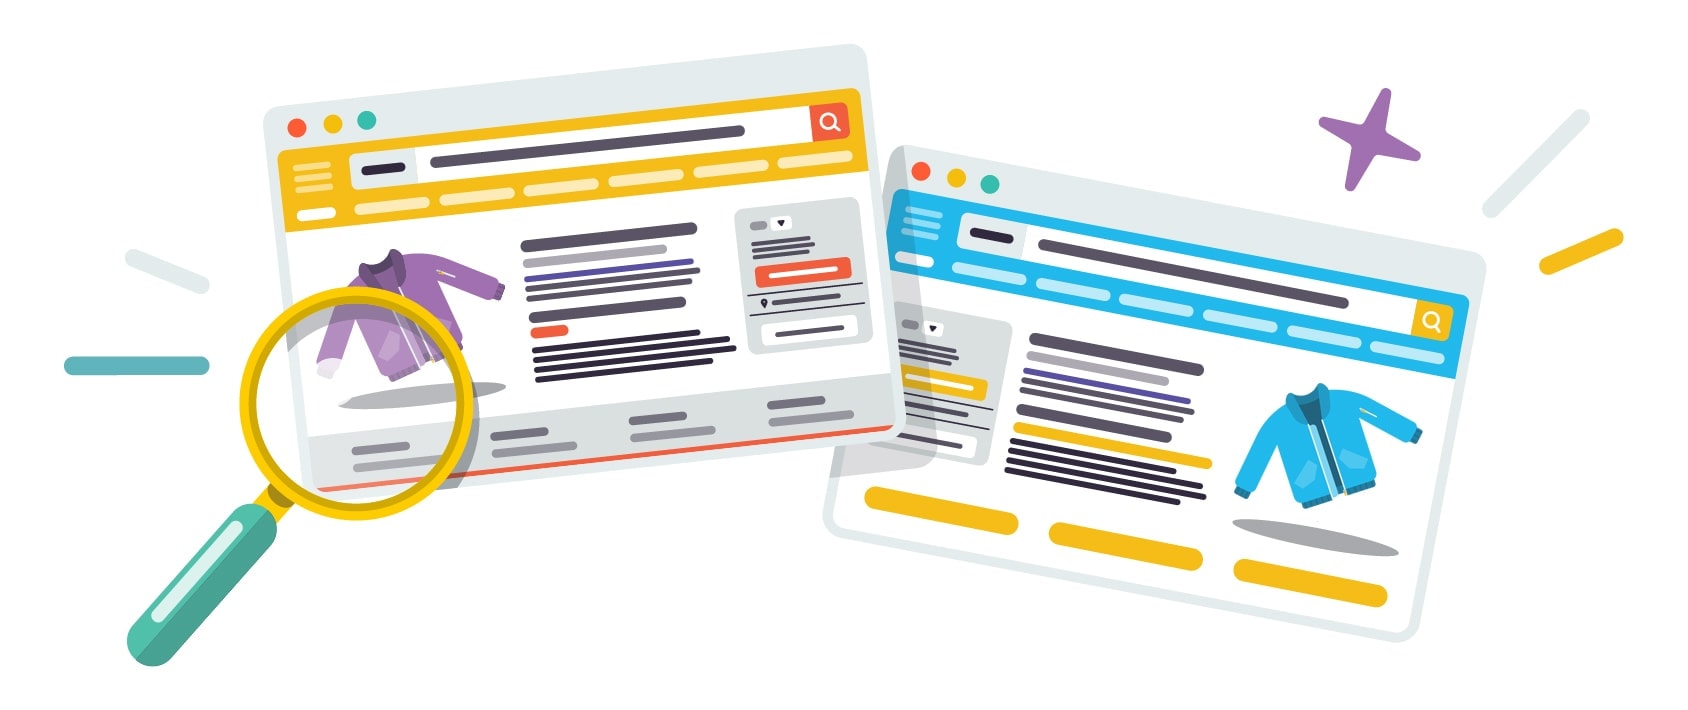
의류 라인 시작 방법: 디자인, 샘플링, 생산 및 포장에 대한 완벽한 가이드
게시 됨: 2021-08-15의류 라인을 시작하는 것은 비전이 있는 창의적인 기업가에게 매우 보람 있는 경험이 될 수 있습니다. 프린트된 의류의 단순한 라인을 만들고 싶거나 다양한 조각과 계절 추가 기능을 갖춘 전체 컷 앤 소우 컬렉션을 만들고 싶거나 이 게시물은 의류 라인을 시작하는 방법을 보여줍니다.
만들고자 하는 의류 라인의 종류에 따라 그 과정에 여러 단계가 포함될 것입니다. 라인의 소싱 및 생산에 더 많이 관여하고 싶어할수록 더 많은 시간, 노력 및 돈을 투자해야 합니다. 빠르고 쉬운 일을 시작하는 데 관심이 있다면 이에 대한 옵션도 있습니다. 이 게시물에서는 예산이 $100이든, 투자할 $10,000 이상이든 자신만의 의류 라인을 시작할 수 있는 방법을 단계별로 보여 드리겠습니다.
의류 브랜드를 시작하는 것에 대해 생각해 본 적이 있다면 더 이상 보지 마십시오. 이 게시물은 거의 1년 동안 작업했으며 그 과정에서 의류 업계의 수십 명의 기업가 및 회사의 지식과 경험을 포함했습니다. 이 산업 지식의 범위는 다음과 같습니다.
- 고급 메리노 울 의류 라인 제조에 투자한 $300,000를 모금한 성공적인 크라우드 펀딩 캠페인을 시작한 소규모 브랜드
- B2B 시장을 겨냥한 블랭크 의류 자체 브랜드 도매업체
- 의류 라인 제작자 지망생과 함께 작업하여 비전을 실현하는 패턴 메이커 및 테크 팩 디자이너
- 그리고 마지막으로 우리는 원사를 염색하고 직물을 짜는 공장의 통찰력을 얻기 위해 출처를 직접 방문했습니다.
자신의 의류 라인을 시작하는 데는 많은 관련이 있으므로 바로 시작해 보겠습니다.
의류 라인을 시작하는 방법: 목차
- 판매할 의류 제품 결정
- 의류 라인 비즈니스 모델 선택
- 주문형 인쇄 의류 라인
- 도매/개인 상표 의류 라인
- 커스텀 컷소우 의류 라인
- 성공적인 의류 브랜드의 요소
- 의류 틈새 시장
- 의류 디자인
- 의류 품질
- 의류 브랜드
- 의류 라인 차별화
- 설계
- 핏/스타일
- 상표
- 벽감
- 성능/소재/품질
- 의류 라인에 대한 사업 계획 개발
- 의류 라인을 위한 브랜드 만들기
- 시장 정의
- 브랜드 기둥 만들기
- 브랜드 비주얼 개발
- 의류 라인의 제품 개발 프로세스
- 의류 라인 컨셉 디자인하기
- 패턴 생성 및 기술 팩 개발
- 연구 의류 제조업체
- 예산 결정
- 의류 제조업체 선택
- 의류 제조업체에 문의
- 스크린 잠재 공장
- 샘플 만들기
- 본격적인 생산 시작
- 의류 및 포장 브랜드
- 브랜드 포장 옵션
- 브랜드 패키지의 요소
- 추가 브랜드 자료 포함
- 의류 브랜드 브랜드
- 온라인 의류 매장 만들기
- 의류 회사를 위한 배송 전략 수립
- 결론
의류 라인을 시작하는 방법에 대한 주요 정보 및 FAQ
나만의 의류 라인을 시작하려면 어떻게 해야 합니까?
의류 라인을 시작하는 것은 원하는 만큼 간단하거나 복잡할 수 있습니다. 간단하게 유지하려면 직송 공급 업체로부터 의류 제품을 소싱하십시오. 더 많은 옵션을 보려면 도매 공급업체의 의류 제품을 구매하세요. 의류 브랜드에 대한 완전하고 완전한 입력 및 제어를 위해 의류 제조업체와 협력하십시오.
의류 라인을 시작하려면 사업 허가가 필요합니까?
아마! 국가 또는 지역에 따라 다를 수 있지만 대부분의 기업은 사업을 운영하기 위해 사업자 등록증이 필요합니다. 정확한 사업 허가 정보는 해당 국가 및/또는 지역의 사업 허가 규제 기관에 문의하십시오.
미국에 계시다면 미국 중소기업 협회, 캐나다에서는 캐나다 정부 웹사이트, 영국에서는 영국 정부 웹사이트, 호주에서는 ABLIS를 확인하십시오.
내 의류 브랜드에 저작권, 상표 또는 NDA가 필요합니까?
때에 따라 다르지. 대부분의 의류 브랜드에서 대답은 아니오일 수 있지만 자격을 갖춘 조언을 얻으려면 법률 전문가에게 연락할 가치가 있습니다. 법적 문제에 관해서는 스스로 실사를 수행하십시오.
많은 새로운 의류 브랜드의 경우 저작권 또는 상표권 등록은 가치가 없을 수 있습니다. 왜요? 짧은 대답은 공식적으로 해당 저작권을 등록하지 않고도 생성한 디자인에 대한 모든 저작권을 자동으로 소유하고 상표는 비싸고 시간이 많이 걸리며 모든 관할권에서 혜택을 제공하지 않는다는 것입니다.
또한 상표를 등록할 때 해당 상표를 방어할 의무가 있을 수 있으므로 사람/기업이 귀하의 상표를 침해하는 경우 법적 조치를 취할 수 있는 책임을 져야 할 책임이 있습니다. ) 미래에.
저작권 및 상표 등록에는 이점과 이점이 있을 수 있지만 처음 시작할 때 가치가 없을 수 있는 많은 시간, 비용 및 골칫거리가 있을 수 있습니다. 그러나 자신의 상황을 고려하여 의류 라인에 가장 적합하다고 생각되는 작업을 수행하십시오.
NDA(비공개 계약)는 패턴 제작자 및/또는 제조업체와 협력할 때 맞춤형 의류 디자인을 보호하는 데 유용할 수 있습니다. 귀하의 상황에 맞는 지침을 얻으려면 법률 전문가와 상담하는 것이 가장 좋습니다.
법률 자문을 위해 다음 온라인 리소스를 확인하십시오.
- 법률 거래(미국)
- 선명도(전 세계)
- 소유자(캐나다)
- 로켓 변호사 (미국, 영국, 스페인, 프랑스, 네덜란드)
의류 라인을 시작하는 데 드는 비용은 얼마입니까?
때에 따라 다르지. 직송 공급업체와 협력하여 의류를 만들고 배송 및 주문 처리 프로세스를 처리하는 경우 의류 브랜드를 시작하는 데 $100-$500의 비용이 들 수 있습니다. 그러나 완벽한 브랜드 관리를 원하고 옷을 처음부터 디자인하려면 수만 달러 이상의 비용이 들 수 있습니다. 의류 사업이 운영되기를 원하는 규모에 따라 다릅니다!
의류 라인을 무료로 시작하는 방법
의류 라인을 무료로 시작하려면 직송 공급업체로부터 의류를 소싱하십시오. dropshipper는 의류 제품을 만들고 의류에 로고, 패턴 또는 이미지를 인쇄할 수 있으며 배송 프로세스도 처리합니다. 의류 직송 배송업체와 함께 작업할 때 재고를 미리 구매할 필요도 없으므로 재정적 자본이 거의 또는 전혀 없이 시작할 수 있습니다.
이 프로세스에 대해 알아보려면 주문형 인쇄 의류 라인 섹션으로 이동하십시오.
경험이 없는 의류 라인을 시작하는 방법
경험이 없어도 의류 라인을 시작할 수 있습니다. 너무 부담되지 않도록 많은 책임을 덜어주는 직송으로 의류 라인을 시작하는 것이 좋습니다.
자세한 내용은 주문형 인쇄 의류 라인을 확인하십시오.
의류 제조업체를 찾는 방법
다양한 의류 제조업체가 있습니다! 주로 북미에 기반을 둔 의류 제조업체를 찾으려면 의류 제조업체 디렉토리를 확인하십시오.
자신의 옷을 디자인하는 방법
자신의 옷을 디자인하는 방법을 배우려면 해당 지역의 수업을 듣거나 온라인으로 수업을 찾으십시오! Skillshare 또는 YouTube에서 과정을 찾을 수 있습니다!
명품 의류 브랜드를 시작하는 방법
명품 의류 브랜드를 시작하려면 품질과 맞춤 디자인에 중점을 두고 싶으므로 이러한 요소를 중시하는 의류 제조업체도 찾으십시오. 세심하고 세심한 주의를 기울여 의상을 제작하는 의류 아틀리에와 긴밀히 협력하여 각 의상에 적합한 핏을 만들고 고품질 재료로 작품을 만드는 데 중점을 둡니다. 해당 지역의 의류 아틀리에를 검색하거나 만들고 싶은 의류 종류를 전문으로 하는 해외 의류 제조업체를 찾으십시오.
도매 구매로 의류 사업을 시작하는 방법
도매 의류 의류를 구매하여 의류 사업을 시작하는 것은 의류 라인을 시작하는 접근하기 쉬운 방법입니다. 이렇게 하면 옷을 처음부터 디자인할 필요가 없으므로 변화하는 트렌드를 훨씬 쉽게 따라갈 수 있습니다. 자세한 내용은 도매/개인 라벨 의류 라인 섹션을 확인하십시오.
의류 부티크를 시작하는 방법
대부분의 의류 부티크는 여러 브랜드의 의류를 선별하므로 온라인이나 오프라인으로 자신의 의류 부티크를 시작하려면 다양한 브랜드나 디자이너의 아이템을 구매하는 것이 좋습니다.
즉, 여러 도매 의류 공급업체로부터 의류 제품을 소싱하게 되므로 안목 있는 눈으로 해당 제품을 살펴보고 부티크의 틈새 시장에 가장 적합한 품목을 선별해야 합니다. 도매 의류 소싱 프로세스를 시작하려면 도매/개인 라벨 의류 라인 섹션을 확인하십시오.
집에서 패션 비즈니스를 시작하는 방법
집에서 패션 사업을 시작하는 것은 완전히 가능합니다. 이 기사의 나머지 부분을 확인하여 방법을 알아보세요!
판매할 의류 제품 결정
의류 및 패션 제품을 만들 때 선택의 폭이 넓습니다.
항상 의류 라인을 시작하고 싶었다면 만들고 판매하려는 특정 제품에 대해 이미 잘 알고 있을 것입니다. 다른 사람들에게는 의류 브랜드를 만드는 것이 개인 스타일을 나타내는 제품을 디자인할 수 있는 독특하고 흥미로운 기회가 될 수 있지만 어떤 제품을 판매해야 할지 확신이 서지 않을 수 있습니다.
어느 카테고리에 속하든지, 그 중 하나를 선택하기로 결정하기 전에 모든 의류 및 의류 옵션을 신중하게 고려하는 것이 중요합니다.
브랜드에 대해 고려할 수 있는 일부 의류 및 의류 제품은 다음과 같습니다.
- 반팔 셔츠
- 긴팔 셔츠
- 후드티
- 바지/레깅스
- 복장
- 란제리/속옷/양말
이러한 의류 제품 각각은 주변에 의류 브랜드를 구축할 때 고유한 기회와 과제를 제시하므로 신중하게 고려하는 것이 중요합니다. 이 문서를 계속 진행하면서 이 점을 염두에 두십시오.
아래에서는 각각에 필요한 작업, 시간 및 금전적 투자를 더 잘 이해하기 위해 가장 일반적인 의류 라인 비즈니스 모델 중 일부를 살펴보겠습니다.
의류 라인 비즈니스 모델 선택
의류 브랜드를 시작할 준비가 되었다면 이 시점에서 몇 가지 중요한 선택을 해야 합니다.
서로 상당히 다른 나만의 브랜드를 만들기 위해 취할 수 있는 몇 가지 방향이 있습니다. 그리고 가장 중요한 것은 어려움, 비용 및 시간 입력이 각 옵션에 따라 크게 다릅니다.
가장 일반적인 옵션을 살펴보겠습니다.
- 주문형 인쇄
- 자체 상표 의류 라인
- 커스텀 컷소우 의류 라인
아래에서 각각의 장점과 단점을 파헤쳐 보겠습니다.
| 유형 | 어려움 | 비용 | 시간 입력 |
|---|---|---|---|
| 1. 주문형 인쇄 | 매우 낮은 | $ | 매우 낮은 |
| 2. 도매/개인 상표 | 낮은 | $$ | 중간 |
| 3. 커스텀 커트앤소우 의류 라인 | 높은 | $$$$ | 매우 높음 |
옵션 #1: 주문형 인쇄 의류 라인
자신의 의류 라인을 시작하는 첫 번째이자 가장 쉬운 옵션은 표준 빈 의류에 디자인이나 로고를 인쇄하는 것입니다.
이것은 저예산($1,000 미만)을 가진 사람들과 거의 완전히 자동화된 비즈니스를 설정할 수 있는 혜택을 원하는 사람들에게 매력적인 옵션입니다. 이 유형의 비즈니스 모델의 가장 큰 단점은 표준 도매 의류를 사용하기 때문에 낮은 이윤과 소재, 봉제 및 핏과 같은 항목에서 제품을 차별화할 수 있는 능력이 없다는 것입니다.
주문형 인쇄 또는 의류 직접 인쇄 프로세스는 특수 디지털 잉크젯 프린터를 사용하여 잉크를 의류 및 의류에 직접 인쇄합니다. 이 디지털 프린터는 매우 정확하게 의류 품목에 풀 컬러 이미지를 생성할 수 있습니다.
주문형 인쇄 인쇄는 고품질 인쇄 의류를 빠르고 효율적으로 생산합니다. 이 때문에 스크린 인쇄와 달리 설정 비용이 없습니다. 이는 소액 주문(단 1개 포함)을 쉽고 비용 효율적으로 인쇄할 수 있음을 의미합니다.
장점
- 설치 비용 없음
- 고품질 인쇄물
- 무제한 색상 옵션
- 소량 주문 또는 일회용에 적합
- 다양한 의류 옵션(셔츠, 레깅스, 양말, 드레스 등)
단점
- 대규모 생산 실행에는 비용 효율적이지 않음
- 일반적으로 볼륨 할인 없음
- 제한된 인쇄 제품 선택
- 제한된 마감 옵션(태그, 라벨 등)
타임라인: 일
비용: $0-$500
시간 및 에너지 투입량: 매우 낮음
기타 참고 사항: 주문형 인쇄 의류 브랜드를 시작하려면 Printful 및 Shopify를 사용하는 것이 좋습니다. Printful(Shopify 스토어와 원활하게 통합됨)과 같은 의류 및 의류 인쇄 회사를 활용하면 $50 미만의 비용으로 몇 시간 만에 작업을 시작할 수 있습니다. 온라인 상점에 대한 주문을 받으면 Printful도 자동으로 주문을 받고 인쇄 프로세스를 시작하여 귀하를 대신하여 고객에게 배송합니다. 이 프로세스에 대해 자세히 읽고 24시간 이내에 티셔츠 사업을 시작하는 방법 문서에서 이와 같은 사업을 시작하는 방법을 단계별로 알아보세요. 주문형 인쇄 의류 공급업체를 더 찾으려면 Dropshipping 공급업체 디렉토리를 확인하십시오.
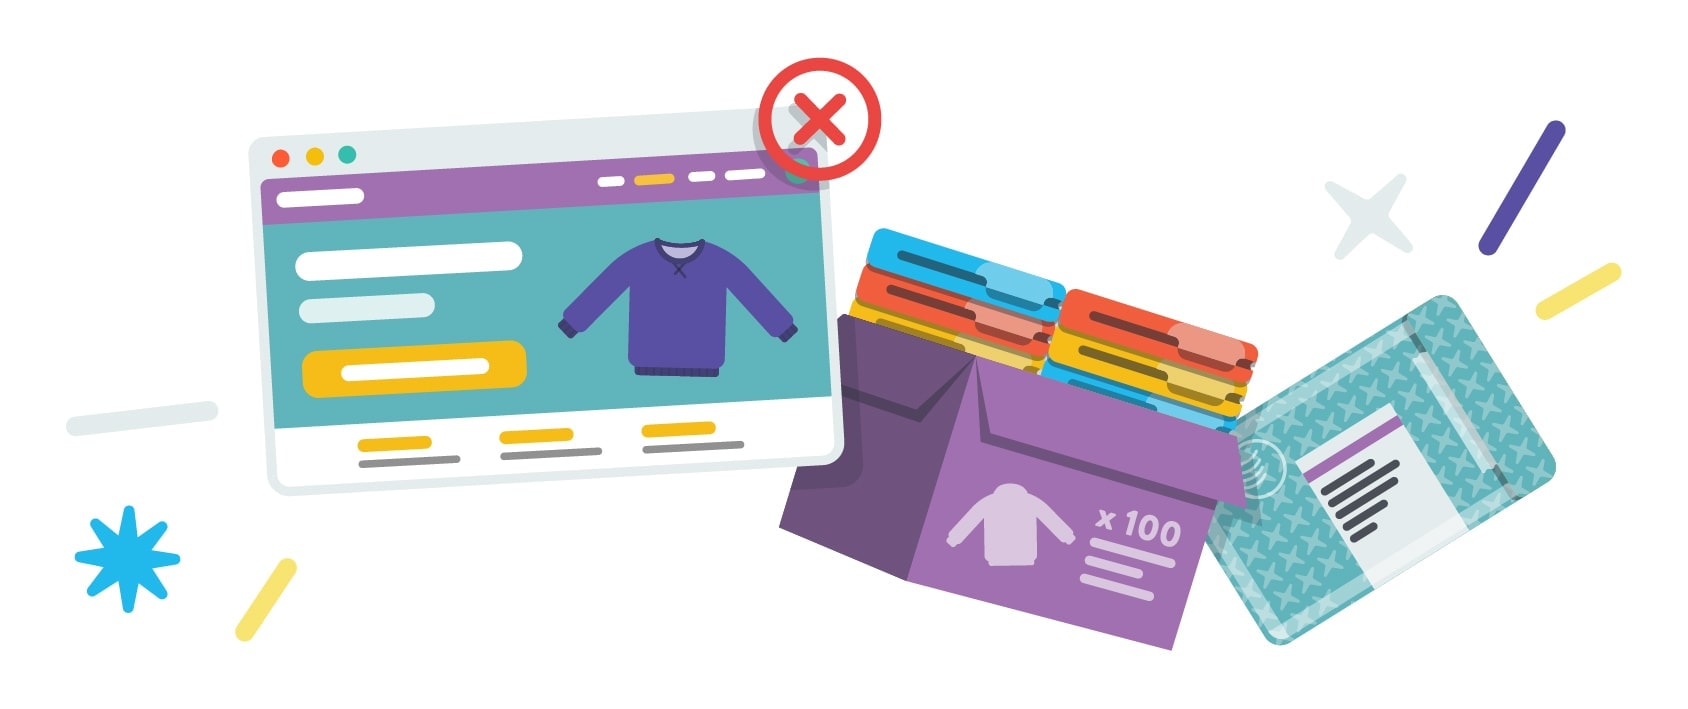
옵션 #2: 도매/개인 상표 의류 라인
도매 또는 자체 상표 공급업체를 통해 의류 제품을 소싱할 때 본질적으로 다른 브랜드의 의류 제품을 구매한 다음 자신의 상점에서 고객에게 판매합니다. 이러한 방식으로 의류 제품을 소싱하면 공급업체로부터 할인된 가격으로 대량으로 제품을 구매한 다음 이 가격에 고객에게 판매합니다.
광고
이 옵션을 사용하면 처음부터 자신의 의류 품목을 제조하지 않고 고객의 취향에 맞는 옷을 선별하게 됩니다. 의류 품목을 제조하는 것처럼 각 의류 조각을 사용자 정의할 수는 없지만 자신의 의류 품목을 제조하는 길고 비싼 과정을 겪을 필요도 없습니다. 그러나 이 옵션의 주요 단점은 의류 품목의 많은 SKU(stock-keeping unit)를 대량으로 선불로 구매해야 하므로 현금 흐름이 필요하다는 것입니다.
장점
- 자신의 항목을 제조할 필요가 없습니다
- 변화하는 트렌드를 보다 쉽게 따라갈 수 있습니다.
- 자신의 제품 범위를 선별하십시오.
- 대량 할인
- 좋은 수익 마진을 위한 가능성
- 자신의 행택, 포장 등으로 아이템을 브랜드화할 수 있습니다.
- 개인 라벨 공급 업체와 작업 할 때, 당신은 당신의 자신의 브랜드 이름으로 의류 태그를 사용자 정의 할 수 있습니다
단점
- 도매업체와 협력할 때 브랜드 이름으로 의류 태그를 사용자 정의할 수 없습니다 .
- 일반적으로 최소 주문 수량은 100개 또는 1,000개가 아닌 경우 색상/크기당 10개( 최소) 부터 시작합니다.
- 재고 및 배송을 직접 관리해야 합니다.
- 많은 제품을 미리 구매하려면 현금 흐름이 필요합니다.
타임라인: 주
비용: $2,500+
시간 및 에너지 투입: 중간
기타 참고 사항: 귀하의 의류 브랜드에 대한 공급업체를 찾으려면 도매 공급업체 디렉토리 및 개인 상표 공급업체 디렉토리를 확인하는 것이 좋습니다!
옵션 #3: 맞춤 재단 및 봉제 의류 라인

맞춤 재단 및 봉제 의류는 모든 작업을 수행한다는 의미입니다. 우리는 스케치를 디자인하고, 패턴으로 만들고, 직물과 제조업체를 소싱하고, 전체 생산 실행(수천 단위가 될 수 있음)에 대한 비용을 지불하는 것에 대해 이야기하고 있습니다.
자신의 옷을 만드는 것은 희미한 마음을위한 것이 아닙니다. 시작하고 실행하는 데 몇 달(최소한)이 걸릴 수 있는 집약적인 프로세스일 수 있습니다. 제조업체를 찾아야 하고, 패턴 제작자와 협력해야 하고, tach pack을 만들어야 하고, 패브릭을 소싱하고 테스트해야 하고, 또한 만들고 테스트해야 할 것입니다. 완제품에 가까워지기 전에 많은 샘플.
생산하려는 정확한 의류 품목에 따라 완제품으로 몇 가지 샘플을 얻는 데만 수천 달러가 소요될 수 있습니다.
완제품이 완성되면 제조업체와 함께 전체 실행을 해야 하고 재고를 비축해야 하며 옷을 고객에게 제공하기 위한 배송 전략도 개발해야 합니다.
장점
- 100% 커스텀 제품을 만나보실 수 있습니다.
- 고객의 인지 가치 증가 가능성
- 마진 증가 가능성
- 브랜딩을 100% 제어할 수 있습니다.
단점
- 매우 높은 시작 비용
- 여러 움직이는 부품이 포함된 복잡한 프로세스입니다.
- 출시하는 데 몇 달 이상 걸릴 수 있습니다.
일정: 3개월 – 1년 이상
비용: $10,000+
시간 및 에너지 투입량: 매우 높음
기타 참고 사항: 이 게시물의 두 번째 부분은 자신만의 재단 및 봉제 의류 라인을 개발하는 데 관련된 모든 단계와 리소스에 중점을 둘 것이므로 계속 읽으십시오!
성공적인 의류 브랜드의 요소
훌륭한 의류 브랜드에는 이유가 있습니다. 일반적으로 그들은 한 가지 일을 아주 잘하고 때로는 여러 가지 일을 정말 잘합니다. 자신의 의류 라인을 시작하기 전에 고려해야 할 성공적인 브랜드에 대한 네 가지 중요한 요소가 있습니다.
- 벽감
- 설계
- 품질
- 상표
아래에서 이러한 요소 각각에 대해 좀 더 자세히 살펴보겠습니다.
의류 브랜드 틈새 선택
특정 틈새 시장을 선택하는 것은 의류 및 의류 산업에서 성공하기 위해 중요하며 여러 번 중요합니다. 많은 사람들을 대상으로 맹목적으로 노력하면 아무에게도 말하지 않는 브랜드를 남길 수 있습니다.
특정 그룹의 사람들에 초점을 맞추면 다음과 같은 몇 가지 주요 이점이 있습니다.
- 마케팅하기가 더 쉽습니다(목표 시장을 보다 구체적으로 공략할 수 있기 때문에)
- 더 저렴할 수 있습니다(잘못된 잠재고객을 타겟팅하지 않기 때문에).
- 경쟁이 줄어들 가능성이 있습니다(틈새가 많을수록 경쟁 풀이 작아짐).
- 고객 충성도를 높일 수 있습니다(청중이 고객에게 집중하고 있다는 사실을 알고 있기 때문).
예를 들어, "재미있는 슬로건이 있는 의류" 또는 "남성용 후드티"는 시장이 매우 발달되어 있기 때문에 공격하기에는 너무 광범위합니다. 틈새 시장을 공략하면 시장을 더 잘 타겟팅하고 더 쉽게 도달할 수 있으며 더 많은 가치를 창출할 수 있습니다. 따라서 "재미있는 슬로건이 있는 옷" 대신 "간호사 또는 소방관을 위한 슬로건이 있는 옷"과 같이 구체적이고 열정적인 시장을 겨냥할 수 있습니다. 또는 "남성용 후드티" 대신 추운 기후에 있는 사람들을 위한 매우 두꺼운/따뜻한 후드티 제조에 집중할 수 있습니다.
의류 디자인
인쇄, 자수 또는 실제 의복 자체의 디자인 여부와 상관없이 귀하의 디자인은 매우 중요합니다. 의류는 멋지게 보일 뿐만 아니라 특히 타겟 시장의 눈에 멋지게 보여야 합니다.
궁극적으로 의류 디자인이 미학적으로 만족스럽지 않고 구매자에게 매력적이지 않으면 손해를 보게 될 것입니다. 디자인이 반드시 복잡할 필요는 없습니다. 실제로 가장 많이 팔리는 의류 디자인은 매우 단순하지만 특정 청중/틈새와 연결되어야 합니다.
의류 품질
사람을 한 번 속일 수는 있어도 두 번 속일 수는 없습니다. 시간이 지남에 따라 바래고 갈라지는 패턴이나 한 번 세탁한 후 이음새에서 분리되는 조각은 돌아와서 재구매할 열광적인 팬을 만들지 않습니다.
모든 의류가 동일한 것은 아니며 의류 품목의 품질에 큰 차이가 있을 수 있습니다. 선택하는 재료의 품질과 구성은 옷이 어떻게 입는지, 어떻게 세탁하는지, 어떻게 바래고, 줄어들고, 궁극적으로 얼마나 오래 지속되는지에 영향을 미칩니다. 위에서 언급했듯이 품질은 브랜드와 브랜드의 성공에 가장 중요하므로 스스로 교육하고 재료를 신중하게 선택하는 것이 중요합니다.
더 높은 이윤을 위해 품질을 희생하고 싶은 유혹은 항상 있을 수 있지만 장기적으로 다른 사람들과 브랜드를 공유하고 재구매하려는 고객의 결정에 품질이 어떤 영향을 미칠지 고려해야 합니다.
의류 브랜드
많은 의류 회사는 강력한 브랜드를 기반으로 합니다. 의류 자체를 넘어 강력한 브랜드는 목표 시장이 의류를 구매, 대표, 공유 및 재구매하도록 장려하고 강화합니다. 귀하의 브랜드는 제품 자체를 넘어 브랜드가 의미하는 것과 관련된 라이프스타일을 포괄합니다.
의류 라인 차별화
의류 디자인 및 의류 산업은 가장 포화 상태에 있는 산업 중 일부입니다. 효과적으로 경쟁하려면 시장에서 다른 모든 산업과 차별화되는 차별화 요소가 필요합니다.
공장에서 일하는 것은 나에게 얼마나 많은 사람들이 이 산업에 뛰어들었는지 전혀 알 수 없는 상황에서 멀리 떨어진 성공을 거둔 브랜드를 구축하는 데 필요한 것이 무엇인지를 미리 볼 수 있는 기회를 주었습니다. 무지를 비난하는 것은 완전히 공정하지 않습니다... 우리는 그것이 얼마나 힘든지 전혀 몰랐습니다. 그러나 우리는 우리를 차별화하는 이유, 사람들이 우리 제품을 구매하는 데 관심을 갖는 이유, 판매 방법에 대한 명확한 이유를 가지고 Stock을 시작했습니다. 많은 메이커 지망생들이 건너뛰는 단계입니다. – 짐 스네디커 | 주식회사
좋은 소식은 군중과 차별화되는 여러 가지 방법이 있다는 것입니다.
설계
옷에 그래픽이나 이미지를 넣을 계획이라면 디자인(디자인 스타일 및 디자인 품질)이 다른 사람들과 차별화되는 데 도움이 될 수 있습니다.
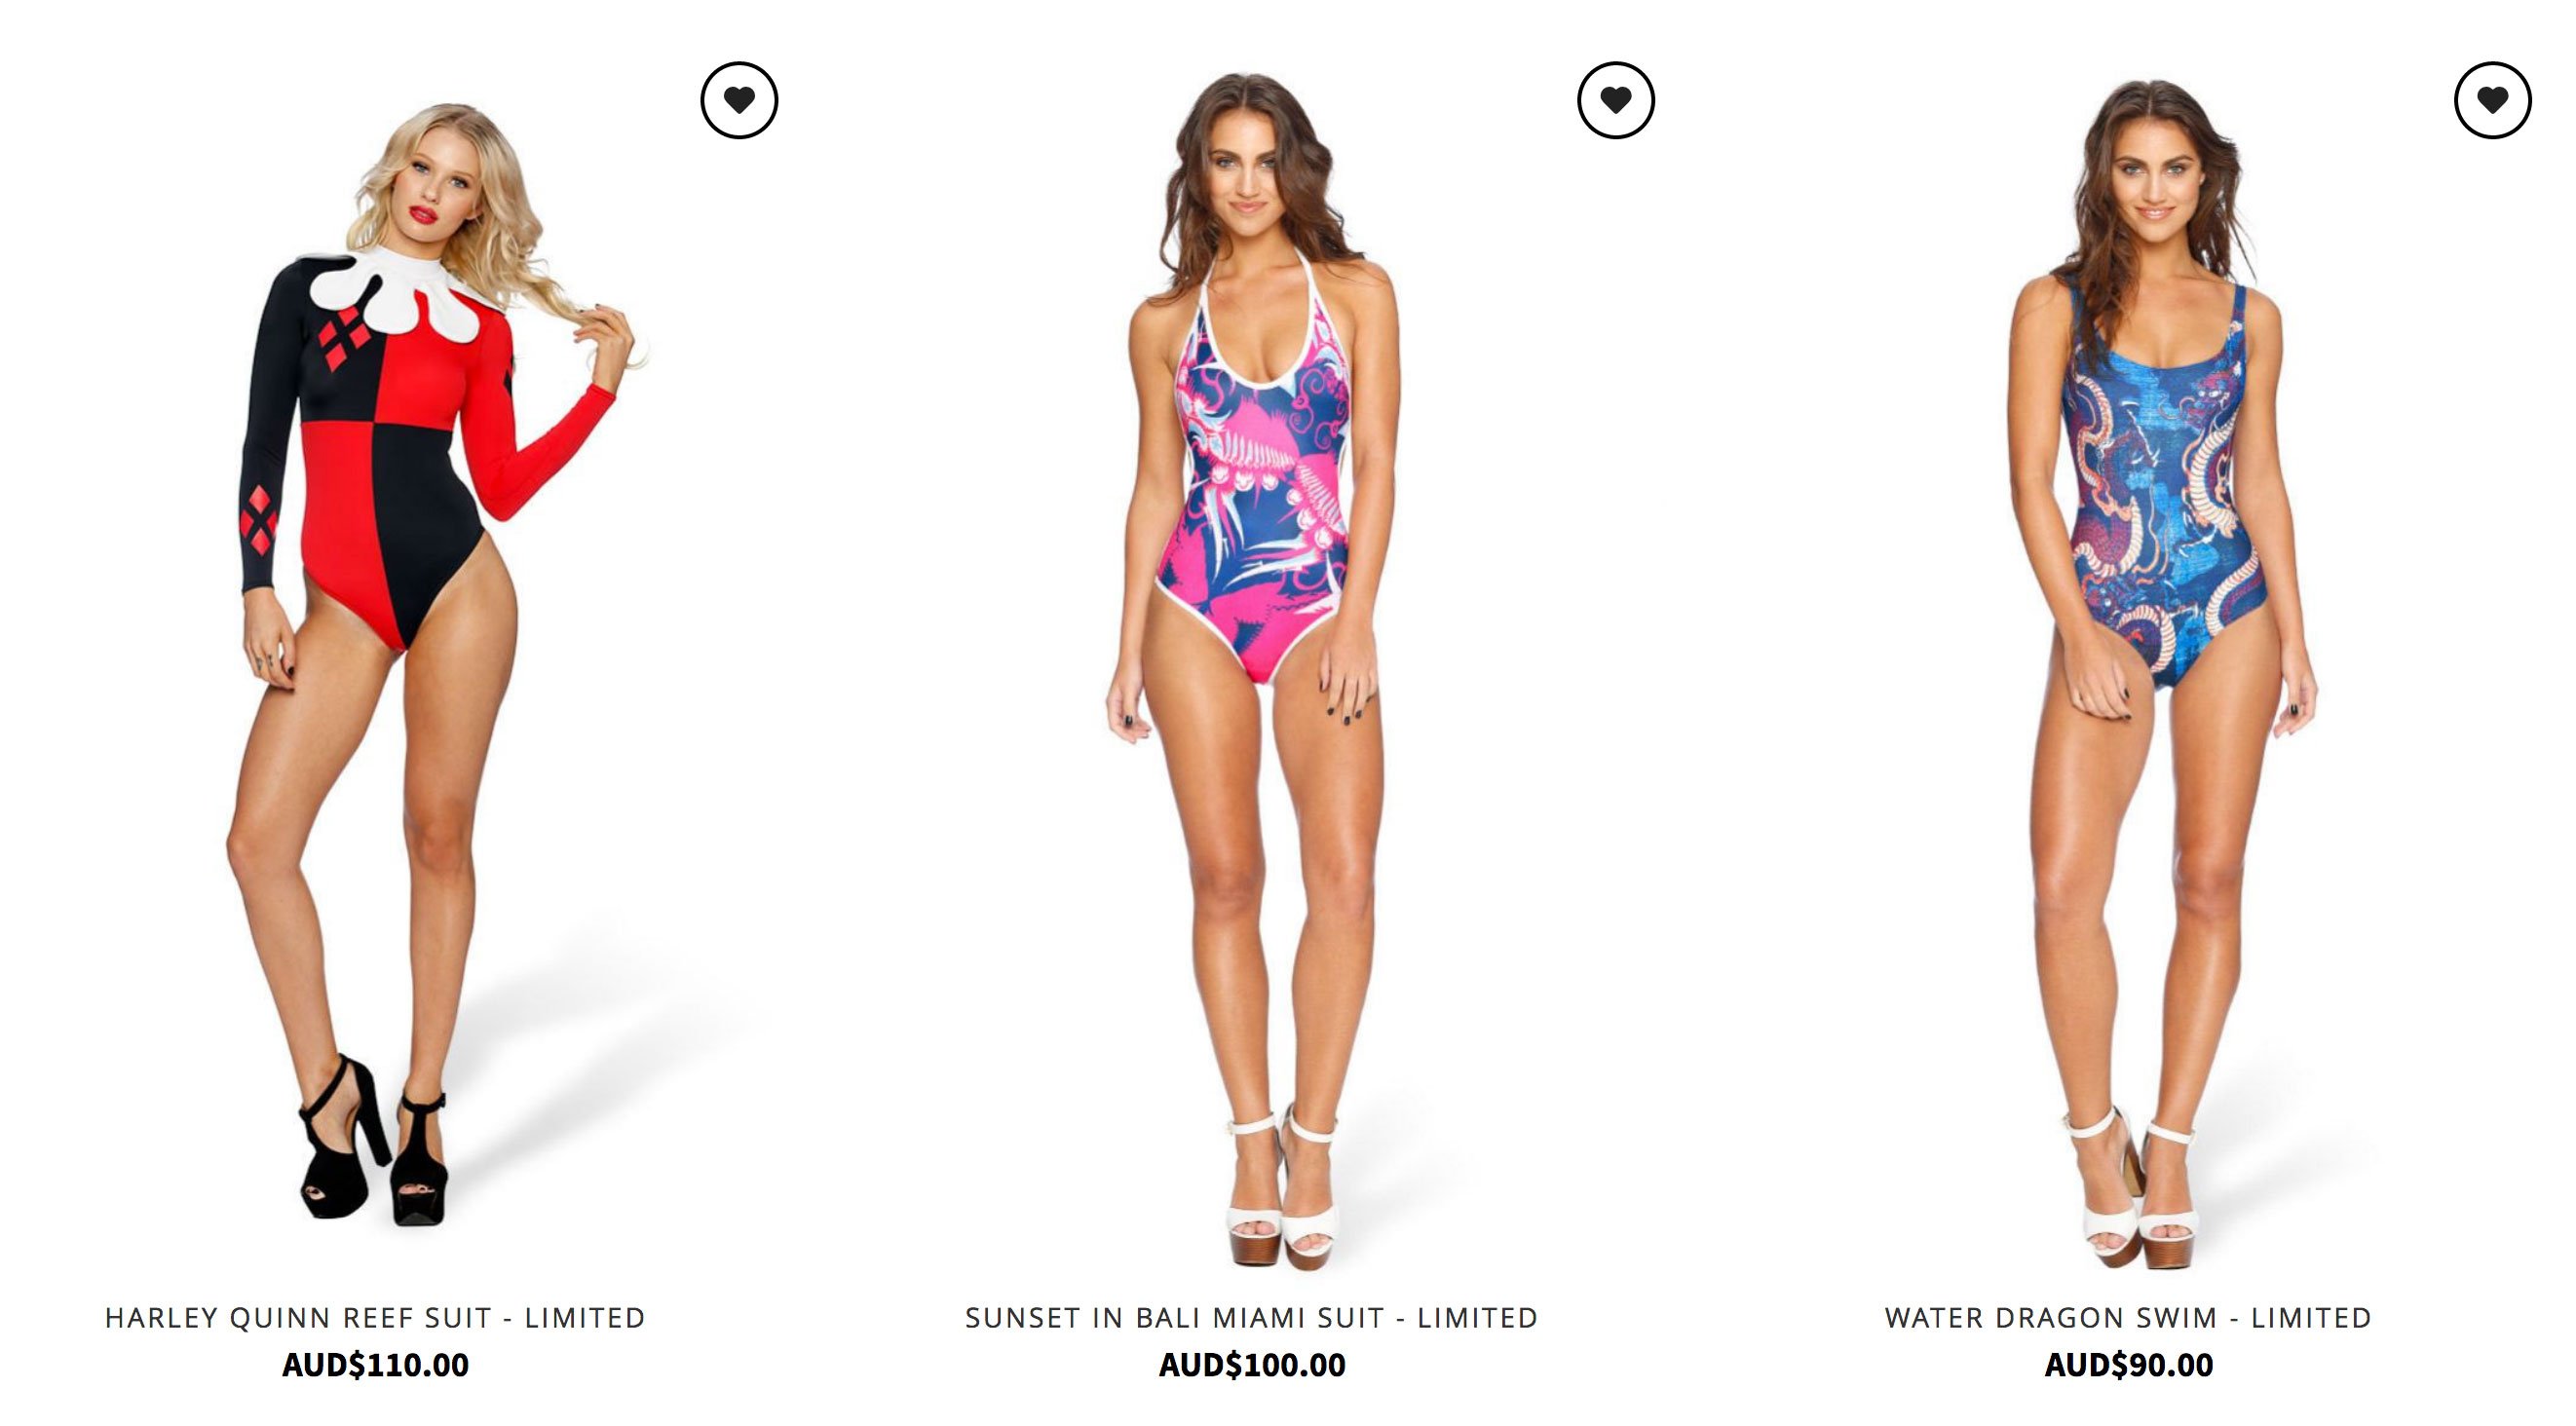
예: Blackmilk Clothing은 고유한 디자인의 레깅스를 제작하여 이름을 알리고 Shopify의 가장 큰 판매자 중 하나가 되었으며 주요 브랜드(아래의 경우 Dr. Who:
핏/스타일
처음부터 나만의 옷을 만들 계획이라면 옷의 실제 핏과 스타일이 중요한 차별화 포인트가 될 수 있습니다.
예: Sharp Casualwear는 잘 어울리는 스타일리시한 스테이플을 찾는 5'8" 이하 남성에게 고급 의류를 제공합니다. 더 나은 핏으로 유명해지고 알려지게 된 원래 온라인 브랜드는 아마도 보노보스일 것입니다. Bonobos는 더 잘 맞는 남성용 바지를 만들기로 결정했습니다. 더 나은 적합성은 초기에 회사를 설립하는 데 도움이 되었고 브랜드를 1억 달러 규모의 회사로 만들었습니다.
상표
다른 모든 것이 동일할 때 사람들은 가장 공감할 수 있는 스토리를 가진 브랜드에서 구매할 가능성이 더 높습니다. 또한 소비자와 연결되는 강력한 브랜드만으로도 다른 일반 브랜드와 품질이 비교적 같거나 저렴하더라도 더 높은 가격대를 요구할 수 있습니다.
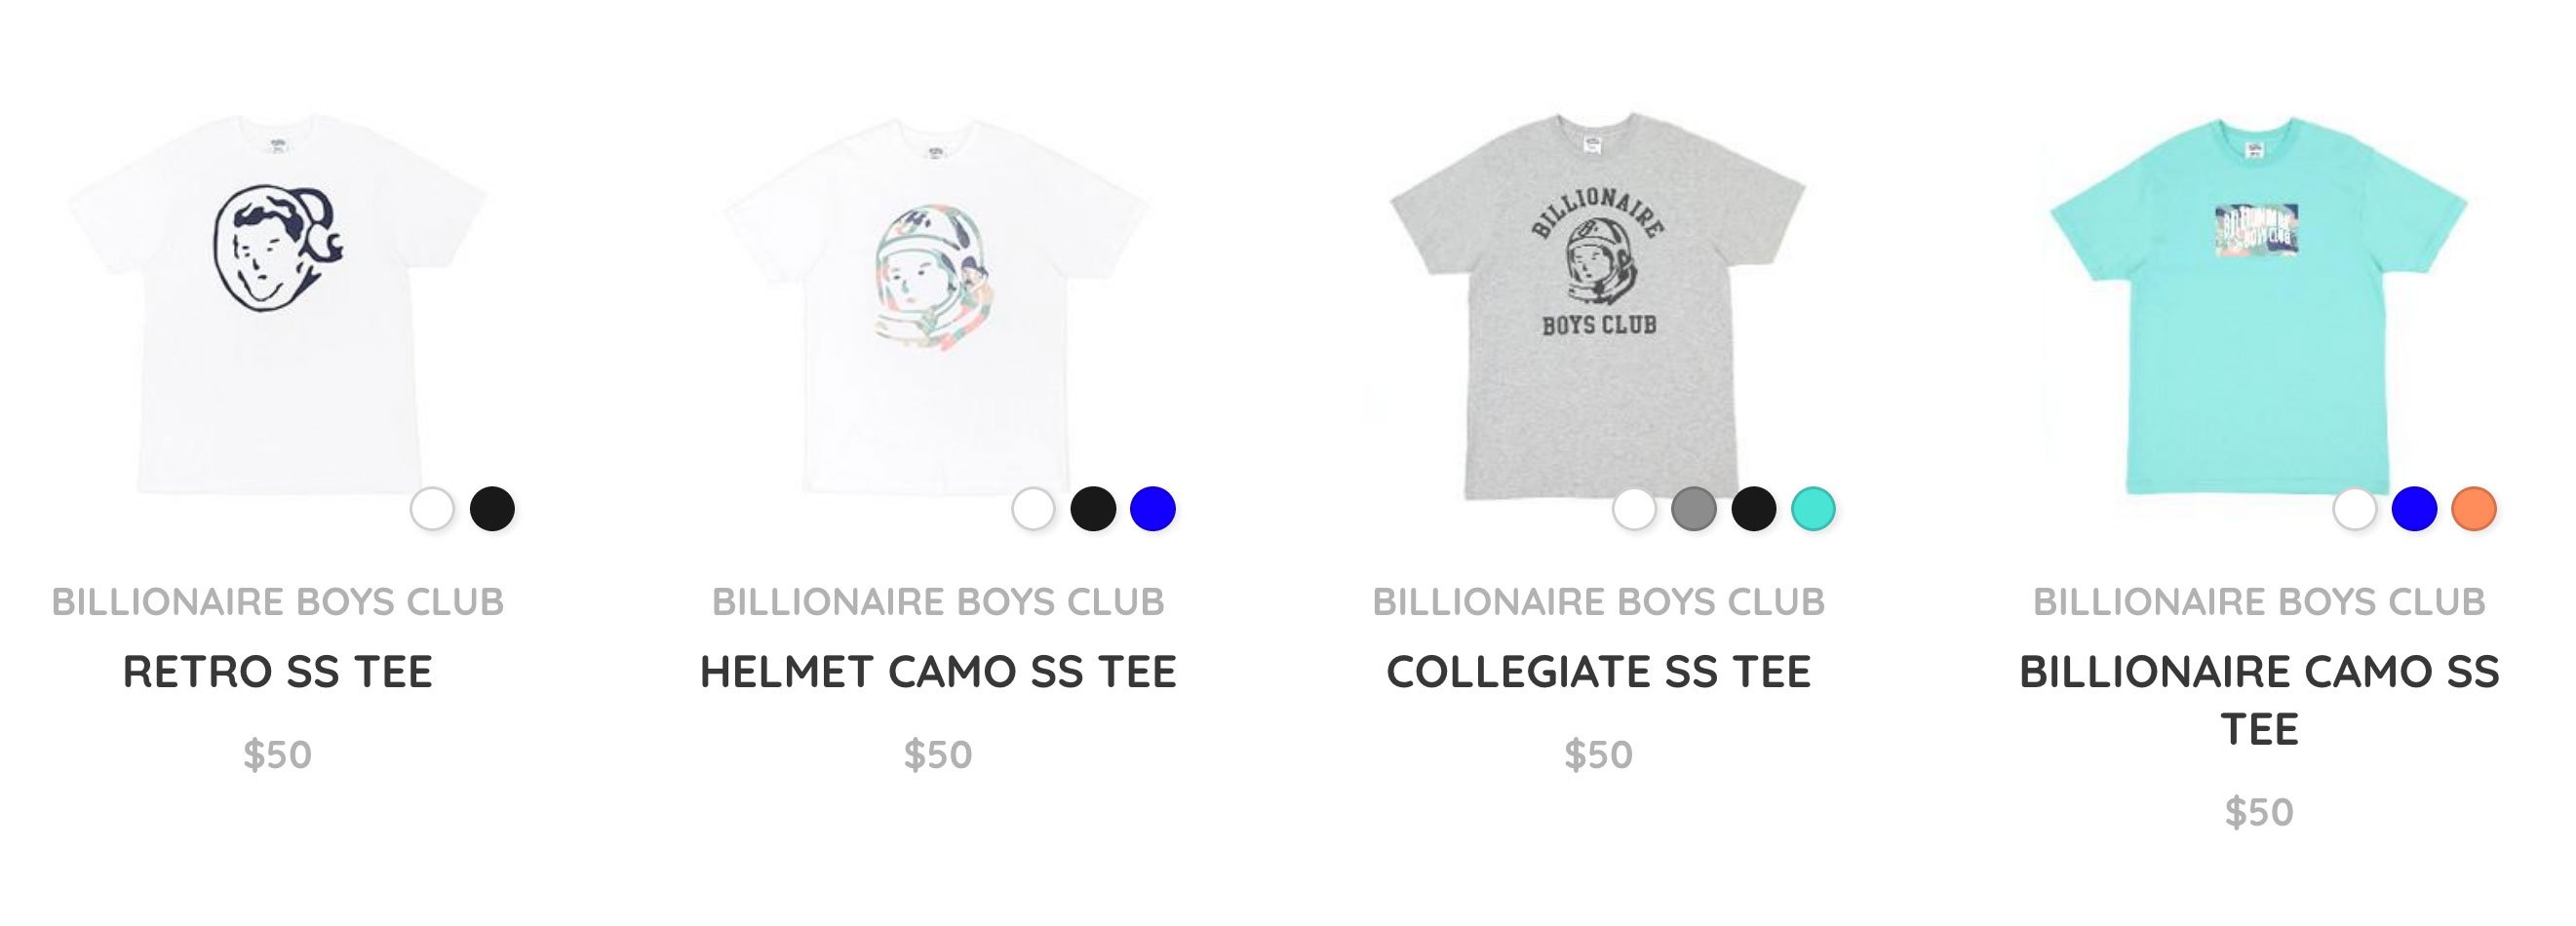
예: 2000년대 초반 내내 Billionaire Boys Club은 "Billionaire Boys Club"이라고 간단히 쓰여진 티셔츠를 거의 100달러에 판매했습니다. 논쟁의 여지가 있지만, 그들의 티셔츠는 시장에 나와 있는 수백 개의 다른 티셔츠와 품질이 같았지만, 소비자들은 젊고 도시적인 브랜드와 그 이야기를 샀습니다.
벽감
당신이 운영하기로 선택한 틈새 시장과 목표 시장(충분히 정의되고 서비스가 부족한 경우)은 그 자체로 차별화 포인트가 될 수 있습니다.
예: See Ya Never는 원격으로 일하고 전 세계를 여행하는 디지털 유목민을 타겟팅하지 않습니다. 시장에 수천 개의 의류 브랜드가 있음에도 불구하고 이 특정 그룹의 사람들을 대상으로 하는 의류 브랜드는 거의 없습니다.
80s Tees는 80년대 영화 및 TV 프로그램의 독점 디자인을 판매합니다. 디자인은 매력적이고 향수를 불러일으킬 뿐만 아니라 많은 디자인이 라이선스가 부여되어 다른 곳에서는 거의 찾아볼 수 없습니다.
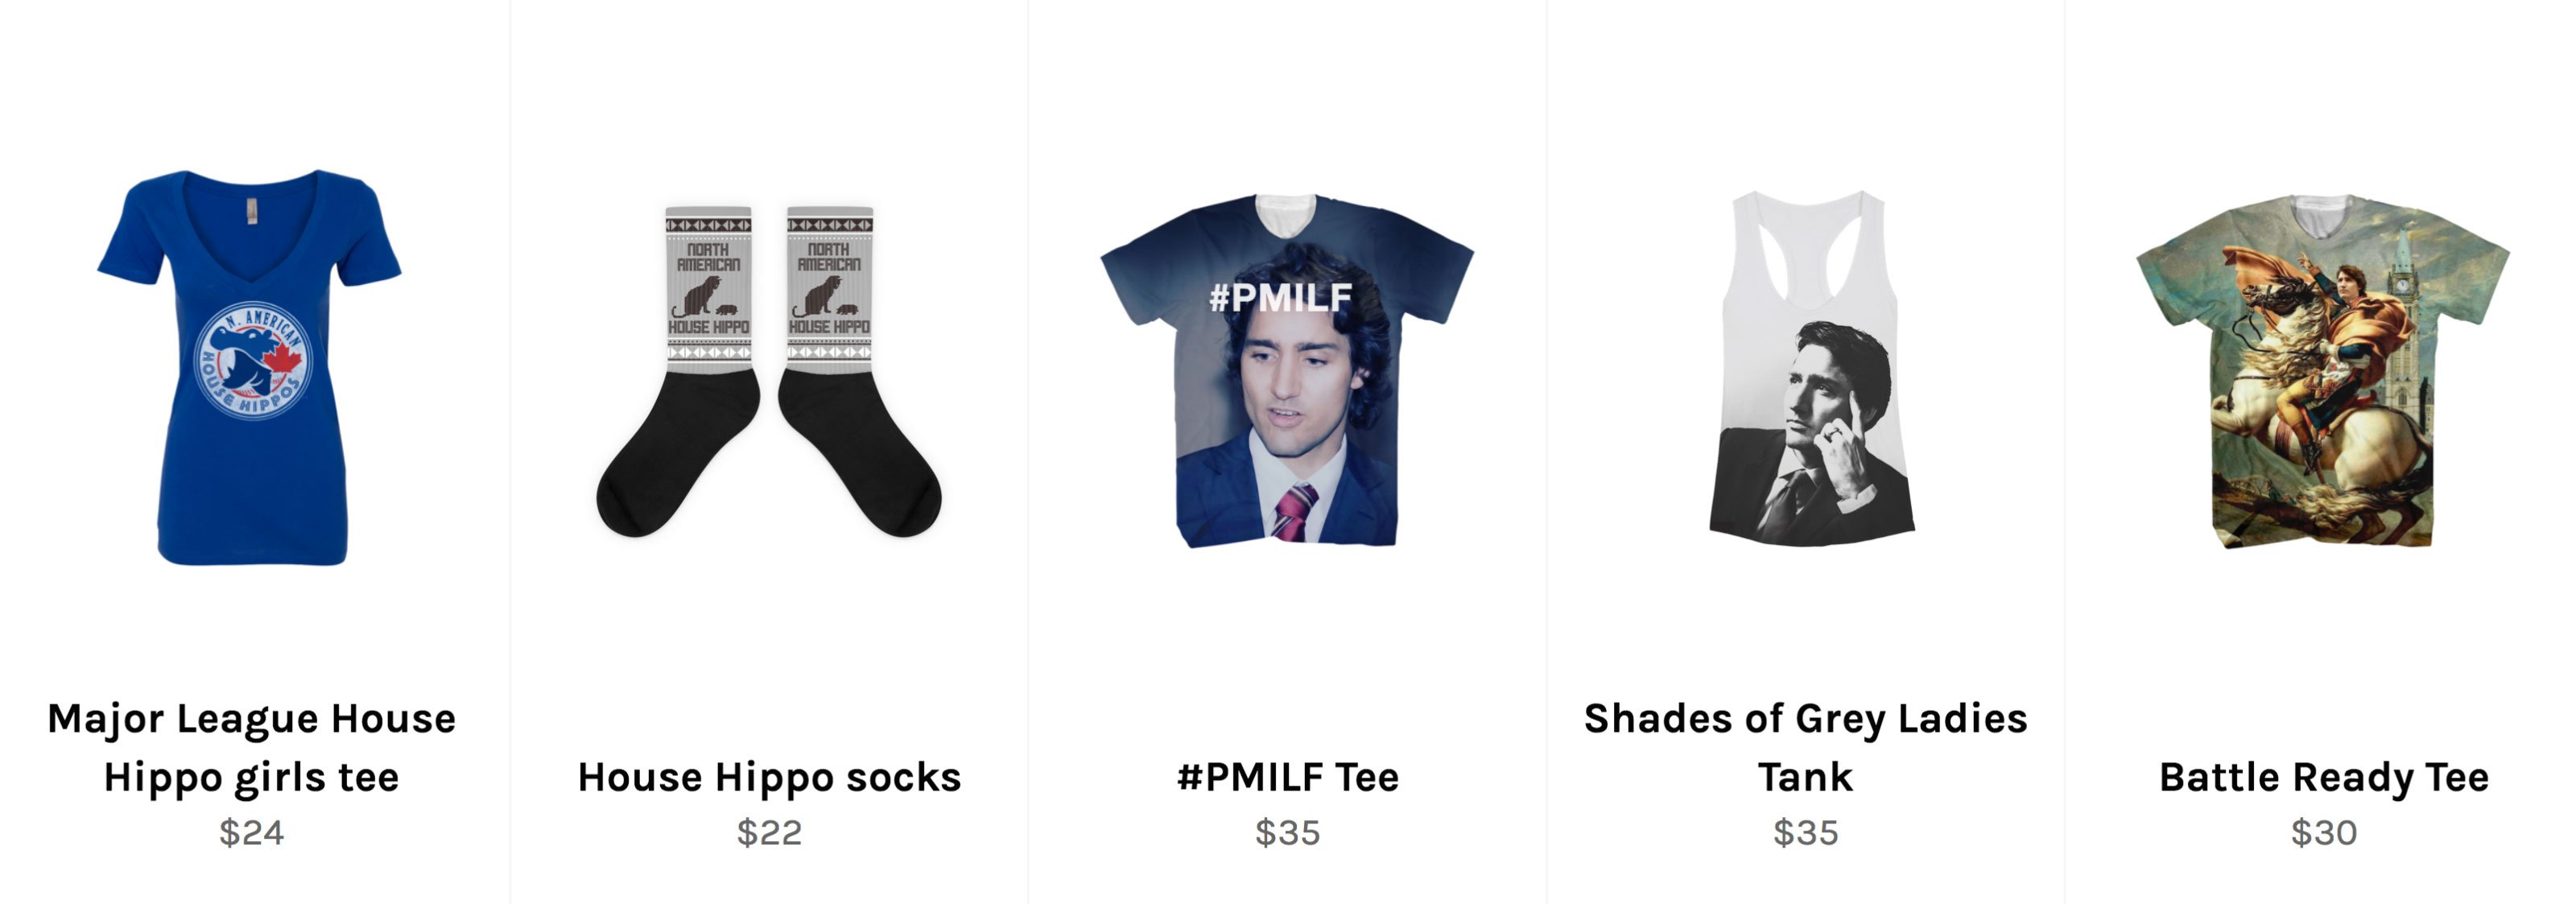
마지막으로 Canada Threads는 사랑받는 Canadian House Hippo와 관련된 디자인을 포함하여 캐나다인에게 독특하게 반향을 일으키는 의류 및 액세서리에 중점을 둡니다.
성능/소재/품질
재료의 유형은 다른 옷과 옷을 구별하는 데 중요한 역할을 합니다. 착용자에 대한 성능(편안함, 가려움, 압박감, 따뜻함, 가벼움, 통풍성, 쉽게 주름이 생기는지 등)과 전반적인 품질(이음새, 단추, 천의 무게 등 포함)은 다음과 같습니다. 모두 고객 만족에 중요한 역할을 합니다.
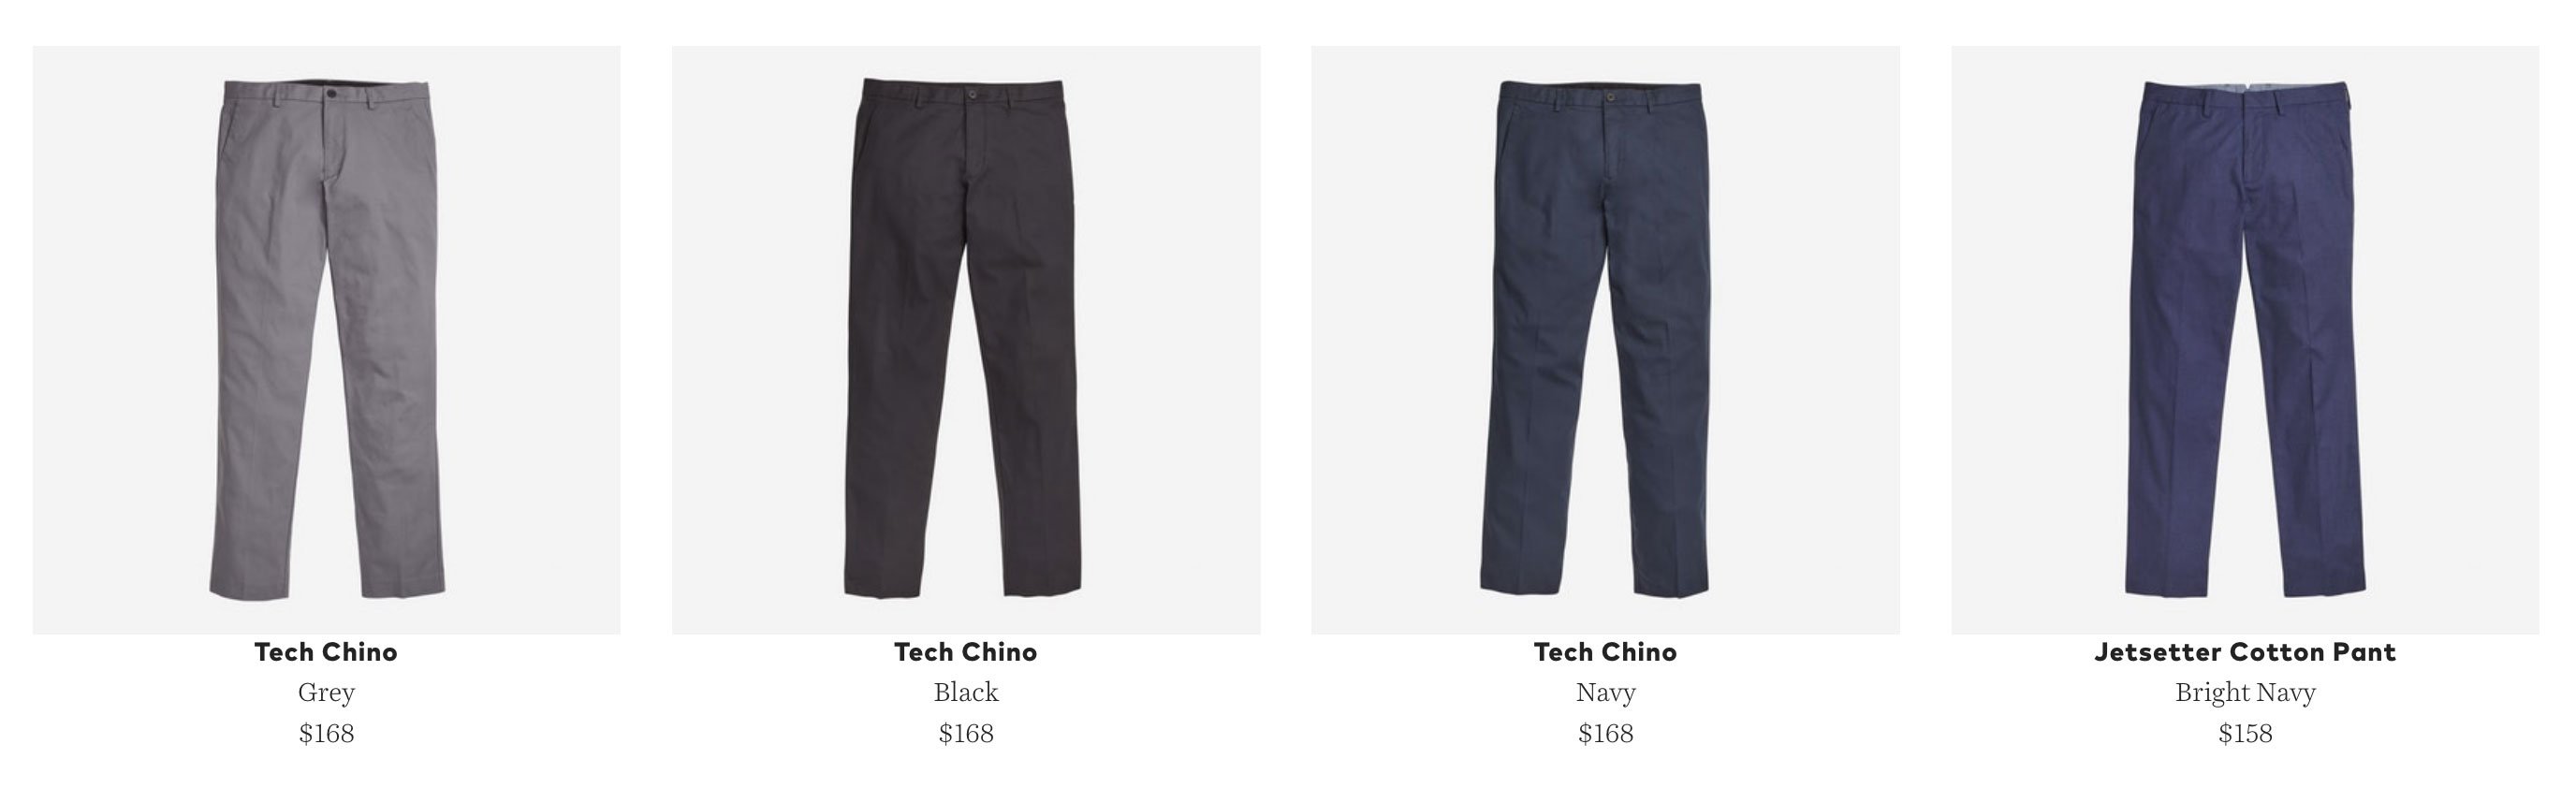
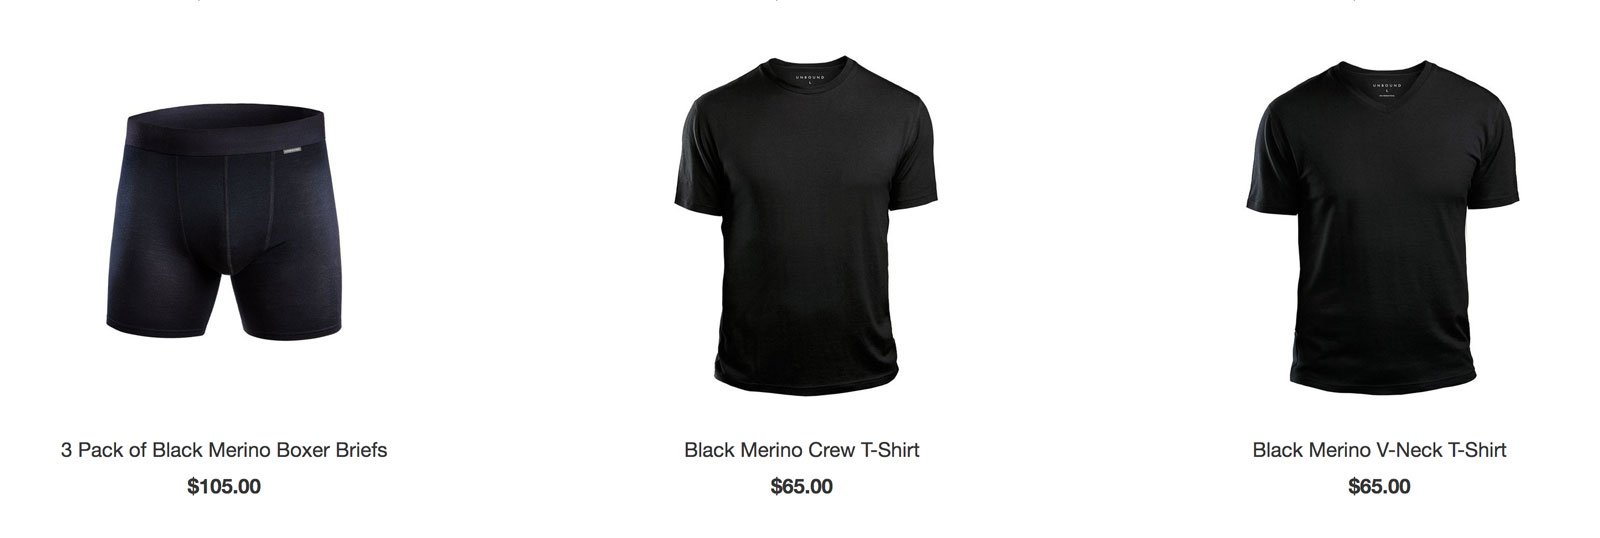
예: Unbound Merino는 $300,000를 모금하는 성공적인 크라우드 펀딩 캠페인을 실행하고 의류 성능을 기반으로 브랜드를 구축하고 있습니다. 통기성과 냄새 차단 능력이 뛰어난 100% 슈퍼 소프트 메리노 울로 만든 캐주얼웨어로 이 여행 라인을 허용합니다. 세탁하지 않고 여러 번 입는 옷.
의류 라인에 대한 사업 계획 개발
몇 가지 기본 사항을 정리하고 다음 단계는 기본(그러나 중요한) 비즈니스 계획을 개발하여 의사 결정과 의류 회사의 방향을 매핑하는 것입니다.
광고
전자상거래 사업 계획을 세울 때 고려해야 할 주요 요소는 다음과 같습니다.
- 비즈니스 모델
- 고객 페르소나
- 경쟁사 강점 및 약점
- 비용 및 마진
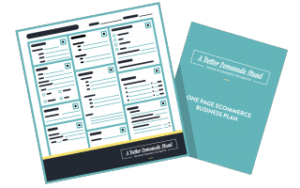 보너스: 의류 라인에 대한 비즈니스 계획 및 전략을 수립하는 데 도움이 되는 독점적인 원페이지 전자상거래 사업 계획을 권장합니다. 전체 페이지 워크시트와 40페이지 분량의 전자책을 포함하는 한 페이지 전자상거래 비즈니스 계획은 비즈니스 기반의 12가지 주요 영역을 안내하도록 구성되어 중요한 단계를 놓치거나 중요한 수치를 간과하지 않습니다.
의류 라인을 위한 브랜드 만들기
다음 단계는 새로운 의류 회사의 브랜드를 개발하는 것입니다.
새로운 의류 회사의 브랜드를 만드는 것이 가장 중요합니다. 의류 회사와 브랜드가 너무 많기 때문에 자신을 차별화해야 합니다. 당신의 브랜드는 그 중 큰 부분을 차지할 것입니다.
궁극적으로 모든 비즈니스에는 브랜드가 있고 모든 새로운 비즈니스에는 브랜드가 있습니다. 브랜드를 미리 만들면 메시지와 스토리를 더 잘 정의하고 전달할 수 있습니다.
맞춤 재단 및 봉제 의류 라인을 만들 계획이라면 전담 브랜드 대행사를 고용하여 브랜드를 만드는 데 도움을 주는 것이 좋습니다. 투자와 예산이 훨씬 적은 주문형 인쇄 또는 개인 상표 브랜드를 계획하는 경우 자체 브랜드를 개발하는 것이 가치 있고 저렴한 옵션이 될 수 있습니다.
이 단계에서 다음을 식별해야 합니다.
- 당신의 시장은 누구인가
- 이 시장에 가장 적합한 브랜드는 무엇입니까?
아래에서 의류 회사 브랜드 개발의 몇 가지 핵심 요소를 빠르게 소개할 것이지만 모든 브랜드 요소에 대한 완전한 분석과 모든 브랜드 요소를 정의하는 가이드 및 워크시트는 브랜딩 가이드 A를 확인하십시오. 더 나은 브랜드.
시장 정의
시장을 정의하는 것은 모든 브랜드에 중요하지만 특히 의류 및 의류 시장의 브랜드는 포화 상태이기 때문에 매우 중요합니다. 대규모 그룹의 사람들을 광범위하게 타겟팅함으로써 처음부터 실패에 대비하는 것입니다. 당신이하고 싶은 것은 틈새 시장을 만들고 세그먼트를 만드는 것입니다.
이 단계에서 스스로에게 던져야 할 몇 가지 중요한 질문은 다음과 같습니다.
- 어떤 종류의 의류 및 의류 제품을 만들고 싶습니까?
- 누가 내 제품을 구매할 것인가?
- 내 제품이나 브랜드가 이 사람들에게 어떤 특정한 가치를 가져다 줄까요?
- 내 제품의 고유한 점은 무엇입니까?
- 나의 경쟁자는 누구인가?
브랜드 기둥 만들기
브랜드 기둥은 브랜드가 무엇인지 구현하는 몇 가지 핵심 단어 또는 속성(보통 3-4개)이며 브랜드 페르소나를 개발하기 위한 출발점 역할을 합니다. 나중에 이 단어들은 대부분의 브랜드 활동에 대한 체크포인트로 사용됩니다. 예를 들어 웹사이트, 광고 또는 고객과의 대화를 만들 때 브랜드 기둥과 비교하여 확인해야 합니다. 스스로에게 물어보세요: 내 디자인/웹사이트/광고/대화는 내 브랜드 기둥 단어의 본질을 나타내는가?
브랜드 기둥은 모든 활동에서 브랜드를 일관되게 유지하기 위한 간단한 도구 역할을 하며 브랜드의 기초 역할을 합니다.
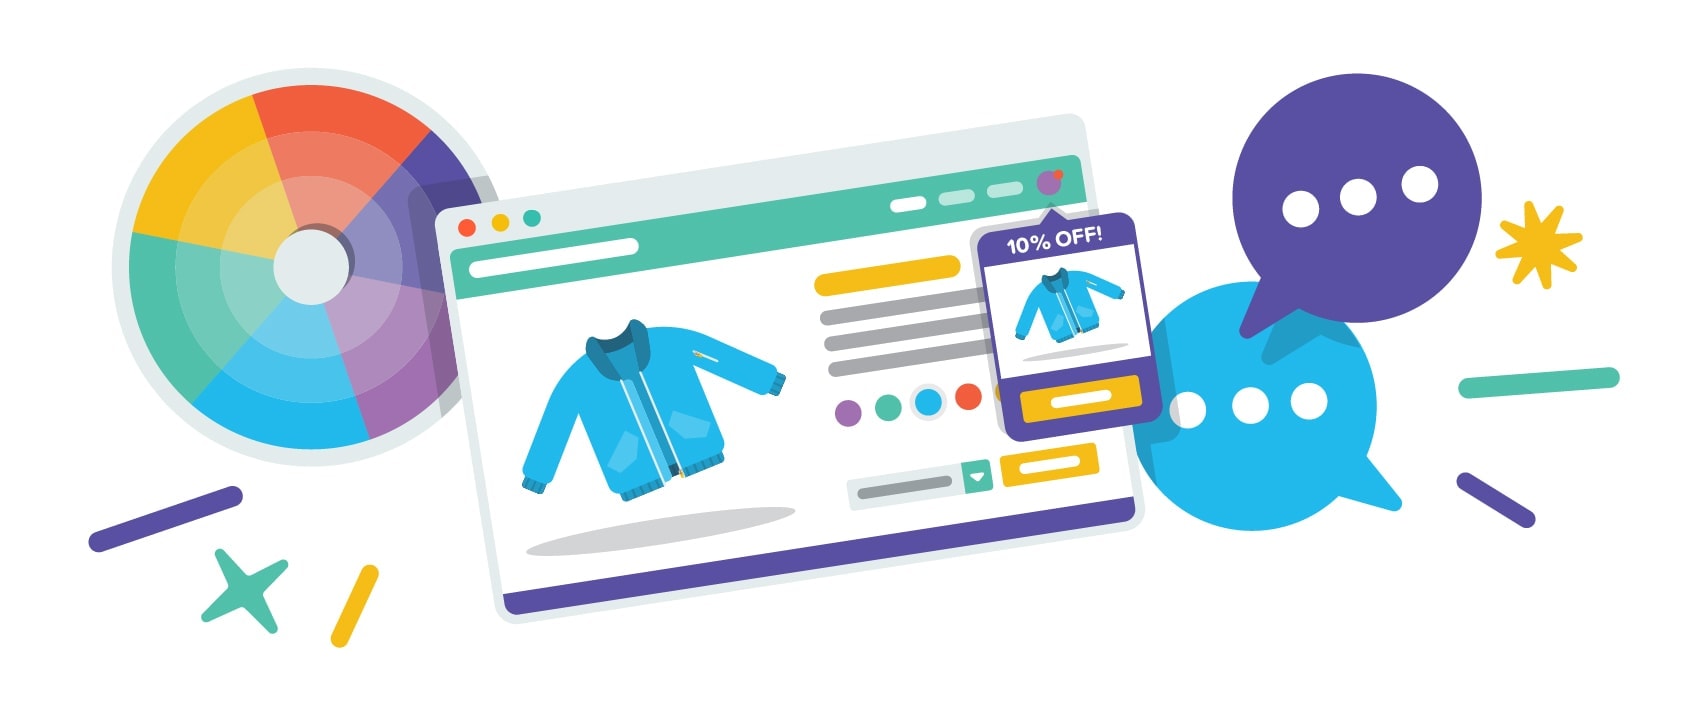
브랜드 비주얼 개발
브랜드 비주얼은 많은 사람들이 특정 브랜드를 생각할 때 즉시 생각하는 일반적인 브랜드 요소입니다. 여기에는 회사 로고, 브랜드 색상, 글꼴, 전반적인 디자인 및 사진 미학이 포함됩니다.
- 무드보드 만들기: 무드보드는 원하는 비주얼 스타일을 결합하기 시작하는 완벽한 방법입니다. 기본적으로 무드 보드는 이미지, 사진, 디자인, 색상 및 브랜드에 영감을 주는 웹에서 찾은 기타 멀티미디어 조각 모음입니다. 이러한 요소를 수집하는 데 도움이 되는 온라인 도구가 많이 있지만 가장 쉬운 방법은 Pinterest나 Instagram을 사용하는 것입니다.
- 색상 팔레트 선택: 브랜딩 프로세스의 다음 단계는 사용할 색상 팔레트의 범위를 좁히는 것입니다. 색상 팔레트를 미리 선택하면 모든 채널에서 브랜드가 일관되게 보이도록 유지하는 데 도움이 됩니다. 무드 보드에 사용된 주요 색상은 즉시 눈을 사로잡을 가능성이 높기 때문에 먼저 특히 주의를 기울이는 것으로 시작하는 것이 좋습니다. 여기에서 Adobe Color와 같은 도구를 사용하여 커뮤니티에서 영감을 받고 투표를 받은 다른 색상 팔레트를 검토하여 추가 아이디어를 얻을 수도 있습니다. 마지막으로 Adobe는 색상 팔레트를 선택하고 다듬는 데 도움이 되는 도구도 제공합니다. 여기에서 확인하십시오.
- 로고 제작: 비즈니스 로고를 제작할 때 브랜드를 잘 나타낼 뿐만 아니라 타겟 인구통계학적 특성에도 부합하는 로고를 원할 것입니다. 브랜드에 대한 완벽한 로고를 만들기 위해 존경받는 로고 디자이너와 함께 작업하는 것이 항상 권장되지만 예산이 적은 사람들은 Looka와 같은 도구를 사용하여 거의 무료로 시작할 수 있습니다.
 보너스: 전자상거래 브랜딩 가이드를 확인하여 무드보드, 색상 팔레트, 로고 및 사진 스타일과 같은 브랜드 비주얼뿐만 아니라 브랜드 페르소나를 포함한 브랜드의 모든 중요한 구성 요소를 개발하는 데 도움을 받으십시오. 이 가이드에는 의류 라인에 완벽한 브랜드를 만드는 데 도움이 되는 PDF 전자책과 워크시트가 포함되어 있습니다.
의류 라인의 제품 개발 프로세스
패션 비즈니스에 완전히 새로운 사람이라면 이것이 컷앤소 의류 라인을 시작하고 운영하는 과정에서 매우 중요한 단계라는 것을 아는 것이 중요합니다. 이 시점에서 자신이 하는 일과 올바르게 수행하는 방법을 알고 있는 전문가와 파트너 관계를 맺는 것이 좋습니다.
패턴 제작자, 테크팩 제작자, 디자인 파트너, 재료 파트너 및 생산 파트너와 같은 전문가들은 각자의 분야에서 경험이 풍부하며 가장 효율적인 방법으로 의류 라인을 현실화하는 것이 그들의 임무입니다. 전문가의 도움 없이 패턴 제작 및 기술 팩과 같은 작업은 귀하뿐만 아니라 함께 일할 미래 제조업체에게도 악몽이 될 수 있습니다.
이것은 제조업체를 미리 조사하는 것이 도움이되는 곳입니다. 일부 제조업체는 전문적인 제품 개발 서비스를 제공하고, 일부는 제품 개발을 직접 수행한 경우에만 귀하를 위해 제조하고, 다른 제조업체는 이러한 서비스를 제공하지 않지만 함께 작업하는 것을 선호하는 파트너가 있습니다. 이 모든 정보는 제조업체의 웹사이트 또는 직접 연락하여 설명합니다.
의류 라인의 제품 개발과 관련하여 일반적으로 개발 중인 의류 제품 유형에 관계없이 몇 가지 공통 용어를 사용하여 따라야 하는 공통 경로가 있습니다. First, we will look at what the general process of clothing product development looks like, then we will discuss the process in more detail.
- Designs: This generally refers to the initial design concept and is usually represented as sketches either on paper or digitally. While your patterns might start out as concept sketches, eventually you'll likely turn them into digital sketches using a program like Illustrator.
- Tech Pack: A tech pack is essentially a blueprint for your apparel product, providing a manufacturer with all the details and technical specifications for production. This includes the designs, measurements, materials, and any accessories (zipper, buttons, etc.).
- Pattern Making & Grading: Pattern making is the process of turning your technical drawings into patterns that can be used for production. Grading is the process of taking a single pattern and grading the pattern up or down to create the additional patterns for all the other sizes in your apparel line.
- Sourcing: Sourcing involves finding, communicating, vetting, and working with multiple manufacturers to determine which one is best suited for the full production of your particular products.
- Samples: This involves manufacturers producing a one-off or small batch of samples to provide you with a proof of concept, as well as for you to identify potential issues or improvements prior to a full production run.
- Production: A full product run is the mass production of your apparel products. Depending on the products and the manufacturer, this can be hundreds of units, thousands of units, or even hundreds of thousands of units.
Below, we will go into greater detail about each of these steps in the process and provide you with more content and resources to get you started. However, it's important to note that there are other resources available that will guide you through the full process, helping you at each step of the way.
Some of the most popular ones are:
- Maker's Row
- Sqetch
- FactoryFinder
- Sewport
- CALA
Step 1: Design Your Clothing Line Concepts
Your clothing line will begin as sketches—most likely simple sketches in a notebook. This is usually the best route to get the ideas out of your head. As you begin sketching your clothing pieces, also think about adding any specific notes or unique ideas you have, as well as any special features or functionality. These notes will likely be part of tech packs later.
The initial goal is just to start developing your ideas and bring them to life.
Furthermore, the benefit of sketching out your ideas is that they can be shared. This is important because unless you're a professional clothing designer, you're going to likely need to enlist the help of a fashion designer or illustrator to help you pull together and refine your sketches into something more realistic and thought out.
Step 2: Create Patterns & Develop Tech Packs
You will need to enlist the help of a qualified pattern maker to take your idea and turn it into an actual pattern that can then be turned into an actual piece of clothing. A pattern can then be used to help create a tech pack.
A tech pack is essentially a blueprint for each garment. Your tech pack tells your manufacturer all the information required to transform your design into a final product. A proper and complete tech pack will reduce errors in production, save you money, prevent miscommunication, and ultimately, bring your product to life exactly how you envisioned it.
Your tech pack should include all possible details about your product, including (but not limited to) the:
- 설계
- 직물
- 측정
- 손질
- Stitching
- Artwork
- Label & Tag Information
- Packaging Instructions
Here's an example of a tech pack for a better understanding:
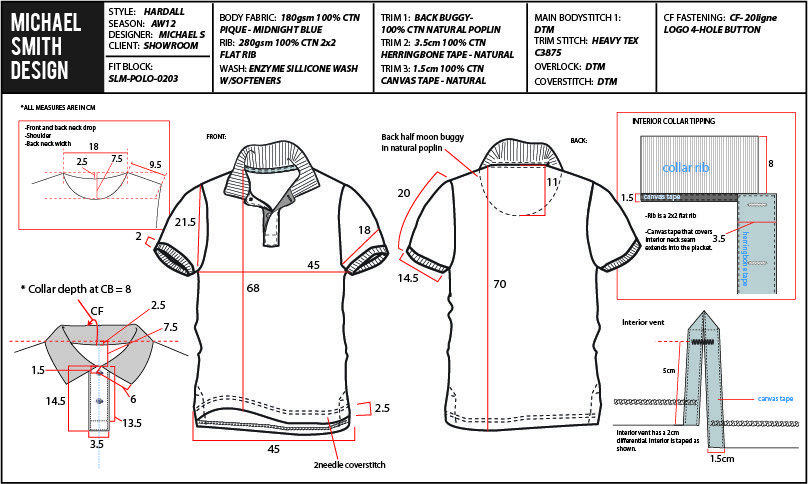
(Source: Michael Smith Design)
Here are some pattern makers and technical designers who have been vetted and provided by Maker's Row, to get you started:
- The Pattern Makers
- JLD Studios
- Nicole Melendez
- Clothier Design Source
Additional places to hire freelancers to help produce your tech packs:
- 시간당 인원 – 기술 팩
- Upwork – 기술 팩 프리랜서
Step 3: Research Clothing Manufacturers
The next step in this process is to research potential clothing manufacturers.
Find out things like their location, capabilities, heritage, reputation, and what other brands they've worked with to get an idea of what they can offer you. It's important at this stage to really be thorough as small things such as location can have a massive impact on communication, turnaround time, and shipping when it actually comes to working with a manufacturer.
Not every manufacturer provides the same services so it's important to know the pros and cons of as many manufacturers as possible so you can find the services you're looking for without compromising on your brand values.
- Maker's Row : Maker's Row has nearly 10,000 factories to explore, including over 3,000 in apparel, all based in the USA.
- Sourcify: Sourcify has relationships with hundreds of Chinese manufacturers and will work with you to find and vet the right one for you.
- Sqetch: Sqetch is similar to Maker's Row but focuses on connecting you with European manufacturers.
- FactoryFinder : FactoryFinder can help with material selection, samples, and production by connecting you with the right clothing manufacturer.
Step 4: Determine Your Budget
Budgeting out product development and production costs is something you need to determine prior to selecting a factory to work with. You need to understand your budget availability and limits so you can map out all aspects of production, such as what fabric you'll be able to use and whether producing overseas or in your home country is your best option.
Costs to consider in your budget include:
광고
- The price of professional product development services such as pattern making, tech packs, design development, etc.
- The cost of making samples (bearing in mind that more than one sample is usually made)
- The cost of materials such as fabric, buttons, zippers, hardware, and any other pieces used in the construction of your garments
- The cost of transportation between you and the factory for meetings/visiting the factory
- The cost of labor (determine the difference in labor cost between your home country and overseas labor cost requirements)
- The cost of shipping between you and the factory and the cost of shipping the necessary materials to the factory
- The cost of production and actually creating the clothing items themselves
After considering these factors, you'll be able to communicate your budget to your future manufacturer and find one that fits your requirements.
Pricing out all of these costs is also helpful in determining whether or not producing in an overseas factory is more realistic for your business—bearing in mind that while the cost of labor may be cheaper, the cost of shipping between you and the factory will increase; as will turn around time. Nonetheless, understanding the cost of product development and production helps you and your future manufacturer make the best choices for your business.
Step 5: Select Clothing Manufacturers
Once you've researched a bunch of different manufacturers and have an idea of what's out there, make a shortlist of manufacturers who seem like they'll be a good fit for your clothing brand.
Maybe there are some manufacturers who specialize in the kinds of clothing products you want to produce, maybe some operate out of your local area, maybe some have raving reviews from past or current clients, or maybe some fit into your budget range better than others. Whatever is important to you in a manufacturer, narrow down your shortlist to ones who seem like they check off some of your most important boxes.
Step 6: Contact Clothing Manufacturers
By now you should have been able to narrow down a long list of potential clothing manufacturers into a shorter list of manufacturers who meet your needs when it comes down to what you require in terms of professional services, which manufacturers are actually able to create your future garments, manufactures in an accessible location, or ones who meet your budget requirements.
Now is the time to contact your potential manufacturers, but that may be easier said than done. Response rates for manufacturers differ, but producing a well-thought-out initial email can increase your chances of actually receiving a response back from potential manufactures.
Here are some general DOs and DON'Ts when it comes to contacting a manufacturer:
- DON'T come across as a “tire-kicker.” If your interest in manufacturing doesn't seem to be serious or genuine you may not get a response. Manufacturers don't want to waste their own time working with people who aren't serious when they could be working with people who actually want to build and grow their business.
- DO be polite. You and your manufacturer will be working together in this process—they don't solely work for you—so treat them with respect and be mindful of their requirements, services, and processes.
- DO be clear. In the best interest of yourself and your future manufacturer, it's best practice to be clear about what you're looking for, the services you require, your timeline, etc. Be upfront about what you need and don't leave any room for ambiguities in the event that it will create more confusion down the road.
- DO follow up. It's okay to follow up after your initial email to ensure the factory received and read the message, so be prepared to send up to three follow-up emails spaced apart by a week or so to prompt a response from a factory. This will make you seem eager and serious to the factory which, if you're new to this process, is what you want.
- DON'T give them too much information. Introduce your company, the products that you're looking to create with them, what services you're looking for, and ask what further information they need from you. Give them enough information to know your intentions and that you're serious about the inquiry, but don't overload them with your brand goals, material choices, and timelines yet.
Click here to learn more about how to construct the perfect initial contact email.
Step 7: Screen Potential Factories
If you're lucky, by this step you'll have received responses from some of the factories you've contacted and now it's time to narrow down your search.
Even if you only received a response from one factory, it is still important to make sure it's the right fit for you. At this step, you should communicate further with the factories and learn more about how they conduct business and the quality of their products. You should be looking to evaluate whether or not you will get along with them personally and professionally in order to gauge your potential for success as colleagues.
These are things to look out for:
- How they prefer to communicate with their clients (by email, phone, or personal visits)
- Ask for references from other clients (to get a first-hand evaluation of what they are like to work with)
- Ask for samples of products they've made (to judge if the quality of their products is at the level you're looking for)
- Understand how they charge for samples, services, and what constitutes extra charges
- Get a feel for their timeline and availability
Now is the time to learn more about the factory, see their workspace in action, and communicate further with the manufacturer. This stage will give you an initial glimpse of what it will be like to work with this factory in the long run so it's important to identify your respective strengths and weaknesses now so you can reduce the possibility of headaches and potential miscommunications in the future.
This is also now the right time to let the manufacturer in on your brand goals, where you see your brand starting off, what you see your brand scaling to, and let them know how you want them involved in that process. All the time you spent defining your brand in the first step should be communicated to the manufacturer to see if they understand where your brand is going and if they can get excited for your brand, too.
Step 8: Get Samples Made
Now that you can see yourself manufacturing your clothing line with a factory or two, it's time to get some samples made so you can truly experience what your potential product will be like.
No matter how well-designed your patterns and tech packs have been, there are always opportunities for adjustments and corrections so it's strongly encouraged that the sampling step is never skipped. It can be easy to want to jump straight into production—especially when time and money are on the line—but in the end, a whole line of garments that don't fit properly will cost you more than just having a few samples done right from the start.
At this stage, it is appropriate to have more than one factory make samples of your garments. Feel free to shop around so you're absolutely sure the factory you pick will be producing the garments you want at the quality level you want!
Step 9: Start Full-Scale Production
The final step of the manufacturing process is really just the first step of building your own clothing brand.
This is the time to work with your manufacturer and get your garments produced! At this stage, it's important to stay five steps ahead of everything:
- Make sure deadlines are adhered to
- Be available to answer any questions your manufacturer may have for you
- Be diligent with quality control
Once production for one season of garments starts, the planning for the next season begins—this is only just the beginning! But now that you have the right manufacturer for your business, let their skills and services help you build your clothing brand to where you want it to be.
Step 10: Brand Your Clothing & Packaging
The branding of your clothing line has everything to do with how you'll be perceived by your customers. Branding tells the story of your company and your packaging is one of the few parts of your brand—besides your clothing items themselves—that your customers will actually be able to touch, feel, and see. It engages your customers, it can make them feel valued, and it can even increase the perceived level of quality your customers associate with your brand and your clothing items.
This is why it's important to seriously consider how you package and present your clothing items, no matter what items you're selling.
There are plenty of different ways to enhance your brand's packaging and presentation and to make it unique and true to your brand.
Step 11: Branded Packaging Options
There are two different types of options when it comes to branding your packaging: The actual elements that you use for the packaging itself, and the additional extras you can include with the package to elevate the unboxing experience.
The package elements are the more functional items that are required to actually ship your clothing pieces, whereas the added extras enhance the experience and help to make your customers feel valued.
Elements of a Branded Package
These are the functional parts of a shipping package that you'll need in order to ship your items from you to your customers. You won't need every single one of these items, but they're all options that you can use depending on what you want your packaging to achieve.
배송 상자
Depending on the clothing items you sell, you may have to ship them to your customers in a shipping box. Shipping boxes are sturdy and are a good option for shipping heavy or bulky items (such as coats) or delicate items that need to be protected throughout the shipping process (such as beaded clothing pieces, or items with 3D applique).
Shipping boxes, however, can add weight and size to your package making it more expensive to ship, but if it will protect your clothing items while they're on their way to your customers, it's a small price to pay upfront that should decrease the potential of damaged items and returned products in the future.
Keep in mind that your shipping boxes don't have to be boring cardboard boxes. There are plenty of services available to entrepreneurs and small businesses that can create custom boxes for your products at competitive prices, whether you're looking for something sleek, simple, and plain or something colorful, bold, patterned, and vibrant.
You can also use these services to get your brand name printed onto the box itself for a more professional unboxing experience.
Where to Source Shipping Boxes:
- 정제 포장
- 파커블
- Packwire
- 루미
- Wolfpack Packaging Inc.
- Arka
- 박스 긱
- Custom Boxes & Packaging
- Custom Boxes Now
- eSupplyStore
- Fast Pack: Boxes
- Instabox (Canada)
- PakFactory
- 페이퍼마트
- 밸류메일러
Poly Mailers
Another great alternative for shipping clothing items is shipping bags—otherwise referred to in the industry as poly mailers.
These are an ideal option because unlike shipping boxes, they don't add much weight or bulk to your package, so you won't be adding extra shipping costs to your package. They are less sturdy than a box though, so they're a good option if you're shipping clothing pieces that aren't easily damaged and can be bent and folded throughout the shipping process. They do come in plenty of sizes too, so whether you're shipping one item or a few at a time, you should be able to source a selection of different sized poly mailers to meet your customer's needs. Plenty of brands ship clothing items to their customers in poly mailers, so it is an appropriate method for the industry.
There are plenty of places online where you can get custom poly mailers made for your business so you're able to add your logo, brand colors, or fun patterns to make it more exciting for your customers.
Where to Source Poly Mailers:
- 스티커 뮬
- 파커블
- 루미
- Uline: Poly Mailers
- eSupplyStore: Poly Mailers
Bubble Mailers
If your clothing items need a bit more protection but you don't want to completely upgrade from a poly mailer to a full-on shipping box, you have another option: Bubble mailers. As the name would suggest, they're like poly mailers but they have a layer of bubble wrap included on the inside of the mailer which helps protect whatever's inside.
They don't offer the same sturdiness that shipping boxes do, but they help to cushion the contents of the mailer throughout the process and are less bulky than shipping boxes.
Where to Source Bubble Mailers:
- 파커블
- Uline: Bubble Mailers
- eSupplyStore: Bubble Mailers
- Fast Pack: Bubble Mailers
Tissue Paper
If using packing peanuts and crinkle paper isn't your style, or if your products don't need additional protection, or even if you're using a poly mailer, tissue paper may be an ideal option to enhance the unboxing experience for your customers.
Tissue paper makes the unboxing experience feel more like a gift, which can make your package seem thoughtful and your customers feel valued.
Tissue paper is also an easy way to add to your packaging without adding any extra bulk or weight, and you can have it printed with your logo or choose colored or patterned paper to add some extra flair to the package. Use an everchanging assortment of patterns, colors, and styles to keep repeat customers interested.
Where to Source Tissue Paper:
- Uline: Retail Cushioning
- Uline: Industrial Tissue Paper
- JAM Paper: Tissue Paper
- eSupplyStore: Tissue Paper
- Fast Pack: Tissue Paper
- Papermart: Tissue Paper
Packing Tape
Depending on your brand's style, using packing tape that's colorful, patterned, or printed with your logo may be an interesting way to decorate your shipping box or package. Not only is it decorative, but packing tape is functional and adds another layer of security to keep box openings sealed throughout the shipping process.
Where to Source Packing Tape:
- 테이프 정글
- Uline: Tape
- JAM Paper: Packaging Tape
- eSupplyStore: Packing Tape
Stickers
If you don't need something as heavy-duty as packing tape to seal your boxes or mailers shut, stickers can be an alternative option that can also add to the branded packaging experience. Get your logo printed on them, your brand's tagline, mission statement, fun facts about your brand, or any other piece of info you want to share with your customers for an added layer of personalization. Alternatively, use stickers to brand plain shipping boxes or mailers, or include them inside your package for customers to use or share as they please.
Stickers are super versatile, so think about how you can use stickers to enhance your unboxing experience!
Where to Source Stickers:
- 스티커 자이언트
- 스티커 뮬
- 스티커 너
- 음매
Include Extra Branded Material
These aren't necessary to include, but if you're interested in elevating your unboxing experience, making it memorable for your customers, and making them feel valued, then including one or two of the following options can help you to start out in a positive way.
Promotions, Discounts & Deals
Including packing inserts that notify your customer of an upcoming promotion, or share a discount code or deal they can use for themselves or share with a friend is a pleasant surprise your customers will likely appreciate when opening their package. It shows thought and care from your end, and it's also likely to encourage them to purchase from you again, which is advantageous for you.
Business Cards
If you want your customers to remember you, refer you to a friend, or send you feedback about their experience with your business or your products, consider including your business card so they can hold onto it or pass it on to others. It's a small token, but it shows that you value their input and experience.
광고
Custom Notes/Personalized Messages
This is the ultimate way to make your customers feel valued and shows an immense amount of consideration and thoughtfulness.
Custom, handwritten notes with personalized messages are a great way to connect with your customers and make them feel appreciated. While it likely won't be possible to include a handwritten note for all of your customers, consider including them for your very first customers, your most frequent purchasers, for customers who leave glowing reviews on your website, or ones who have taken the time to send you valuable feedback. Your customers will likely feel very touched by your effort and will likely also share their experience with their peers or on their social platforms, which is positive exposure for your brand.
Gifts or Samples
Who doesn't love to receive a gift?! Using gifts as a way to thank your customers for their purchase is a surefire way to capture their attention and make them feel valued. It doesn't have to be anything big (some companies include candy bars to treat their customers) as you just want it to be an addition to the package, but something small can be just as appreciated by your customers.
If you don't want to gift an item from another company, consider including a sample of one of your own products. Again, it doesn't have to be anything big, but something that complements their purchase could be appreciated.
Step 12: Brand Your Clothing Items
Beyond the packaging of your clothing items, you can also add additional touches of branding to your clothing items themselves to ensure they're as seemingly high-quality as possible and are presented in the most thought out way possible. The best way to do this is by adding custom labels and tags.
Clothing Labels & Tags
Clothing labels are a piece of fabric that's attached to the inside of clothing items that typically include the brand's logo. While it's required in most countries for clothing items to have care and size labels, brand labels aren't necessary but they add a thoughtful touch to the clothing piece. They also often help customers to remember where the clothing item is from once they've integrated it into their wardrobe, and they can add to the overall feel of the clothing piece.
Some labels can be scratchy and uncomfortable for the wearer, which can make the garment seem cheap, while others can be well sewn into the garment and made of a cloth material that's much more high quality. Think about how you want your brand to be perceived and choose a type of label that fits accordingly.
Clothing Label Material Options:
- Damask Woven Labels
- Satin Woven Labels
- Taffeta Woven Labels
- Woven Patches
- Cotten Twill Labels
- Canvas Printed Labels
- Nylon Printed Labels
- Satin Printed Labels
- Silicon Clothing Labels
- Leather Labels
- And much more
It's also important to consider which label types exist and where they can be located on the garment.
If you want to increase your brand's awareness, you may want to consider placing brand labels on the outside of your clothing items such as on hems or cuffs, but if you want to maintain relatively inconspicuous brand placement, you may just want to include the labels on the inside of your garments.
The types of clothing labels you can include on your garments include:

- Manhattan Fold Labels: These are quite similar to Center Fold Labels in their appearance, except that the top of the label is folded over to give a more finished and high-quality look. This type of label is typically sewn into the collar of a garment.
- The End Fold Labels: These have more of a finished and high-quality look to them because the edges are tucked in at the sides. These types of labels are typically printed with brand logos and they're quite small.
- Straight Cut Labels: These have no folds at all, which means they're typically sewn on flat—straight onto the garment. They're commonly also placed on the outside of a garment as a decorative patch, usually with a brand logo printed on them.
- Center Fold Labels: These are the most common type of apparel labels. They're usually made of woven materials and commonly attached to the inside of garment collars.
- The Mitre Fold Label: These are similar to the End Fold Label as they're quite small, shaped like a thin rectangle, and are typically printed just with a brand logo. This type of label, however, hangs down a bit farther than the End Fold Label instead of going straight across.
- Loop Fold Labels: These labels are commonly sewn on the inside of garments, typically close to the hemline in shirts or the waistband in some trousers. This type of label is usually reserved for care and size information, not brand logos.
Clothing Tags
Where to Source Clothing Labels and Tags:
- Custom Labels 4 U
- Uline: Hanging Tags
Step 13: Create Your Online Clothing Store
If you're serious about building a brand or learning more about digital marketing, search engine optimization, and conversion rate strategies, you need to build your clothing store on a customizable ecommerce platform. We can't recommend Shopify enough. Not only is Shopify one of the easiest platforms to get started with, but its app store is the most robust and has a host of print-on-demand clothing printers and dropshippers if you choose to go that route (read our Shopify Review to learn more about why we recommend it so highly).
Shopify enables you to build your own online clothing store wherever you are, with the ability to sell to customers all over the world. Setting up your store with Shopify is easy, and you don't have to worry about your website's security so you can be sure that you and your customers' sensitive information is protected when shopping on your site.
Overall, Shopify is the most recommended ecommerce platform out there, and it's your best option when it comes to starting your own clothing store online.
When setting up your clothing store on Shopify you'll want to take your brand into consideration and make use of all your brand visuals. Implement your color palette, use your logo, take effective product and lifestyle photos of your garments, and create a glowing “About Page” so your customers can learn more about who your brand is and what you stand for.
These are the types of things that will make your clothing store stand out to your customers, so they'll be more trusting when it comes time for them to make a purchase. You want your website to install confidence in your customers, so take that into consideration when setting up your online clothing store.
 Bonus: Still not sure about which ecommerce platform to choose? Check out our exclusive Ecommerce Platform Recommendation Tool. This tool will ask you a series of questions to help you narrow down and choose the best ecommerce platform for your specific needs.
Your Store's Theme
Another aspect of your online clothing/apparel store to take into serious consideration is your store's theme. Themes are the general outward look and feel of your website, and depending on the products you sell, some themes may display your products better than others.
Since you'll be starting a clothing/apparel store, you'll want a theme that shows off your garments to their full potential so choose a theme that enables you to post lots of images.
Shopify offers plenty of free and premium themes to choose from (see them all in action on the Shopify Theme Store) but if you're looking for more theme options, Out Of The Sandbox creates premium Shopify themes and they are one of the best, if not the best, place to get them.
Step 14: Create a Shipping Strategy for Your Clothing Company
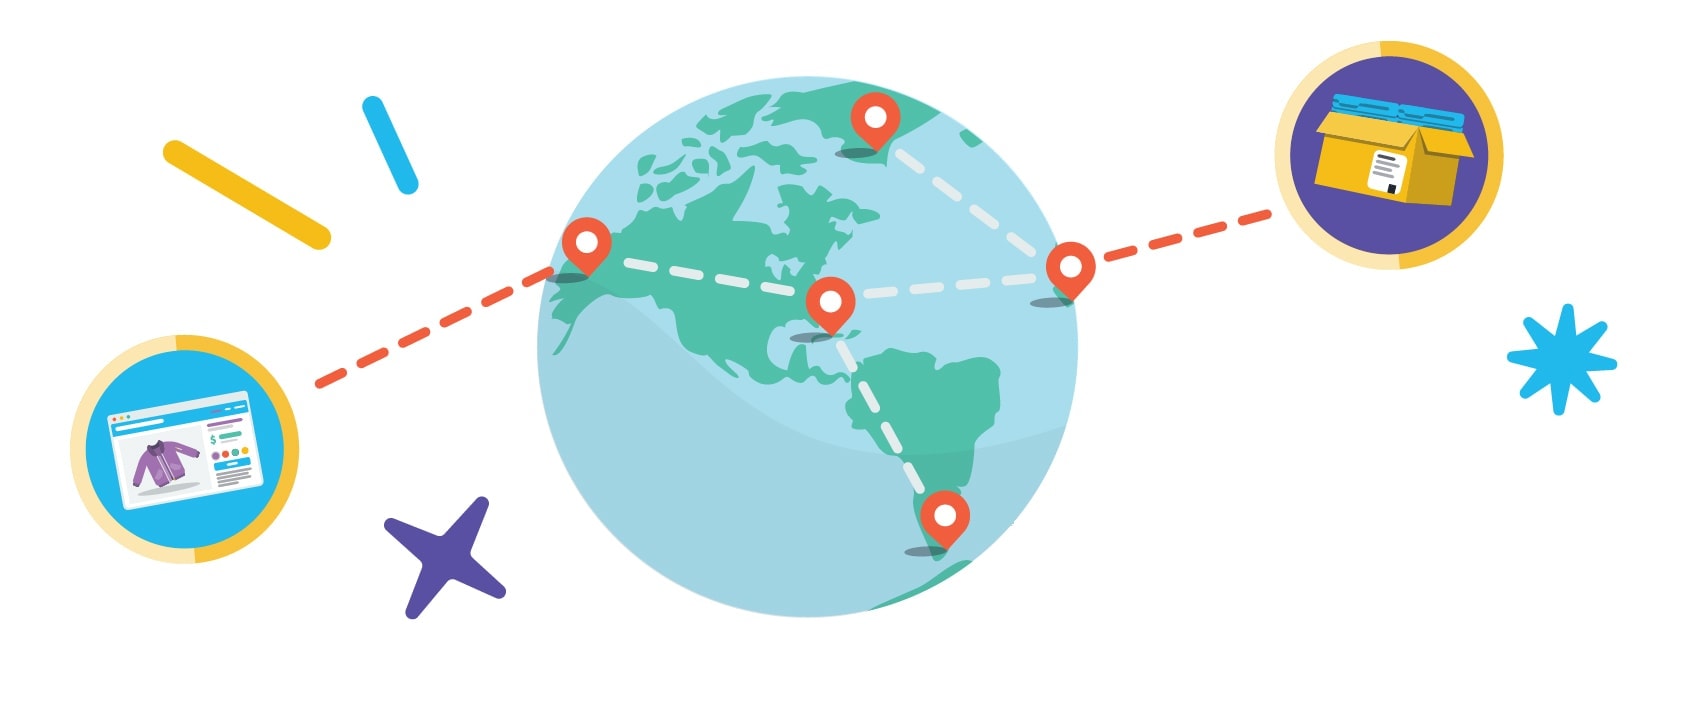
Figuring out how to ship your products to your customers can be a confusing and daunting process if you've never done it before as there's a lot to take into consideration.
What should you charge for shipping? How much does shipping cost? What about returns? What shipping carrier should you use? Should you start off with a shipping and fulfillment warehouse? Will your customers get charged duty and customs fees? What about shipping labels? What about tracking and insuring your packages?
All these questions, and more, are valid questions to be asking yourself—and we'll dive into them now:
How to Charge Your Customer for Shipping
다음과 같은 옵션이 있습니다.
- Charge Your Customers the Exact Shipping Fee: This means that your customers will be made aware of the shipping costs while they're checking out and they'll have to pay the exact amount it costs to get their order shipped to them.
- Charge Your Customers a Flat Shipping Fee: This means that you can instate a flat shipping fee such as $6 for domestic orders and $12 for international orders, no matter how many items each customer orders and no matter where they're located domestically or internationally. Some orders will cost you more to ship and some will cost you less, but if you budget it correctly it should even out.
- Offer Your Customers Free Shipping Over a Certain Threshold: For example, you could offer all customers free shipping if they spend over $100. This encourages customers to purchase enough products to meet that amount so they don't have to pay for shipping. By making sure they spend a certain monetary amount, it makes it more worthwhile for you to ship their package for “free” because the cost of shipping is absorbed into your profit margin on the order. Check out our article on How to Offer Free Shipping & Calculating Your Free Shipping Threshold for more information.
- Offer Your Customers Free Shipping Based on their Location: In this case, you could offer free shipping for all domestic destinations and any international locations will have to pay a calculated rate or a flat fee. This encourages your local customers to purchase from you without having to pay any shipping fees and depending on your domestic shipping rates you should be able to absorb the cost in your profit margin, assuming you price your items accordingly. For international customers, however, you'll be able to fund the shipping cost fully or in part by their calculated or flat rate fee.
- Offer Your Customers Free Shipping on Any Order: Some businesses choose to offer free shipping to all customers because it's easier for them to calculate, more attractive to customers, and results in fewer cart abandonments. The cost of shipping will be absorbed by your profit margin, so take that into consideration when pricing your items.
Shipping is never free. No matter what it says on any website, “free shipping” is not free for the business—the cost is just being absorbed in some other way. It's also no secret that shipping costs are one of the most likely reasons for shopping cart abandonments, so in order to combat that, many ecommerce stores offer free shipping to decrease shipping cart abandonments.
Take both of these things into consideration when pricing your products so you can gauge whether you'll need to charge higher prices for your items so you can afford to offer free shipping, or at least a subsidized shipping rate.
Calculating Shipping Costs
The cost of shipping depends on your carrier, where you're shipping to, and where you're shipping from. There are also other variables involved like the weight and size of the package as well, so your best bet is to use a shipping calculator to determine how much it would cost you to ship your packages. Many carriers have shipping calculators available on their websites so you can price out the cost of your packages on there.
- USPS Postage Price Calculator
- UPS Shipping Calculator
- DHL Shipping Calculator
- FedEx Shipping Calculator
- Canada Post Shipping Calculator
- UK Royal Mail Shipping Calculator
- Australia Post Shipping Calculator
How to Handle Returns
You basically have two options when it comes to handling returns for your customers: You can provide your customers with pre-paid postage in case they need to return an item, or you don't provide your customers with pre-paid postage and they will have to assume the responsibility to pay for postage in the event that they need to return an item to you.
Providing pre-paid postage for customers offers them a seamless shopping experience with your company, however not offering free returns can actually affect customer's decision to purchase from you at all.
Check out this blogpost from Shopify that discusses shipping returns in more detail to learn more about it and how it affects your business.
Which Shipping Carrier to Use
Most popular shipping carriers offer a business account program so businesses can get perks such as better order management, discounts on shipping, and/or free shipping supplies. Basically, it makes it a little bit easier and less expensive for you than just shipping packages without a business account.
Check out these popular shipping carrier's business accounts:
- USPS Customer Gateway
- UPS 비즈니스 솔루션
- DHL 비즈니스 계정
- 페덱스 비즈니스 센터
- Canada Post Business Account
- 영국 Royal Mail 온라인 비즈니스 계정
- 호주 우체국 비즈니스 신용 계정
Using a Shipping & Fulfillment Warehouse
Shipping and fulfillment warehouses can be a tricky service to use for clothing stores as there are usually many different SKUs (stock-keeping units) such as different sizes and colors for each item of clothing. Although shipping and fulfillment warehouses may be convenient services to use since they handle the entire picking, packing, and shipping service for you, there can be some drawbacks, including:
- Inability to Use Your Own Branded Packaging: Some warehouses require that you use their own shipping packaging, so you won't be able to use any boxes, poly mailers, tissue paper, stickers, etc. that have your own branding on them. It can also be difficult to add other extras such as promotional inserts, custom notes, samples, etc.
- Cost: Shipping and fulfillment warehouses can take the shipping process off your hands but at what cost? It costs you to store your SKUs on your warehouse's shelf space so depending on how quickly your product ships out to customers and how much product you're selling, it may or may not be a worthwhile cost for you.
- Handling Returns: Since your business is just one of many at a shipping and fulfillment warehouse, returned items may be handled in an inefficient manner, depending on the warehouse. Make sure you look into each warehouse's return policy before you work with them.
However, there are also advantages to using shipping and fulfillment warehouses:
- Shipping Costs: Shipping and fulfillment warehouses generally have to pay less to ship packages, so you'll likely pay less too.
- Simplified Process: No need to wait in line at the post office or deal with couriers to get your packages shipped.
- Saves You Time: All the time that it takes you to pick, package, and send packages can be put to other uses such as managing customer inquires, advertising, or just growing your business in general.
Generally speaking, if you're just starting your online clothing store: Handle the shipping and fulfillment process yourself, initially.
This gives you the chance to learn the best practices for shipping your own products, you can put your own personal touch on each package and you can use your own branded packaging materials. If you're just sending out a few parcels a day, it won't take up too much of your time to send them through post offices or couriers.
If you anticipate having a large customer base to start off with and predict that you may not be able to keep up with packing and shipping orders yourself, have a look into shipping and fulfillment warehouses to see what your options are.
Shipping & Fulfillment Warehouses:
These are some shipping and fulfillment options to consider, however, we encourage you to do your own research and due diligence:
- 인쇄물 보관 및 주문 처리
- Shopify 주문 처리 네트워크
- Fulfillment by Amazon (FBA)
- Fulfillrite
- Fulfillment.com
- 붉은 수사슴 이행
- ThinkLogistics
- ShipFusion
- WSI Supply Chain Solutions
To learn more about why third-party logistics providers are advantageous for your business, check out our Ultimate Guide to Utilizing a 3PL Provider for Ecommerce Fulfillment article.
Duty & Customs Fees
It's important to be aware that you as a business are not in control of the duties and customs fees your international customers may be charged on their orders. Customs and duties fees are managed and imposed on your customers by their country itself, you don't have the power to prevent them or influence their cost.
You do, however, have the ability to warn your customers about potential customs and duties fees they may face so that they're not unpleasantly surprised when their order arrives.
On your shipping information page, include a section about customs and duties fees and let your customers know that they may be charged these fees by their county and that your business has no control over that.
For more information about customs and duties declaration, required forms, and policies, check out these pages:
- USPS Postal Exporter
- UPS Import/Export Regulations
- DHL Customs and Duties
- FedEx Guide to Customs Forms
- Canada Post Customs Requirements
- UK Royal Mail Customs and Duties
- Australia Post Customs Forms & Regulations
Shipping Tracking & Insurance
Many customers now expect to have their packages tracked and expect to receive email updates on the whereabouts of the packages. If you're interested in giving your customers a streamlined and professional shopping experience, look into what tracking options your shipping carrier has available. It almost always costs extra or will mean that you'll have to upgrade to a more expensive service, but it could be very worthwhile for both you and your customers.
Most shipping carriers offer some kind of insurance, but it may not cover the entire cost of your orders—depending on the price of your items. If you sell high-priced items or just want the peace of mind that you're insured for any lost parcels, it may be worth looking into a third-party shipping insurance provider such as Shipsurance or InsureShip.
It's important to be aware that the shipping process can be complex, and it can take a while to set up and get used to all the different steps, systems, and processes. It'll probably be a learning curve at the start, especially if you've never shipped a large number of orders before or if you're launching to an eager audience, so give yourself time to set up your shipping systems properly so it doesn't affect your business too much. Once you get a system going though you'll likely get the hang of it and be able to make small improvements or scale your processes as needed.
광고
결론
We hope this post has provided you with very clear insight into the steps, systems, and processes it takes to start a clothing line. It may seem overwhelming at first if this is all new to you, however, just focus on one step at a time and grow from there. No matter what kind of clothing line you want to create—whether it's just your own line of t-shirts or an entire collection of cut and sew garments—the information, tools, resources, and experiences provided in this guide should help you get where you want to go.
Before you launch your clothing brand, don't forget to run through our Launch Checklist to make sure you don't miss anything important, and once you've launched, use our 52 Week Marketing Plan to drive traffic to your store.
