
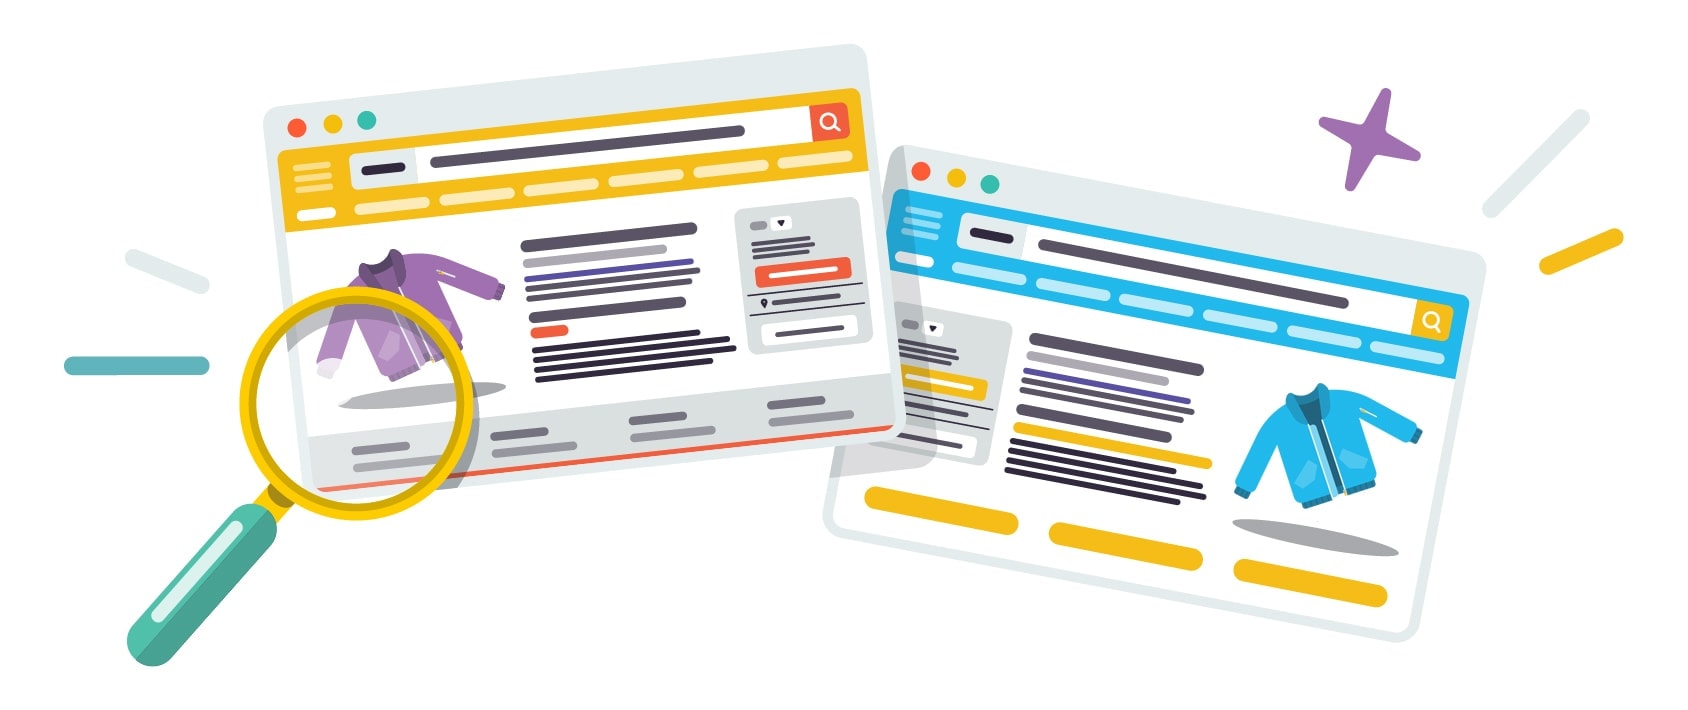
衣料品ラインの開始方法:デザイン、サンプリング、生産、パッケージングの完全ガイド
公開: 2021-08-15衣料品ラインを始めることは、ビジョンを持った創造的な起業家にとって非常にやりがいのある経験になる可能性があります。 シンプルなプリントアパレルのラインを作成したい場合でも、さまざまなアイテムや季節の追加を備えたカットソーコレクション全体を作成したい場合でも、この投稿では、衣料品のラインを開始する方法を紹介します。
作成する衣料品ラインの種類に応じて、プロセスにはさまざまなステップが含まれる可能性があります。 ラインの調達と生産に関与したいほど、より多くの時間、労力、およびお金を投資する必要があります。 すばやく簡単に何かを始めることに興味がある場合は、そのためのオプションもあります。 この投稿では、予算が100ドルの場合でも、投資額が10,000ドルを超える場合でも、独自の衣料品ラインを開始する方法を段階的に説明します。
衣料品ブランドの立ち上げを考えたことがあるなら、もう探す必要はありません。 この投稿は1年近く作業を続けており、その過程で、衣料業界の数十人の起業家や企業の知識と経験が含まれています。 この業界の知識は次の範囲です。
- クラウドファンディングキャンペーンを成功させ、30万ドルを調達した小さなブランドが、ハイエンドのメリノウールの衣料品ラインの製造に投入しました。
- B2B市場をターゲットとするブランクアパレルの自社ブランド卸売業者
- 意欲的な衣料品ラインのクリエイターと協力してビジョンを実現するためのパターンメーカー兼テックパックデザイナー
- そして最後に、私たちは毛糸を染色し、織物を織る工場から洞察を得るために情報源に直接行きました
あなた自身の衣料品ラインを始めることに関しては多くのことが関係しているので、それに飛び込みましょう。
衣料品ラインの開始方法:目次
- あなたが売りたい衣料品の決定
- 衣料品ラインのビジネスモデルの選択
- プリントオンデマンド衣料品ライン
- 卸売/自社ブランドの衣料品ライン
- カスタムカット&ソー衣類ライン
- 成功する衣料品ブランドの要素
- 衣類のニッチ
- 服飾デザイン
- 服の品質
- 衣料品ブランド
- 衣料品ラインの差別化
- デザイン
- フィット/スタイル
- ブランド
- 適所
- 性能/素材/品質
- 衣料品ラインのビジネスプランの作成
- 衣料品ラインのブランドを作る
- あなたの市場を定義する
- ブランドの柱を作成する
- ブランドビジュアルの開発
- 衣料品ラインの製品開発プロセス
- 衣料品ラインのコンセプトをデザインする
- パターンの作成とTechPackの開発
- 衣料品メーカーの調査
- あなたの予算を決定する
- 衣料品メーカーを選択
- 衣料品メーカーにお問い合わせください
- 潜在的な工場を選別する
- サンプルを作成する
- 本格生産開始
- 衣料品とパッケージのブランド化
- ブランドパッケージオプション
- ブランドパッケージの要素
- 追加のブランド素材を含める
- 衣料品のブランド化
- オンライン衣料品店を作成する
- 衣料品会社の配送戦略を作成する
- 結論
衣料品ラインを開始する方法に関する重要なポイントとFAQ
自分の衣料品ラインを始めるにはどうすればよいですか?
衣料品ラインの開始は、必要に応じて単純または複雑にすることができます。 シンプルにするために、ドロップシッピングサプライヤーから衣料品を調達します。 その他のオプションについては、卸売業者から衣料品を調達してください。 衣料品ブランドの完全かつ完全な入力と管理については、衣料品メーカーと協力してください。
衣料品ラインを始めるにはビジネスライセンスが必要ですか?
多分! これは国や地域によって異なる場合がありますが、ほとんどの企業が事業を行うにはビジネスライセンスが必要です。 正確なビジネスライセンス情報については、お住まいの国や地域のビジネスライセンス規制機関にご相談ください。
米国にいる場合は、米国中小企業協会、カナダではカナダ政府のWebサイト、英国では英国政府のWebサイト、オーストラリアではABLISを確認してください。
衣料品ブランドの著作権、商標、またはNDAは必要ですか?
場合によります。 ほとんどの衣料品ブランドにとって、答えはノーかもしれませんが、資格のあるアドバイスについては法律専門家に連絡する価値があります。 法的な問題に関しては、独自のデューデリジェンスを実施してください。
多くの新しい衣料品ブランドにとって、著作権や商標登録は価値がないかもしれません。 どうして? 簡単に言うと、作成したデザインの著作権は、正式に登録しなくても自動的に所有されます。商標は、費用と時間がかかり、すべての法域でメリットが得られるわけではありません。
さらに、商標を登録するとき、あなたはその商標を擁護する義務があるかもしれません、それであなたは彼らがあなたの商標を侵害した場合に人々/企業に責任を負わせる責任があります。 ) 将来。
著作権と商標を登録することには利点と利点がありますが、最初に始めたときには価値がないかもしれない多くの時間、お金、そして頭痛が伴うこともあります。 ただし、ご自身の状況を考慮に入れて、衣料品ラインに最適と思われることを行ってください。
秘密保持契約(NDA)は、パターンメーカーやメーカーと協力する際に、オーダーメイドの服のデザインを保護するのに役立つ場合があります。 状況に合ったガイダンスについては、法律専門家に相談することをお勧めします。
法律上のアドバイスについては、次のオンラインリソースを確認してください。
- Lawtrades(USA)
- クラリティ(全世界)
- 所有者(カナダ)
- ロケット弁護士(アメリカ、イギリス、スペイン、フランス、オランダ)
衣料品ラインを始めるのにどれくらいの費用がかかりますか?
場合によります。 ドロップシッピングサプライヤーと協力して衣料品を作成し、出荷とフルフィルメントのプロセスを処理する場合、衣料品ブランドを立ち上げるのにおそらく100ドルから500ドルの費用がかかる可能性があります。 しかし、完全なブランド管理が必要で、衣服を一から設計する場合は、数万ドル以上の費用がかかる可能性があります。 それはあなたがあなたの衣料品事業を運営したい規模に依存します!
無料で衣料品ラインを始める方法
無料で衣料品ラインを開始するには、ドロップシッピングサプライヤーから衣料品を調達します。 ドロップシッパーは衣料品を製造し、ロゴ、パターン、または画像を衣料品に印刷できます。また、配送プロセスも処理します。 衣料品のドロップシッパーと一緒に仕事をするときは、事前に在庫を購入する必要がないため、ほとんどまたはまったく資金を使わずに立ち上げることができます。
このプロセスについては、プリントオンデマンド衣料品ラインのセクションにジャンプしてください。
経験のない衣料品ラインを始める方法
あなたは間違いなく経験のない服のラインを始めることができます。 ドロップシッピングから服のラインを始めることをお勧めします。ドロップシッピングは、圧倒されすぎないように、多くの責任を負わせます。
詳細については、プリントオンデマンド衣料品ラインをご覧ください。
衣料品メーカーを見つける方法
そこには多くの異なる衣料品メーカーがあります! 主に北米に拠点を置く衣料品メーカーを見つけるには、衣料品メーカーディレクトリをチェックしてください。
あなた自身の服をデザインする方法
自分の服をデザインする方法を学ぶには、地元のクラスに参加するか、オンラインでクラスを見つけてください。 スキルシェアやYouTubeでコースを見つけることができます!
高級衣料品ブランドの立ち上げ方
高級衣料品のブランドを立ち上げるには、品質とオーダーメイドのデザインに焦点を当てたいと思うでしょう。そのため、それらを大切にする衣料品メーカーも見つけてください。 細部にまで気を配りながら衣服を作るアトリエと緊密に連携し、各衣服にぴったり合うようにし、高品質の素材で作品を作ります。 お住まいの地域の衣料品アトリエを検索するか、作成したい種類の衣料品を専門とする海外の衣料品メーカーを見つけてください。
卸売りで衣料品事業を始める方法
衣料品の卸売りを購入して衣料品事業を始めることは、衣料品ラインを始めるための親しみやすい方法です。 これを行うと、衣服を一からデザインする必要がないため、変化するトレンドにはるかに簡単に対応できます。 詳細については、卸売/自社ブランドの衣料品ラインのセクションをご覧ください。
衣料品ブティックを始める方法
ほとんどの衣料品店は、複数の異なるブランドの衣料品を厳選しているため、オンラインまたは直接会って独自の衣料品店を始めるには、さまざまなブランドやデザイナーから商品を調達する必要があります。
これは、複数の異なる卸売衣料品サプライヤーから衣料品を調達することを意味します。そのため、目の肥えた目でそれらの製品の提供を検討し、ブティックのニッチ市場に最適なアイテムをキュレートする必要があります。 衣料品の卸売りの調達プロセスを開始するには、卸売り/自社ブランドの衣料品ラインのセクションを確認してください。
自宅からファッションビジネスを始める方法
自宅からファッションビジネスを始めることは完全に可能です。 方法については、この記事の残りの部分を確認してください。
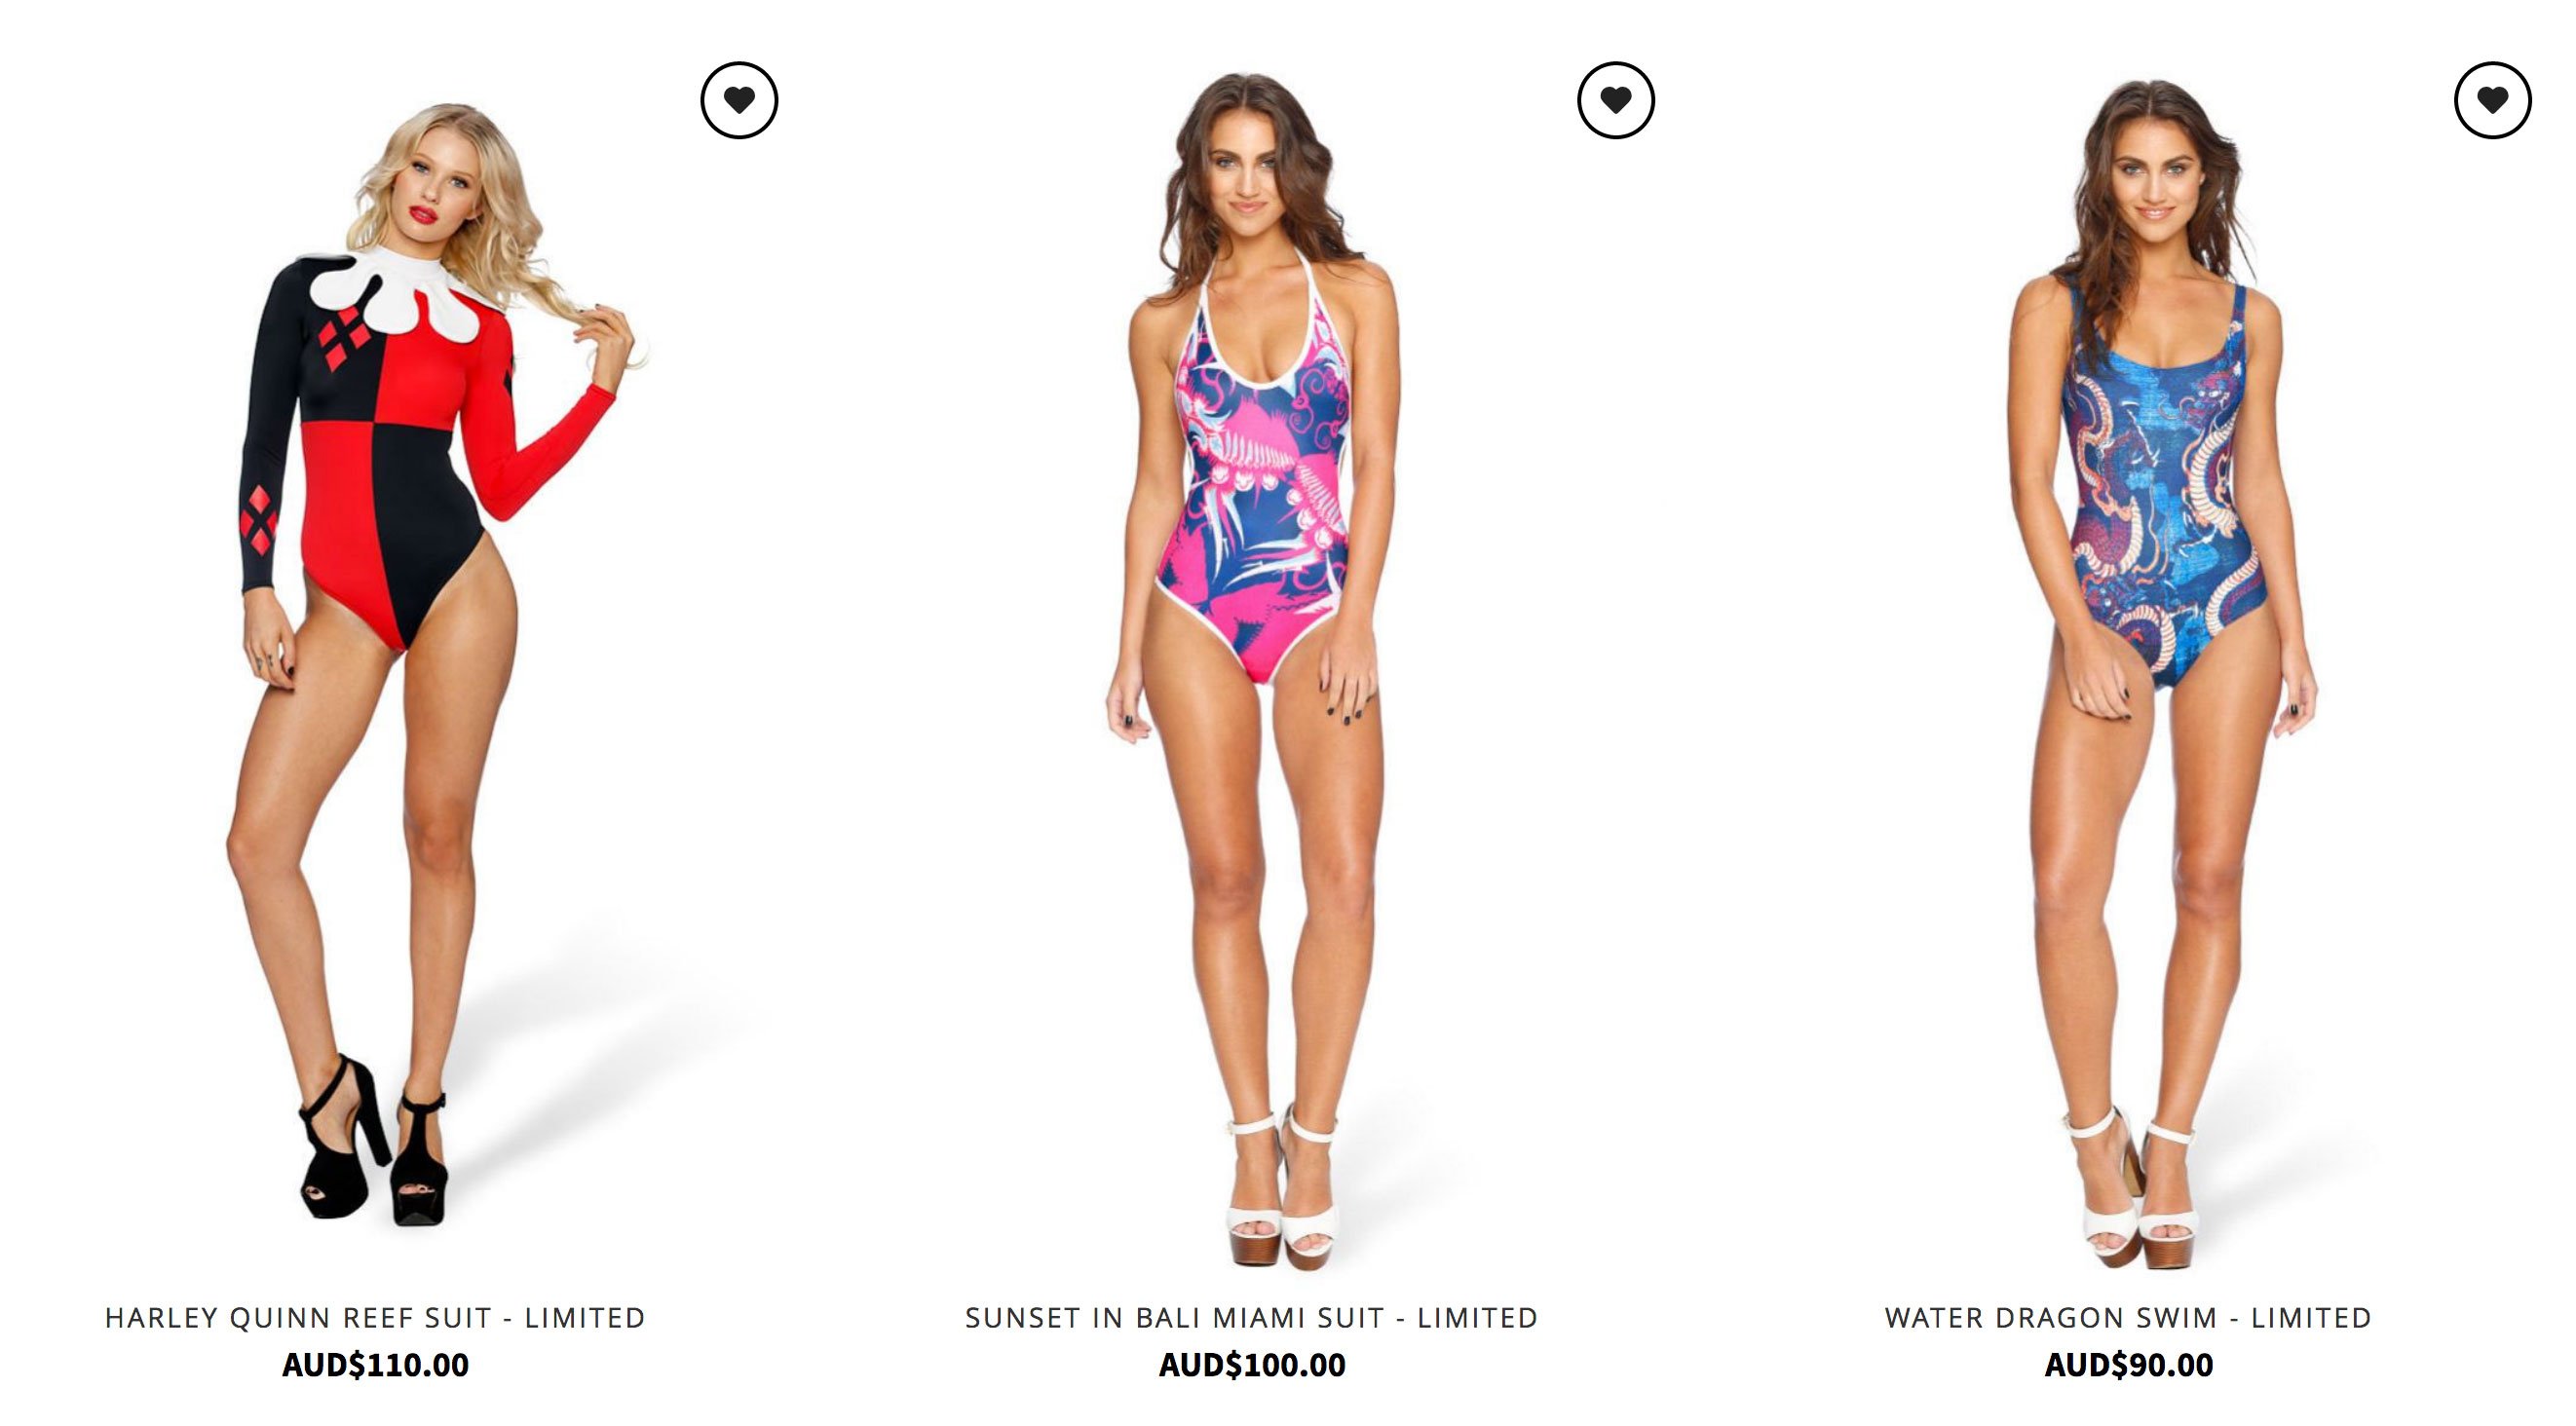
あなたが売りたい衣料品の決定
アパレルやファッション製品の作成に関しては、多くの選択肢があります。
あなたがいつも衣料品のラインを始めたいと思っていたなら、あなたはおそらくあなたが作りそして販売したい特定の製品の良い考えをすでに持っているでしょう。 他の人にとっては、衣料品ブランドを作成することは、あなたの個人的なスタイルを表す製品をデザインするユニークで興味深い機会を表すかもしれませんが、どの製品を販売するかわからない場合があります。
どのカテゴリに分類されるかに関係なく、いずれかを進めることを決定する前に、すべての衣料品とアパレルのオプションを慎重に検討することが重要です。
あなたがあなたのブランドのために考慮したいと思うかもしれないいくつかの衣類とアパレル製品は次のとおりです:
- 半袖シャツ
- 長袖シャツ
- パーカー
- パンツ/レギンス
- ドレス
- ランジェリー/下着/靴下
これらの衣料品はそれぞれ、その周りに衣料品ブランドを構築する際に独自の機会と課題を提示するため、慎重に検討することが重要です。 この記事を読み進めるときは、このことを覚えておいてください。
以下では、最も一般的な衣料品ラインのビジネスモデルのいくつかを調べて、それぞれに必要な作業、時間、および金銭的投資をよりよく理解します。
衣料品ラインのビジネスモデルの選択
衣料品ブランドを始める準備ができている場合は、この時点でいくつかの重要な選択を行う必要があります。
独自のブランドを作成するために取ることができるいくつかの方向性がありますが、それらはすべて互いにかなり異なります。 そして最も重要なことは、困難、コスト、および時間の入力が各オプション間で劇的に異なることです。
最も一般的なオプションを見てみましょう。
- オンデマンド印刷
- 自社ブランドの衣料品ライン
- カスタムカット&ソー衣類ライン
以下で、それぞれの長所と短所を掘り下げてみましょう。
| タイプ | 困難 | 料金 | 時間入力 |
|---|---|---|---|
| 1.プリントオンデマンド | とても低い | $ | とても低い |
| 2.卸売/自社ブランド | 低い | $$ | 中くらい |
| 3.カスタムカット&ソー衣類ライン | 高い | $$$$ | 非常に高い |
オプション#1:プリントオンデマンド衣料品ライン
独自の衣料品ラインを開始するための最初の最も簡単なオプションは、標準の空白のアパレルにデザインやロゴを印刷することです。
これは、予算が少なく(1,000ドル未満)、ほぼ完全に自動化されたビジネスを立ち上げることができるというメリットを享受したい人々にとって魅力的なオプションです。 このタイプのビジネスモデルの最大の欠点は、標準的な卸売りの衣類を使用しているため、利益率が低く、素材、ステッチ、フィット感などで製品を差別化する能力がないことです。
オンデマンド印刷または衣服への直接印刷プロセスでは、特殊なデジタルインクジェットプリンターを使用して、インクを衣服やアパレルに直接印刷します。 これらのデジタルプリンターは、衣料品のフルカラー画像を非常に正確に生成することができます。
オンデマンド印刷は、高品質の印刷されたアパレルを迅速かつ効率的に作成します。 このため、スクリーン印刷とは異なり、セットアップ費用はかかりません。 これは、少量の注文(1ユニットのみを含む)を印刷するのが簡単で費用効果が高いことを意味します。
長所
- セットアップ費用なし
- 高品質のプリント
- 無制限のカラーオプション
- 少量または1回限りの注文に最適
- 多くの衣類のオプション(シャツ、レギンス、靴下、ドレスなど)
短所
- 大規模な生産実行には費用効果がありません
- 通常、ボリュームディスカウントはありません
- 限定印刷製品の選択
- 限られた仕上げオプション(タグ、ラベルなど)
タイムライン:日数
費用: $ 0- $ 500
時間とエネルギーの入力:非常に低い
その他の注意事項:オンデマンド印刷の衣料品ブランドを開始するには、PrintfulとShopifyの使用をお勧めします。 Printful(Shopifyストアとシームレスに統合されている)のような衣料品およびアパレルの印刷会社を利用すると、50ドル未満で数時間で稼働できます。 オンラインストアの注文を受け取ると、Printfulは注文を自動的に受け取り、印刷プロセスを開始して、お客様に代わって顧客に発送します。 このプロセスの詳細を読み、24時間以内にTシャツビジネスを開始する方法の記事で、このようなビジネスを立ち上げる方法をステップバイステップで学びます。 その他のオンデマンド印刷の衣料品サプライヤーを見つけるには、ドロップシッピングサプライヤーディレクトリを確認してください。
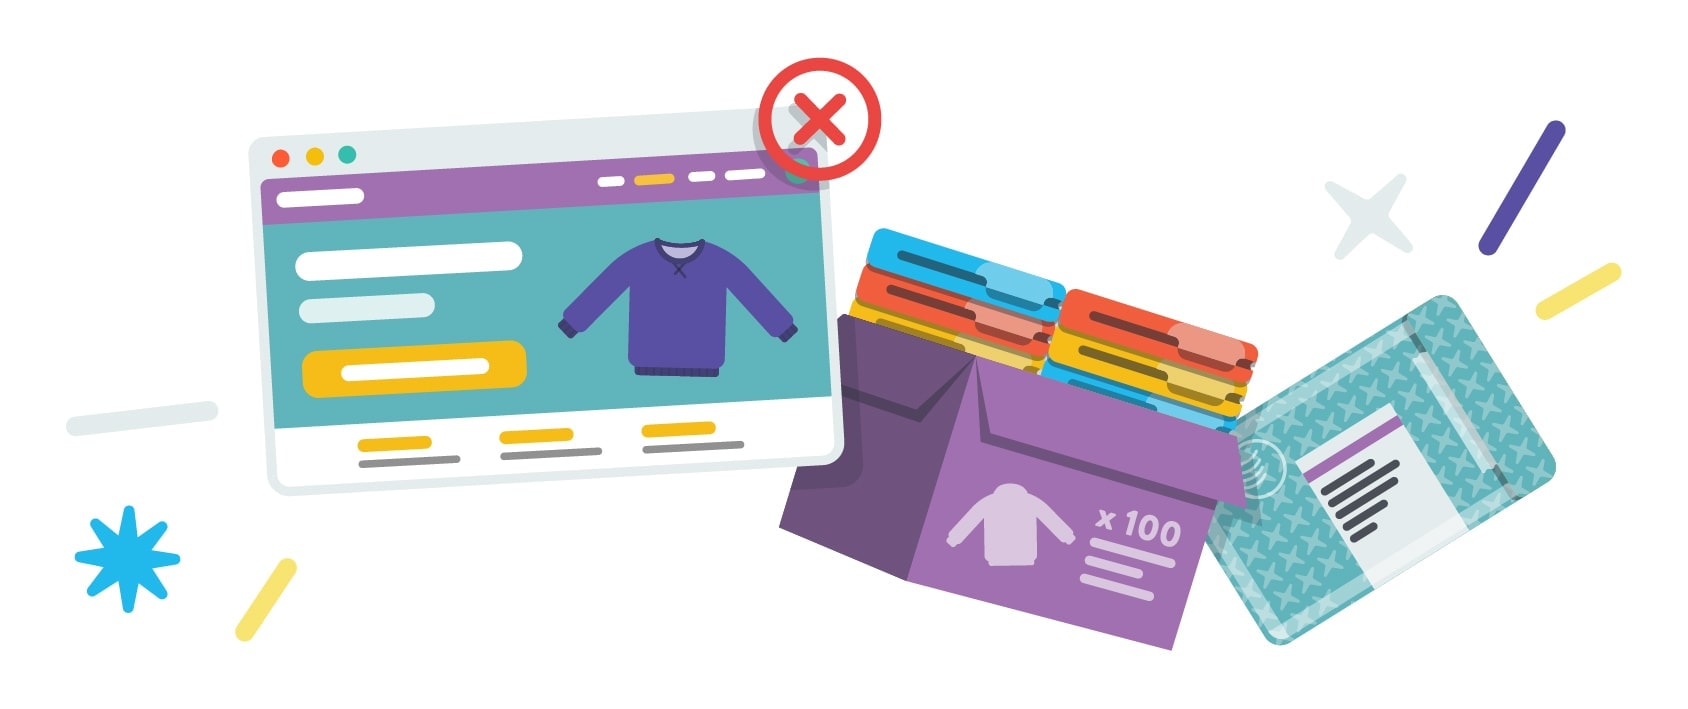
オプション#2:卸売/自社ブランドの衣料品ライン
卸売りまたは自社ブランドのサプライヤーを通じて衣料品を調達する場合、基本的には他のブランドから衣料品を購入し、それを自分の店の顧客に販売します。 この方法で衣料品を調達する場合、サプライヤから割引価格で商品をまとめて購入し、マークアップで顧客に販売します。
広告
このオプションを使用すると、独自の衣料品をゼロから製造することはありませんが、顧客の好みに合ったアイテムの選択をキュレートすることになります。 衣料品を製造する場合のように各衣料品をカスタマイズすることはできませんが、独自の衣料品を製造するための時間と費用のかかるプロセスを経る必要もありません。 ただし、このオプションの主な欠点は、衣料品の多くの在庫管理単位(SKU)をまとめて事前に購入する必要があることです。つまり、キャッシュフローが必要になります。
長所
- あなた自身のアイテムを製造する必要はありません
- 変化するトレンドに簡単に対応できます
- 独自の製品範囲をキュレートする
- ボリュームディスカウント
- 良好な利益率の可能性
- あなたはあなた自身のhangtags、パッケージングなどでアイテムをブランド化することができます。
- 自社ブランドのサプライヤーと協力する場合、独自のブランド名で衣類のタグをカスタマイズすることができます
短所
- 卸売業者と協力する場合、ブランド名で衣料品タグをカスタマイズすることはできません。
- 通常、最小注文数量は、100または1,000ユニットではないにしても、色/サイズごとに(少なくとも) 10ユニットから始まります。
- 在庫と配送を自分で管理する必要があります
- 多くの製品を事前に購入するには、キャッシュフローが必要です
タイムライン:数週間
費用: 2,500ドル以上
時間とエネルギーの入力:中
その他の注意事項:卸売業者ディレクトリと自社ブランドのサプライヤーディレクトリをチェックして、衣料品ブランドのサプライヤーを見つけることをお勧めします。
オプション#3:カスタムカット&ソー衣類ライン

カスタムカットソーの服はあなたがすべてをしていることを意味します。 私たちはスケッチをデザインし、それらをパターンに変え、生地とメーカーを調達し、そして完全な生産実行(数千ユニットになる可能性があります)の支払いについて話している。
自分で服を作るのは気弱な人には向いていません。 これは集中的なプロセスであり、起動して実行するまでに(少なくとも)数か月かかる場合があります。 メーカーを探す必要があり、パターンメーカーと協力する必要があり、tachパックを作成する必要があり、ファブリックを調達してテストする必要があります。また、作成してテストする必要もあります。完成品に近づく前に、多くのサンプルがあります。
あなたが生産しようとしている正確な衣料品に応じて、完成品は数千ドルかかる可能性があるので、いくつかのサンプルを取得するだけです。
完成品ができたら、メーカーとのフルランを作成する必要があります。また、在庫をストックし、さらには顧客に服を届けるための配送戦略を立てる必要があります。
長所
- あなたは100%カスタム製品を手に入れるでしょう
- 顧客からの知覚価値の向上の可能性
- マージン増加の可能性
- ブランディングを100%管理できます
短所
- 非常に高い初期費用
- これは、いくつかの可動部分を含む複雑なプロセスです
- 起動には数か月以上かかる場合があります
タイムライン: 3か月– 1年以上
費用: 10,000ドル以上
時間とエネルギーの入力:非常に高い
その他の注意事項:この投稿の第2部では、独自のカットソー衣類ラインの開発に関連するすべての手順とリソースに焦点を当てますので、読んでください!
成功する衣料品ブランドの要素
優れた衣料品ブランドは、ある理由で優れています。 通常、彼らは1つのことを非常にうまくやっていますが、時には複数のことを本当にうまくやっています。 あなた自身の衣料品ラインを始める前に、あなたが考慮したいと思うであろう成功したブランドへの4つの重要な要素があります:
- 適所
- デザイン
- 品質
- ブランド
以下で、これらの要素のそれぞれについてもう少し詳しく見ていきましょう。
衣料品ブランドのニッチを選択する
特定のニッチを選択することは、衣料品およびアパレル業界で成功するために重要であり、多くの場合、不可欠です。 盲目的に大勢の人々をターゲットにしようとすると、誰にも話さないブランドが残ります。
特定のグループの人々に焦点を当てることには、いくつかの大きな利点があります。
- マーケティングが簡単です(より具体的にターゲット市場に焦点を当てることができるため)
- それはより手頃な価格になる可能性があります(間違ったオーディエンスをターゲットにしていないため)
- 競争が少なくなる可能性があります(ニッチダウンすればするほど、競争力のあるプールは小さくなります)
- あなたはより大きな顧客の忠誠心を引き付けることができます(あなたの聴衆はあなたが彼らに集中していることを知っているので)
例:「面白いスローガンの服」や「男性用パーカー」は、市場が非常に発達しているため、どちらも攻撃するには広すぎます。 ニッチダウンは、市場をより的確にターゲティングし、より簡単に市場に到達できるようにし、市場により多くの価値を生み出すのに役立ちます。 したがって、「面白いスローガンの服」の代わりに、「看護師や消防士のためのスローガンの服」のような特定の情熱的な市場に対応することができます。 または、「男性用パーカー」の代わりに、寒い気候の人々のために超厚手/暖かいパーカーの製造に集中することもできます。
服のデザイン
印刷されているか、刺されているか、実際の衣服自体のデザインであるかにかかわらず、デザインは重要です。 だけでなく、あなたの衣服片が見栄えする必要があるが、彼らはまた、あなたのターゲット市場の目に特異的に見栄えする必要があります。
最終的に、あなたの服のデザインが美的に美しく、バイヤーにアピールしなければ、あなたは負ける人になるでしょう。 デザインは必ずしも複雑である必要はありません。実際、ベストセラーの服のデザインの多くは非常にシンプルですが、特定のオーディエンスやニッチとつながる必要があります。
服の品質
誰かを一度騙すことはできますが、二度騙すことはできません。 時間の経過とともに色あせてひびが入ったり、1回の洗濯後に縫い目でバラバラになったりするパターンは、戻ってきて買い戻す熱狂的なファンを生み出しません。
すべての衣料品が同じというわけではありません。衣料品の品質には大きなばらつきがあります。 選択する素材の品質と構成は、衣類の着用方法、洗濯方法、色あせ、収縮、そして最終的には長持ちする方法に影響します。 上で述べたように、品質はあなたのブランドとその成功にとって最も重要であるため、あなた自身を教育し、あなたの材料を慎重に選ぶことが重要です。
利益率を上げるために品質を犠牲にすることは常に魅力的ですが、長期的には、品質がブランドを他の人と共有して買い戻すという顧客の決定にどのように影響するかを考慮する必要があります。
衣料品ブランド
多くの衣料品会社は強力なブランドに基づいて構築されています。 強力なブランドは、衣料品自体を超えて、ターゲット市場が衣料品を購入、代表、共有、および再購入することを奨励および強化します。 あなたのブランドは製品自体をはるかに超えて広がり、ブランドが表すものとそれに関連するライフスタイルを網羅しています。
衣料品ラインの差別化
衣料品デザインとアパレル業界は、最も飽和状態にある業界の一部です。効果的に競争するには、他のすべての業界とは一線を画す差別化ポイントが必要です。
工場で働くことで、この業界に参入する人の数を前もって把握することができました。リモートでさえ成功するブランドを構築するために何が必要かはまったくわかりません。 無知を非難することは完全に公平ではありません…私達はそれがどれほど難しいかについて全く手がかりがありませんでした。 しかし、私たちは、何が私たちを差別化したのか、なぜ人々が私たちのものを購入することに興味を持っているのか、そして私たちがどのように販売するのかという明確な理由からストックを始めました。 これは、多くの意欲的なメーカーがスキップしているのを私が見ているステップです。 –ジムスネディカー| 株式会社ストックマニュファクチャリング
良いニュースは、群衆から離れて自分自身を設定するための複数の方法があるということです…
デザイン
衣服にグラフィックや画像を配置する場合は、デザイン(デザインのスタイルとデザインの品質)が他の人と一線を画すのに役立ちます。
例: Blackmilk Clothingは、独自にデザインされたレギンスを作成することでその名前を公表し、Shopifyの最大の商人の1つになりました。また、以下の場合、Dr。Who:
フィット/スタイル
ゼロから自分の服を作ることを計画している場合、服の実際のフィット感とスタイルは差別化の重要なポイントになる可能性があります。
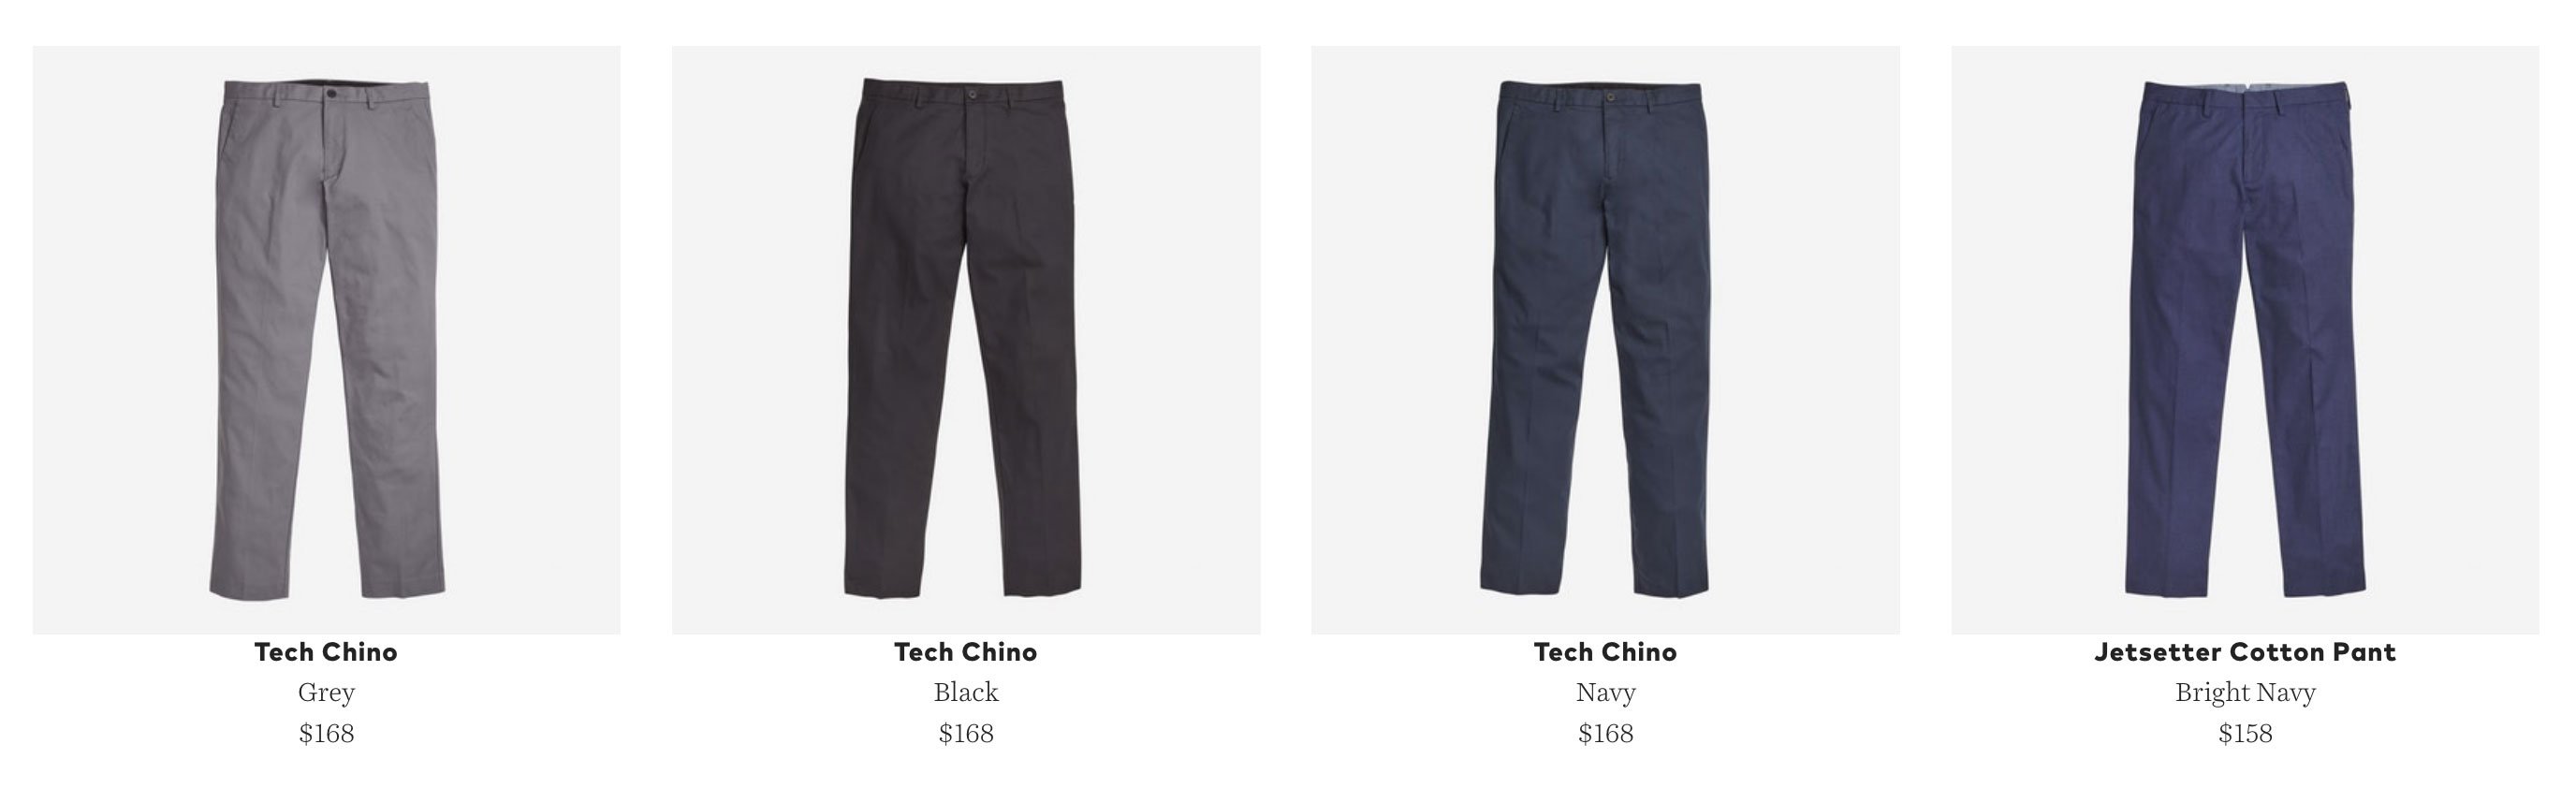
例:シャープカジュアルウェアは、5フィート8インチ以下の男性に、ぴったりフィットするスタイリッシュな定番アイテムを探している高級服を提供します。 おそらく、有名になり、より良いフィット感で知られるようになった元のオンラインブランドはBonobosです。 ボノボスは、よりフィット感のあるメンズパンツを作りたいと考えました。 彼らのより良い適合は彼らを早い段階で確立するのを助け、彼らのブランドを1億ドルの会社に変えました。
ブランド
他のすべてが同じであると、人々は彼らが最も関連することができる物語を持っているブランドから購入する可能性が高くなります。 さらに、消費者とつながる強力なブランドだけでも、品質が他の一般的なブランドや安価なブランドと比較的同じであっても、より高い価格を要求することができます。
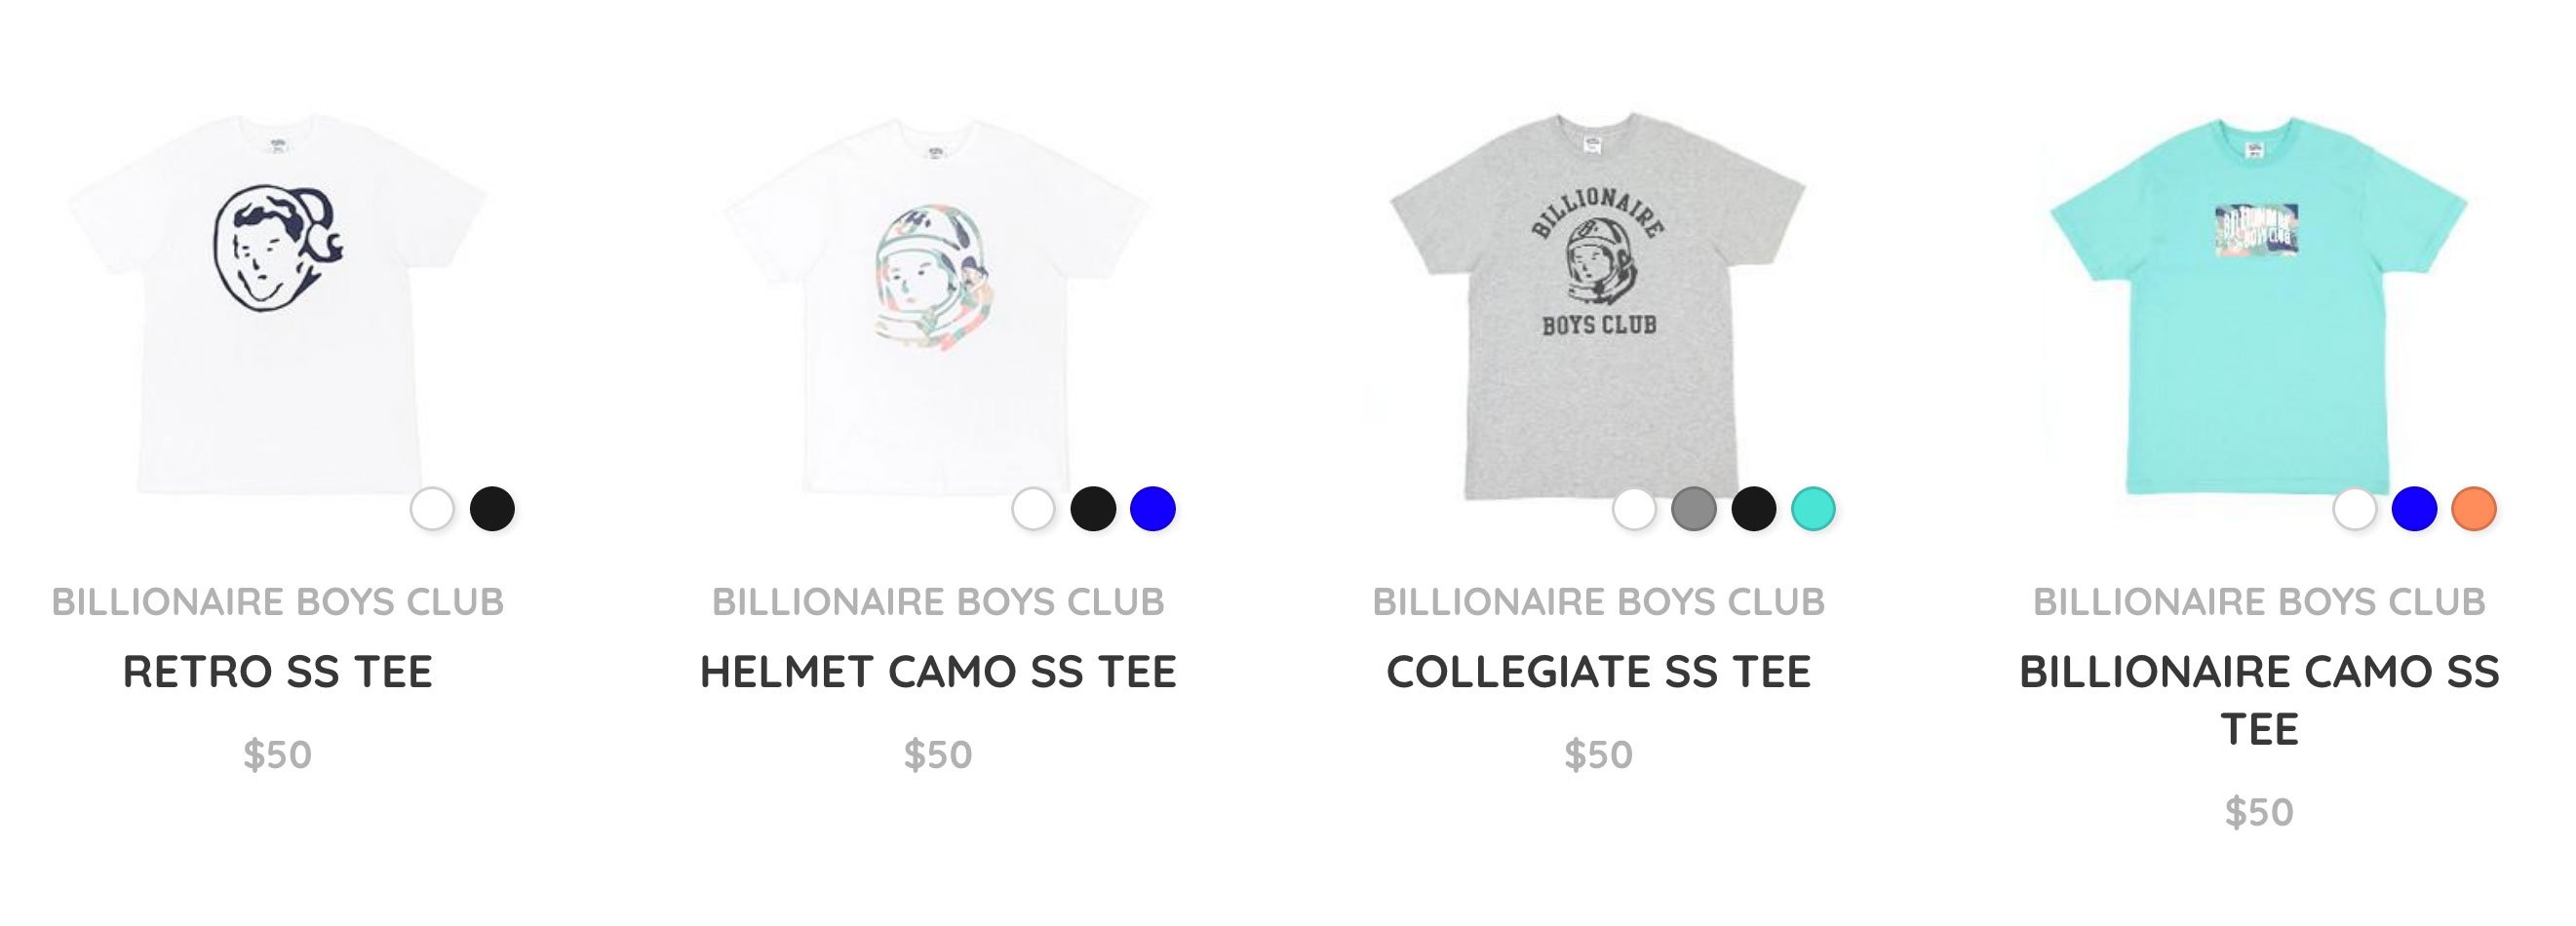
例: 2000年代初頭のビリオネアボーイズクラブは、単に「ビリオネアボーイズクラブ」と書かれたTシャツを100ドル近くで販売していました。 間違いなく、彼らのTシャツは市場に出回っている他の何百ものTシャツと同じ品質でしたが、消費者は若い都会的なブランドとそのストーリーに賛同しました。
適所
あなたが事業を行うことを選択したニッチとあなたのターゲット市場(十分に定義されていて、それが十分に提供されていない場合)はそれ自体が差別化のポイントになる可能性があります。
例: Ya Neverは、リモートで作業して世界中を旅するデジタル遊牧民をターゲットにしています。 何千もの衣料品ブランドが市場に出回っていても、この特定のグループの人々をターゲットにしているものは、あったとしてもごくわずかです。
80年代のTシャツは、80年代の映画やテレビ番組の限定デザインを販売しています。 デザインは魅力的でノスタルジックなだけでなく、多くのデザインがライセンスされているため、他の場所で見つけることはほぼ不可能です。
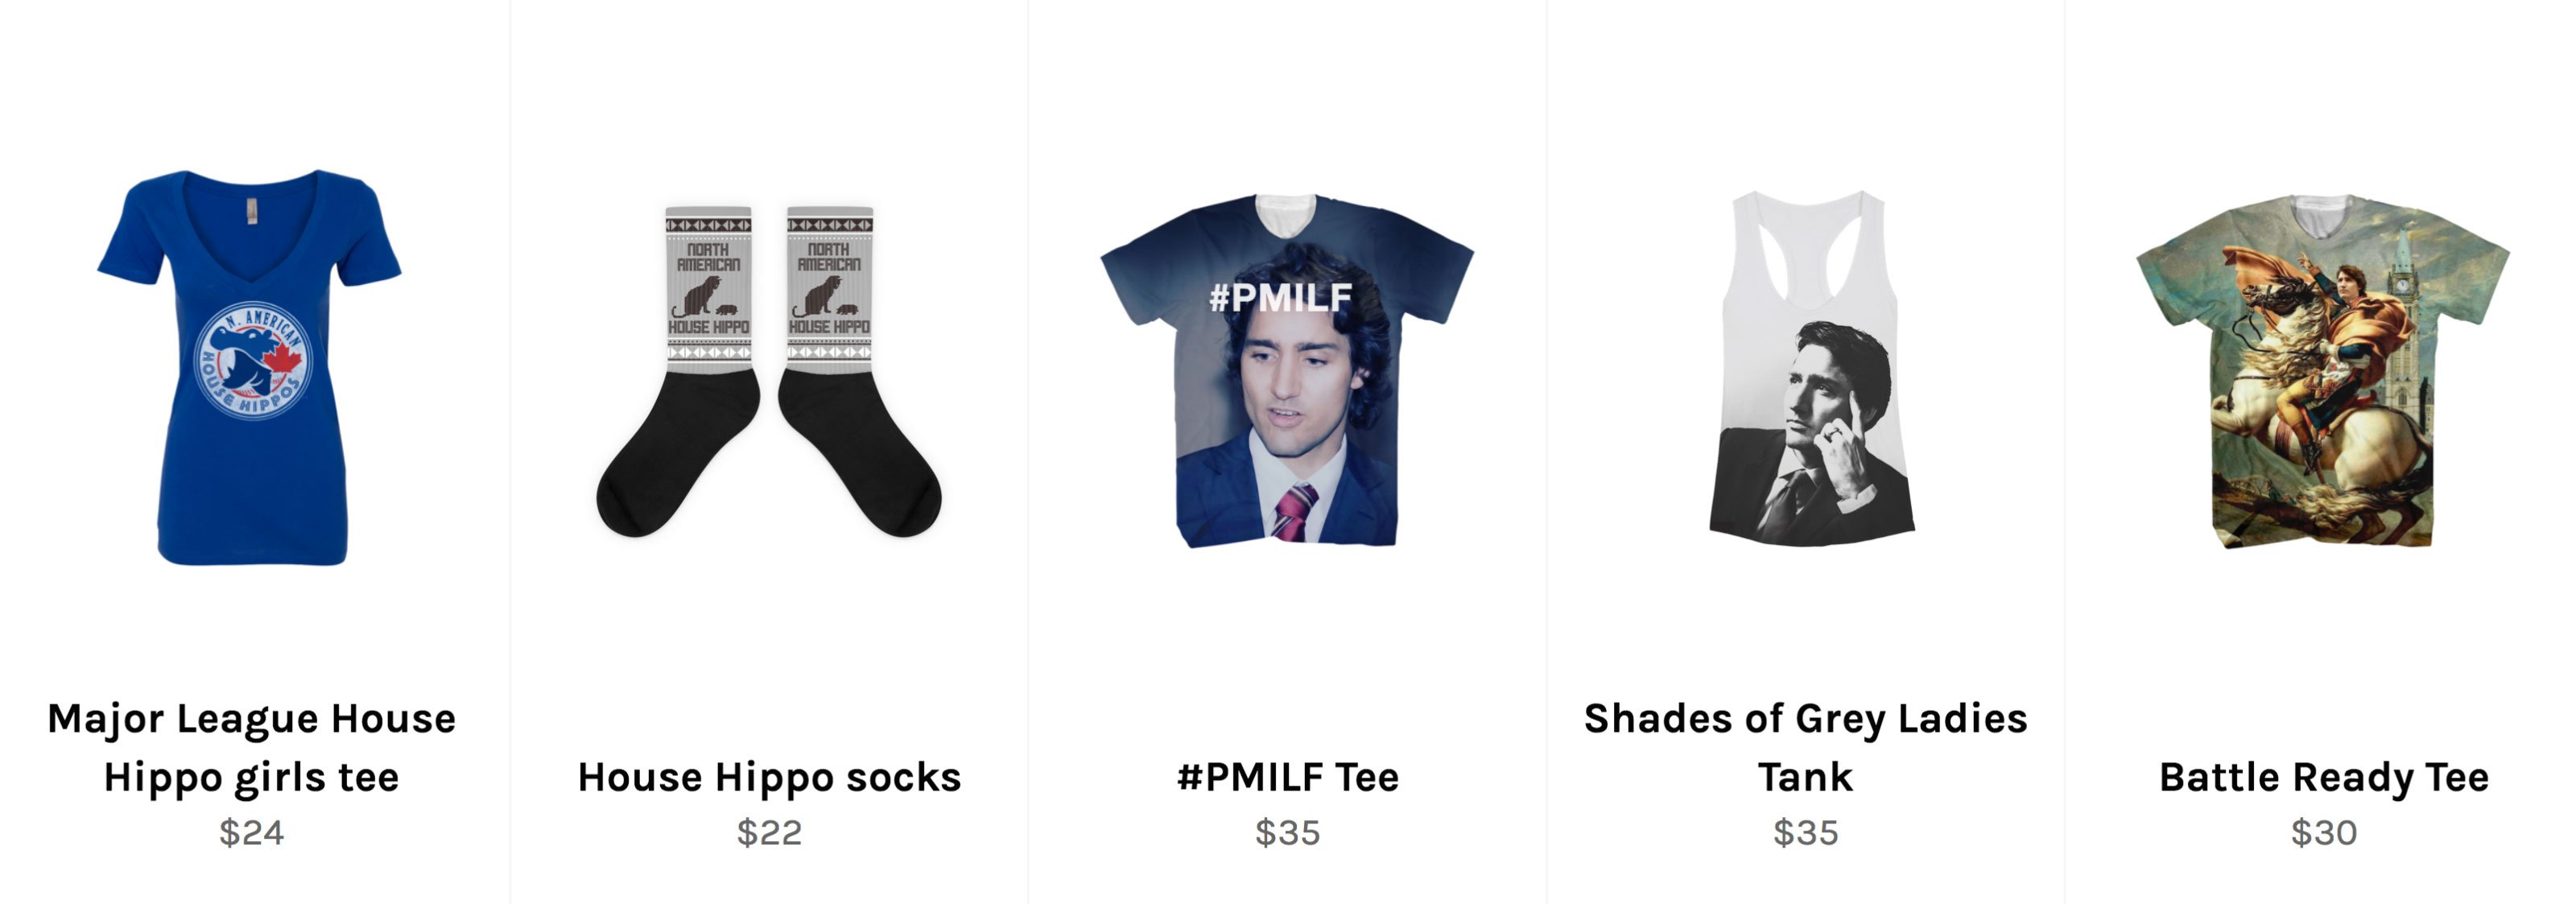
最後に、Canada Threadsは、最愛のCanadian House Hippoに関連するデザインなど、カナダ人の共感を呼ぶ衣類やアクセサリーに焦点を当てています。
性能/素材/品質
素材の種類は、他の服と区別するのに役立ちます。 着用者にとってどのように機能するか(快適、かゆみ、制限、暖かく、軽く、風通しが良く、しわが寄りやすいかなど)、全体的な品質(縫い目、ボタン、生地の重さなど)は次のようになります。すべてが顧客の満足度に影響を及ぼします。
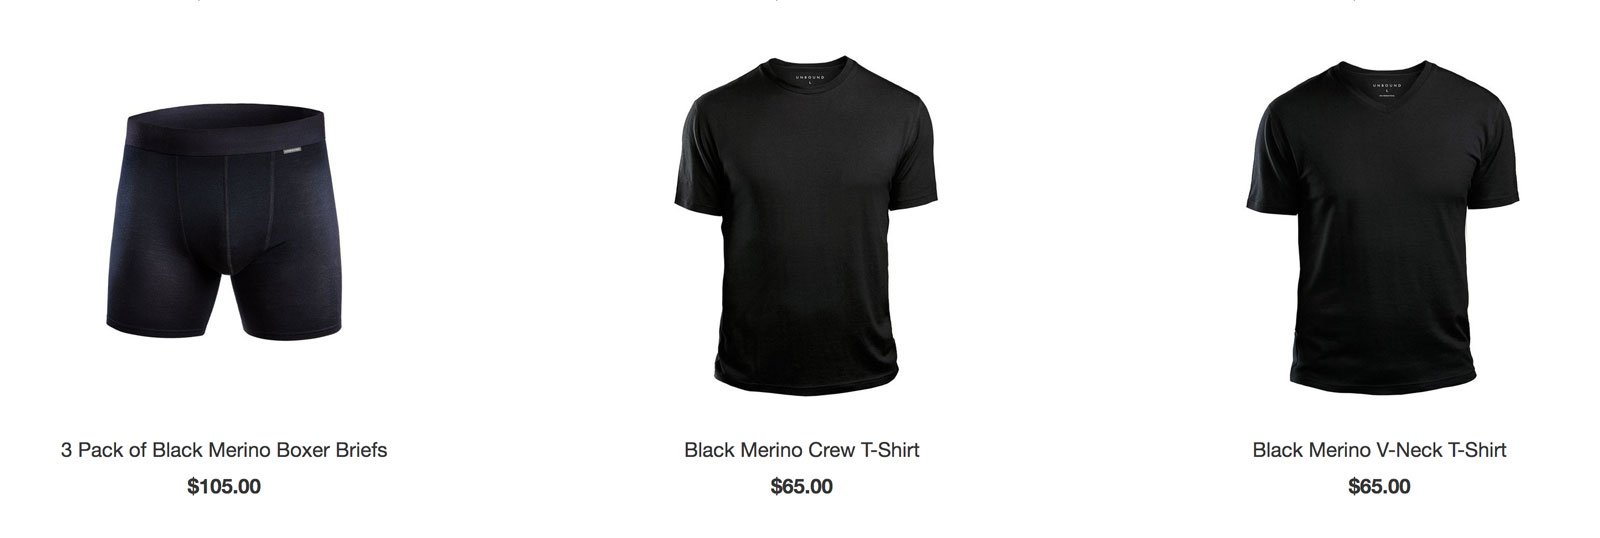
例: Unbound Merinoは、30万ドルを調達するクラウドファンディングキャンペーンを成功させ、衣服のパフォーマンスに基づいてブランドを構築しています。通気性と防臭性に優れた100%超ソフトメリノウールで作られたカジュアルウェアで、このラインの旅行を可能にします。洗わずに何度も着られる服。
衣料品ラインのビジネスプランの作成
基本のいくつかが邪魔になったので、次のステップはあなたがあなたの決定とあなたの衣料品会社の方向性を計画するための基本的な(しかし重要な)ビジネスプランを開発することです。
広告
eコマースビジネスプランをまとめるときに考慮したい主な要素のいくつかは次のとおりです。
- あなたのビジネスモデル
- 顧客のペルソナ
- 競合他社の長所と短所
- コストとマージン
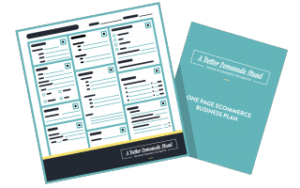 ボーナス:私たちはあなたがあなたの衣料品ラインのためにあなたのビジネスプランと戦略を構築するのを助けるために私たちの排他的なワンページeコマースビジネスプランをお勧めします。 フルページのワークシートと40ページの付属の電子ブックを含む、ワンページeコマースビジネスプランは、ビジネスの基盤の12の主要な領域をガイドするように策定されているため、重要な手順を見逃したり、重要な数字を見落としたりすることはありません。
衣料品ラインのブランドを作る
次のステップは、新しい衣料品会社のブランドを開発することです。
新しい衣料品会社のブランドを作ることが最も重要です。 非常に多くの衣料品会社やブランドが存在するため、差別化を図る必要があります。 あなたのブランドはその大きな部分を占めるでしょう。
最終的に、すべてのビジネスにはブランドがあり、すべての新しいビジネスにはブランドがあります。 ブランドを事前に作成することで、メッセージやストーリーをより適切に定義して伝達する機会が得られます。
カスタムのカットソーの衣類ラインを作成することを計画している場合は、ブランドの作成を支援する専用のブランディングエージェンシーを雇うことを検討することをお勧めします。 投資と予算がはるかに少ないオンデマンド印刷または自社ブランドのブランドを計画している場合は、独自のブランドを開発することは価値があり、低コストのオプションになる可能性があります。
この段階で、以下を特定する必要があります。
- あなたの市場は誰ですか
- どのブランドがこの市場に最もよく話しますか
以下では、衣料品会社のブランドを開発するためのいくつかの重要な要素を簡単に紹介しますが、すべてのブランド要素の完全な内訳、およびすべてのブランド要素を定義するためのガイドとワークシートについては、ブランドガイドAをご覧ください。より良いブランド。
あなたの市場を定義する
市場を定義することは、どのブランドにとっても重要ですが、特に衣料品やアパレル市場のブランドにとっては、非常に飽和しているため重要です。 大勢の人々を幅広くターゲットにすることで、最初から失敗に備えることができます。 あなたがしたいのは、ニッチダウンしてセグメントを作成することです。
この段階で自問する重要な質問は次のとおりです。
- どんな種類の衣料品やアパレル製品を作りたいですか?
- 誰が私の製品を購入するのですか?
- 私の製品やブランドはこれらの人々にどのような具体的な価値をもたらしますか?
- 私の製品のユニークな点は何ですか?
- 私の競争相手は誰ですか?
ブランドの柱を作成する
ブランドの柱は、ブランドの内容を具体化するいくつかのキーワードまたは属性(通常は3〜4)であり、ブランドのペルソナを開発するための出発点として機能します。 後で、これらの単語は、ブランドのほとんどの活動に対するチェックポイントとして使用されます。 たとえば、Webサイト、広告、または顧客との会話を作成するときは、ブランドの柱と照らし合わせて確認する必要があります。 自問してみてください:私のデザイン/ウェブサイト/広告/会話は私のブランドの柱の言葉の背後にある本質を表していますか?
ブランドの柱は、すべての活動を通じてブランドの一貫性を保つためのシンプルなツールとして機能し、ブランドの基盤として機能します。
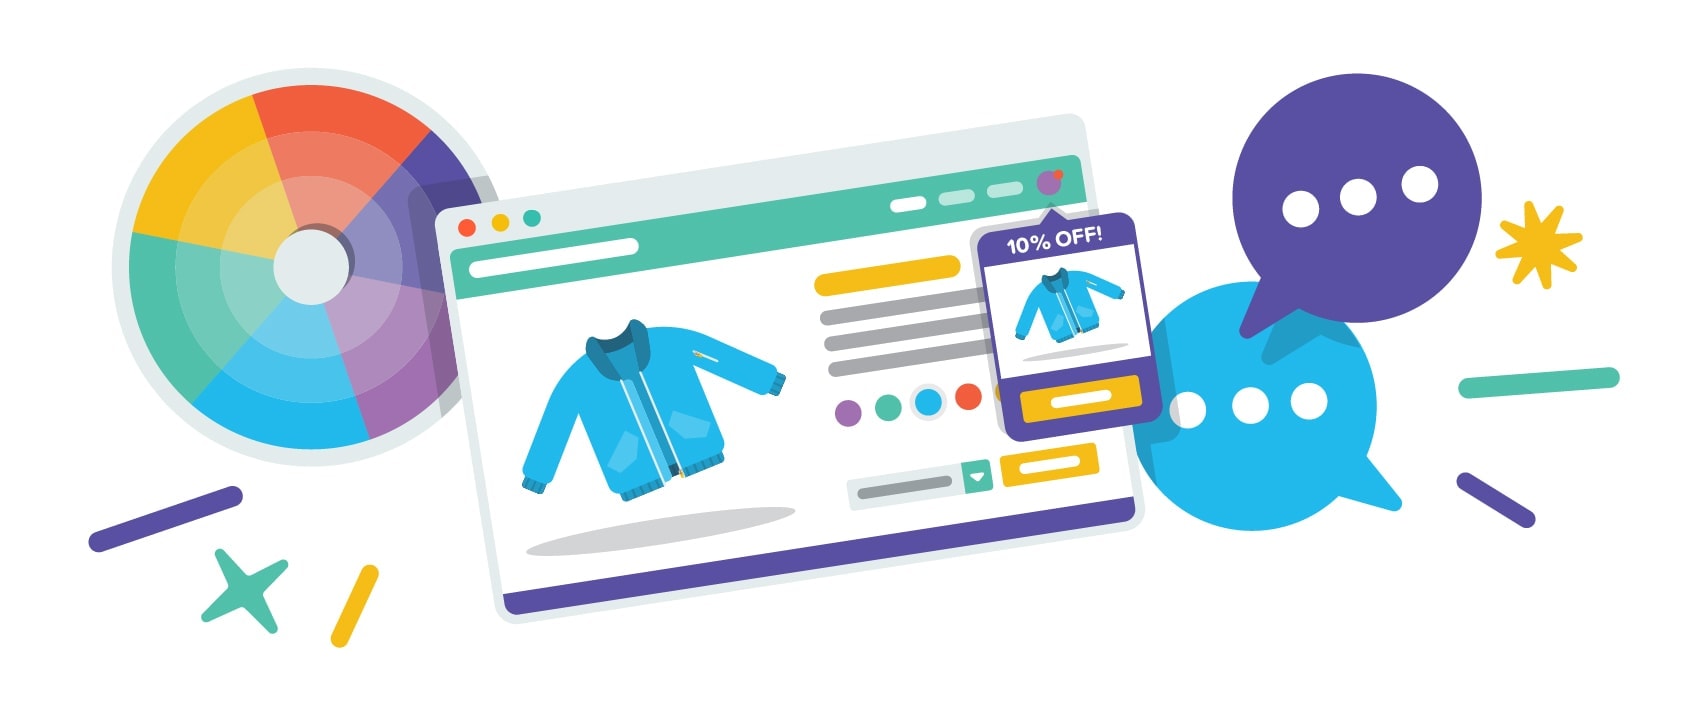
ブランドビジュアルを開発する
ブランドビジュアルは、多くの人が特定のブランドについて考えるときにすぐに考える一般的なブランド要素です。 これには、会社のロゴ、ブランドの色、フォント、および全体的なデザインと写真の美学が含まれます。
- ムードボードを作成する:ムードボードは、目的の視覚スタイルをまとめるのに最適な方法です。 基本的に、ムードボードは、画像、写真、デザイン、色、およびWeb全体から見つけたマルチメディアのその他のスニペットのコレクションであり、ブランドのインスピレーションとして機能します。 これらの要素を収集するのに役立つ多くのツールがオンラインで利用できますが、最も簡単な方法はPinterestまたはInstagramを使用することです。
- カラーパレットの選択:ブランディングプロセスの次のステップは、使用するカラーパレットを絞り込むことです。 事前にカラーパレットを選択すると、すべてのチャネルでブランドの一貫性を保つのに役立ちます。 ムードボードで使用されている主な色は、すぐに目に留まる可能性が高いため、特に注意を払うことから始めます。 そこから、Adobe Colorなどのツールを使用して、他のコミュニティに触発され投票されたカラーパレットを確認して、いくつかの追加のアイデアを取得することもお勧めします。 最後に、アドビはカラーパレットの選択と改良を支援するツールも提供しています。こちらをご覧ください。
- ロゴを作成する:ビジネスのロゴを作成する場合、ブランドを適切に表すだけでなく、ターゲットの人口統計にも対応できるロゴが必要になります。 尊敬されるロゴデザイナーと協力してブランドに最適なロゴを作成することを常にお勧めしますが、予算が少ない人は、Lookaのようなツールを使用してほとんど無料で始めることができます。
 ボーナス: eコマースブランディングガイドをチェックして、ブランドペルソナだけでなく、ムードボード、カラーパレット、ロゴ、写真スタイルなどのすべてのブランドビジュアルを含むブランドのすべての重要なコンポーネントを開発するのに役立ててください。 このガイドには、衣料品ラインに最適なブランドを作成するのに役立つPDF電子ブックとワークシートが含まれています。
衣料品ラインの製品開発プロセス
ファッションビジネスにまったく慣れていない人にとって、これはカットソーの衣料品ラインを開始して実行するプロセスにおいて非常に重要なステップであることを知っておくことが重要です。 この時点で、彼らが何をしているのか、そしてそれを適切に行う方法を知っている専門家と提携することを検討することを強くお勧めします。
パターンメーカー、テックパッククリエーター、デザインパートナー、マテリアルパートナー、制作パートナーなどの専門家は、それぞれの分野で高い経験を積んでおり、可能な限り最も効率的な方法で衣料品ラインを実現するのが彼らの仕事です。 専門家の助けがなければ、パターン作成やテックパックのようなものは、あなただけでなく、あなたが一緒に仕事をする予定の将来のメーカーにとっても悪夢になる可能性があります。
ただし、これは、事前にメーカーを調査することで利益が得られる場所です。 専門的な製品開発サービスを提供しているメーカーもあれば、製品開発を自分で行った場合にのみ製造するメーカーもあります。また、これらのサービスを提供していないが、協力したいパートナーがいるメーカーもあります。 この情報はすべて、製造元のWebサイトに記載されているか、直接連絡することによって概説されます。
衣料品ラインの製品開発に関しては、開発している衣料品の種類に関係なく、一般的にいくつかの一般的な用語に従う共通の道があります。 First, we will look at what the general process of clothing product development looks like, then we will discuss the process in more detail.
- Designs: This generally refers to the initial design concept and is usually represented as sketches either on paper or digitally. While your patterns might start out as concept sketches, eventually you'll likely turn them into digital sketches using a program like Illustrator.
- Tech Pack: A tech pack is essentially a blueprint for your apparel product, providing a manufacturer with all the details and technical specifications for production. This includes the designs, measurements, materials, and any accessories (zipper, buttons, etc.).
- Pattern Making & Grading: Pattern making is the process of turning your technical drawings into patterns that can be used for production. Grading is the process of taking a single pattern and grading the pattern up or down to create the additional patterns for all the other sizes in your apparel line.
- Sourcing: Sourcing involves finding, communicating, vetting, and working with multiple manufacturers to determine which one is best suited for the full production of your particular products.
- Samples: This involves manufacturers producing a one-off or small batch of samples to provide you with a proof of concept, as well as for you to identify potential issues or improvements prior to a full production run.
- Production: A full product run is the mass production of your apparel products. Depending on the products and the manufacturer, this can be hundreds of units, thousands of units, or even hundreds of thousands of units.
Below, we will go into greater detail about each of these steps in the process and provide you with more content and resources to get you started. However, it's important to note that there are other resources available that will guide you through the full process, helping you at each step of the way.
Some of the most popular ones are:
- Maker's Row
- Sqetch
- FactoryFinder
- Sewport
- CALA
Step 1: Design Your Clothing Line Concepts
Your clothing line will begin as sketches—most likely simple sketches in a notebook. This is usually the best route to get the ideas out of your head. As you begin sketching your clothing pieces, also think about adding any specific notes or unique ideas you have, as well as any special features or functionality. These notes will likely be part of tech packs later.
The initial goal is just to start developing your ideas and bring them to life.
Furthermore, the benefit of sketching out your ideas is that they can be shared. This is important because unless you're a professional clothing designer, you're going to likely need to enlist the help of a fashion designer or illustrator to help you pull together and refine your sketches into something more realistic and thought out.
Step 2: Create Patterns & Develop Tech Packs
You will need to enlist the help of a qualified pattern maker to take your idea and turn it into an actual pattern that can then be turned into an actual piece of clothing. A pattern can then be used to help create a tech pack.
A tech pack is essentially a blueprint for each garment. Your tech pack tells your manufacturer all the information required to transform your design into a final product. A proper and complete tech pack will reduce errors in production, save you money, prevent miscommunication, and ultimately, bring your product to life exactly how you envisioned it.
Your tech pack should include all possible details about your product, including (but not limited to) the:
- デザイン
- 生地
- 測定値
- トリム
- Stitching
- Artwork
- Label & Tag Information
- Packaging Instructions
Here's an example of a tech pack for a better understanding:
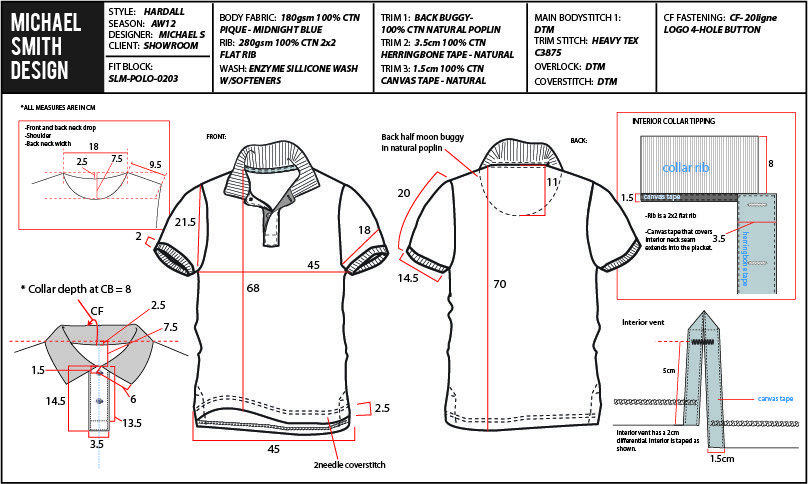
(Source: Michael Smith Design)
Here are some pattern makers and technical designers who have been vetted and provided by Maker's Row, to get you started:
- The Pattern Makers
- JLD Studios
- Nicole Melendez
- Clothier Design Source
Additional places to hire freelancers to help produce your tech packs:
- 1時間あたりの人数–Techパック
- アップワーク– TechPackフリーランサー
Step 3: Research Clothing Manufacturers
The next step in this process is to research potential clothing manufacturers.
Find out things like their location, capabilities, heritage, reputation, and what other brands they've worked with to get an idea of what they can offer you. It's important at this stage to really be thorough as small things such as location can have a massive impact on communication, turnaround time, and shipping when it actually comes to working with a manufacturer.
Not every manufacturer provides the same services so it's important to know the pros and cons of as many manufacturers as possible so you can find the services you're looking for without compromising on your brand values.
- Maker's Row : Maker's Row has nearly 10,000 factories to explore, including over 3,000 in apparel, all based in the USA.
- Sourcify: Sourcify has relationships with hundreds of Chinese manufacturers and will work with you to find and vet the right one for you.
- Sqetch: Sqetch is similar to Maker's Row but focuses on connecting you with European manufacturers.
- FactoryFinder : FactoryFinder can help with material selection, samples, and production by connecting you with the right clothing manufacturer.
Step 4: Determine Your Budget
Budgeting out product development and production costs is something you need to determine prior to selecting a factory to work with. You need to understand your budget availability and limits so you can map out all aspects of production, such as what fabric you'll be able to use and whether producing overseas or in your home country is your best option.
Costs to consider in your budget include:
広告
- The price of professional product development services such as pattern making, tech packs, design development, etc.
- The cost of making samples (bearing in mind that more than one sample is usually made)
- The cost of materials such as fabric, buttons, zippers, hardware, and any other pieces used in the construction of your garments
- The cost of transportation between you and the factory for meetings/visiting the factory
- The cost of labor (determine the difference in labor cost between your home country and overseas labor cost requirements)
- The cost of shipping between you and the factory and the cost of shipping the necessary materials to the factory
- The cost of production and actually creating the clothing items themselves
After considering these factors, you'll be able to communicate your budget to your future manufacturer and find one that fits your requirements.
Pricing out all of these costs is also helpful in determining whether or not producing in an overseas factory is more realistic for your business—bearing in mind that while the cost of labor may be cheaper, the cost of shipping between you and the factory will increase; as will turn around time. Nonetheless, understanding the cost of product development and production helps you and your future manufacturer make the best choices for your business.
Step 5: Select Clothing Manufacturers
Once you've researched a bunch of different manufacturers and have an idea of what's out there, make a shortlist of manufacturers who seem like they'll be a good fit for your clothing brand.
Maybe there are some manufacturers who specialize in the kinds of clothing products you want to produce, maybe some operate out of your local area, maybe some have raving reviews from past or current clients, or maybe some fit into your budget range better than others. Whatever is important to you in a manufacturer, narrow down your shortlist to ones who seem like they check off some of your most important boxes.
Step 6: Contact Clothing Manufacturers
By now you should have been able to narrow down a long list of potential clothing manufacturers into a shorter list of manufacturers who meet your needs when it comes down to what you require in terms of professional services, which manufacturers are actually able to create your future garments, manufactures in an accessible location, or ones who meet your budget requirements.
Now is the time to contact your potential manufacturers, but that may be easier said than done. Response rates for manufacturers differ, but producing a well-thought-out initial email can increase your chances of actually receiving a response back from potential manufactures.
Here are some general DOs and DON'Ts when it comes to contacting a manufacturer:
- DON'T come across as a “tire-kicker.” If your interest in manufacturing doesn't seem to be serious or genuine you may not get a response. Manufacturers don't want to waste their own time working with people who aren't serious when they could be working with people who actually want to build and grow their business.
- DO be polite. You and your manufacturer will be working together in this process—they don't solely work for you—so treat them with respect and be mindful of their requirements, services, and processes.
- DO be clear. In the best interest of yourself and your future manufacturer, it's best practice to be clear about what you're looking for, the services you require, your timeline, etc. Be upfront about what you need and don't leave any room for ambiguities in the event that it will create more confusion down the road.
- DO follow up. It's okay to follow up after your initial email to ensure the factory received and read the message, so be prepared to send up to three follow-up emails spaced apart by a week or so to prompt a response from a factory. This will make you seem eager and serious to the factory which, if you're new to this process, is what you want.
- DON'T give them too much information. Introduce your company, the products that you're looking to create with them, what services you're looking for, and ask what further information they need from you. Give them enough information to know your intentions and that you're serious about the inquiry, but don't overload them with your brand goals, material choices, and timelines yet.
Click here to learn more about how to construct the perfect initial contact email.
Step 7: Screen Potential Factories
If you're lucky, by this step you'll have received responses from some of the factories you've contacted and now it's time to narrow down your search.
Even if you only received a response from one factory, it is still important to make sure it's the right fit for you. At this step, you should communicate further with the factories and learn more about how they conduct business and the quality of their products. You should be looking to evaluate whether or not you will get along with them personally and professionally in order to gauge your potential for success as colleagues.
These are things to look out for:
- How they prefer to communicate with their clients (by email, phone, or personal visits)
- Ask for references from other clients (to get a first-hand evaluation of what they are like to work with)
- Ask for samples of products they've made (to judge if the quality of their products is at the level you're looking for)
- Understand how they charge for samples, services, and what constitutes extra charges
- Get a feel for their timeline and availability
Now is the time to learn more about the factory, see their workspace in action, and communicate further with the manufacturer. This stage will give you an initial glimpse of what it will be like to work with this factory in the long run so it's important to identify your respective strengths and weaknesses now so you can reduce the possibility of headaches and potential miscommunications in the future.
This is also now the right time to let the manufacturer in on your brand goals, where you see your brand starting off, what you see your brand scaling to, and let them know how you want them involved in that process. All the time you spent defining your brand in the first step should be communicated to the manufacturer to see if they understand where your brand is going and if they can get excited for your brand, too.
Step 8: Get Samples Made
Now that you can see yourself manufacturing your clothing line with a factory or two, it's time to get some samples made so you can truly experience what your potential product will be like.
No matter how well-designed your patterns and tech packs have been, there are always opportunities for adjustments and corrections so it's strongly encouraged that the sampling step is never skipped. It can be easy to want to jump straight into production—especially when time and money are on the line—but in the end, a whole line of garments that don't fit properly will cost you more than just having a few samples done right from the start.
At this stage, it is appropriate to have more than one factory make samples of your garments. Feel free to shop around so you're absolutely sure the factory you pick will be producing the garments you want at the quality level you want!
Step 9: Start Full-Scale Production
The final step of the manufacturing process is really just the first step of building your own clothing brand.
This is the time to work with your manufacturer and get your garments produced! At this stage, it's important to stay five steps ahead of everything:
- Make sure deadlines are adhered to
- Be available to answer any questions your manufacturer may have for you
- Be diligent with quality control
Once production for one season of garments starts, the planning for the next season begins—this is only just the beginning! But now that you have the right manufacturer for your business, let their skills and services help you build your clothing brand to where you want it to be.
Step 10: Brand Your Clothing & Packaging
The branding of your clothing line has everything to do with how you'll be perceived by your customers. Branding tells the story of your company and your packaging is one of the few parts of your brand—besides your clothing items themselves—that your customers will actually be able to touch, feel, and see. It engages your customers, it can make them feel valued, and it can even increase the perceived level of quality your customers associate with your brand and your clothing items.
This is why it's important to seriously consider how you package and present your clothing items, no matter what items you're selling.
There are plenty of different ways to enhance your brand's packaging and presentation and to make it unique and true to your brand.
Step 11: Branded Packaging Options
There are two different types of options when it comes to branding your packaging: The actual elements that you use for the packaging itself, and the additional extras you can include with the package to elevate the unboxing experience.
The package elements are the more functional items that are required to actually ship your clothing pieces, whereas the added extras enhance the experience and help to make your customers feel valued.
Elements of a Branded Package
These are the functional parts of a shipping package that you'll need in order to ship your items from you to your customers. You won't need every single one of these items, but they're all options that you can use depending on what you want your packaging to achieve.
配送ボックス
Depending on the clothing items you sell, you may have to ship them to your customers in a shipping box. Shipping boxes are sturdy and are a good option for shipping heavy or bulky items (such as coats) or delicate items that need to be protected throughout the shipping process (such as beaded clothing pieces, or items with 3D applique).
Shipping boxes, however, can add weight and size to your package making it more expensive to ship, but if it will protect your clothing items while they're on their way to your customers, it's a small price to pay upfront that should decrease the potential of damaged items and returned products in the future.
Keep in mind that your shipping boxes don't have to be boring cardboard boxes. There are plenty of services available to entrepreneurs and small businesses that can create custom boxes for your products at competitive prices, whether you're looking for something sleek, simple, and plain or something colorful, bold, patterned, and vibrant.
You can also use these services to get your brand name printed onto the box itself for a more professional unboxing experience.
Where to Source Shipping Boxes:
- パッケージを洗練する
- Pakible
- Packwire
- Lumi
- Wolfpack Packaging Inc.
- Arka
- ボックスオタク
- Custom Boxes & Packaging
- Custom Boxes Now
- eSupplyStore
- Fast Pack: Boxes
- Instabox (Canada)
- PakFactory
- Papermart
- ValueMailers
Poly Mailers
Another great alternative for shipping clothing items is shipping bags—otherwise referred to in the industry as poly mailers.
These are an ideal option because unlike shipping boxes, they don't add much weight or bulk to your package, so you won't be adding extra shipping costs to your package. They are less sturdy than a box though, so they're a good option if you're shipping clothing pieces that aren't easily damaged and can be bent and folded throughout the shipping process. They do come in plenty of sizes too, so whether you're shipping one item or a few at a time, you should be able to source a selection of different sized poly mailers to meet your customer's needs. Plenty of brands ship clothing items to their customers in poly mailers, so it is an appropriate method for the industry.
There are plenty of places online where you can get custom poly mailers made for your business so you're able to add your logo, brand colors, or fun patterns to make it more exciting for your customers.
Where to Source Poly Mailers:
- ステッカーミュール
- Pakible
- Lumi
- Uline: Poly Mailers
- eSupplyStore: Poly Mailers
Bubble Mailers
If your clothing items need a bit more protection but you don't want to completely upgrade from a poly mailer to a full-on shipping box, you have another option: Bubble mailers. As the name would suggest, they're like poly mailers but they have a layer of bubble wrap included on the inside of the mailer which helps protect whatever's inside.
They don't offer the same sturdiness that shipping boxes do, but they help to cushion the contents of the mailer throughout the process and are less bulky than shipping boxes.
Where to Source Bubble Mailers:
- Pakible
- Uline: Bubble Mailers
- eSupplyStore: Bubble Mailers
- Fast Pack: Bubble Mailers
Tissue Paper
If using packing peanuts and crinkle paper isn't your style, or if your products don't need additional protection, or even if you're using a poly mailer, tissue paper may be an ideal option to enhance the unboxing experience for your customers.
Tissue paper makes the unboxing experience feel more like a gift, which can make your package seem thoughtful and your customers feel valued.
Tissue paper is also an easy way to add to your packaging without adding any extra bulk or weight, and you can have it printed with your logo or choose colored or patterned paper to add some extra flair to the package. Use an everchanging assortment of patterns, colors, and styles to keep repeat customers interested.
Where to Source Tissue Paper:
- Uline: Retail Cushioning
- Uline: Industrial Tissue Paper
- JAM Paper: Tissue Paper
- eSupplyStore: Tissue Paper
- Fast Pack: Tissue Paper
- Papermart: Tissue Paper
Packing Tape
Depending on your brand's style, using packing tape that's colorful, patterned, or printed with your logo may be an interesting way to decorate your shipping box or package. Not only is it decorative, but packing tape is functional and adds another layer of security to keep box openings sealed throughout the shipping process.
Where to Source Packing Tape:
- テープジャングル
- Uline: Tape
- JAM Paper: Packaging Tape
- eSupplyStore: Packing Tape
Stickers
If you don't need something as heavy-duty as packing tape to seal your boxes or mailers shut, stickers can be an alternative option that can also add to the branded packaging experience. Get your logo printed on them, your brand's tagline, mission statement, fun facts about your brand, or any other piece of info you want to share with your customers for an added layer of personalization. Alternatively, use stickers to brand plain shipping boxes or mailers, or include them inside your package for customers to use or share as they please.
Stickers are super versatile, so think about how you can use stickers to enhance your unboxing experience!
Where to Source Stickers:
- ステッカージャイアント
- ステッカーミュール
- ステッカーあなた
- ムー
Include Extra Branded Material
These aren't necessary to include, but if you're interested in elevating your unboxing experience, making it memorable for your customers, and making them feel valued, then including one or two of the following options can help you to start out in a positive way.
Promotions, Discounts & Deals
Including packing inserts that notify your customer of an upcoming promotion, or share a discount code or deal they can use for themselves or share with a friend is a pleasant surprise your customers will likely appreciate when opening their package. It shows thought and care from your end, and it's also likely to encourage them to purchase from you again, which is advantageous for you.
Business Cards
If you want your customers to remember you, refer you to a friend, or send you feedback about their experience with your business or your products, consider including your business card so they can hold onto it or pass it on to others. It's a small token, but it shows that you value their input and experience.
広告
Custom Notes/Personalized Messages
This is the ultimate way to make your customers feel valued and shows an immense amount of consideration and thoughtfulness.
Custom, handwritten notes with personalized messages are a great way to connect with your customers and make them feel appreciated. While it likely won't be possible to include a handwritten note for all of your customers, consider including them for your very first customers, your most frequent purchasers, for customers who leave glowing reviews on your website, or ones who have taken the time to send you valuable feedback. Your customers will likely feel very touched by your effort and will likely also share their experience with their peers or on their social platforms, which is positive exposure for your brand.
Gifts or Samples
Who doesn't love to receive a gift?! Using gifts as a way to thank your customers for their purchase is a surefire way to capture their attention and make them feel valued. It doesn't have to be anything big (some companies include candy bars to treat their customers) as you just want it to be an addition to the package, but something small can be just as appreciated by your customers.
If you don't want to gift an item from another company, consider including a sample of one of your own products. Again, it doesn't have to be anything big, but something that complements their purchase could be appreciated.
Step 12: Brand Your Clothing Items
Beyond the packaging of your clothing items, you can also add additional touches of branding to your clothing items themselves to ensure they're as seemingly high-quality as possible and are presented in the most thought out way possible. The best way to do this is by adding custom labels and tags.
Clothing Labels & Tags
Clothing labels are a piece of fabric that's attached to the inside of clothing items that typically include the brand's logo. While it's required in most countries for clothing items to have care and size labels, brand labels aren't necessary but they add a thoughtful touch to the clothing piece. They also often help customers to remember where the clothing item is from once they've integrated it into their wardrobe, and they can add to the overall feel of the clothing piece.
Some labels can be scratchy and uncomfortable for the wearer, which can make the garment seem cheap, while others can be well sewn into the garment and made of a cloth material that's much more high quality. Think about how you want your brand to be perceived and choose a type of label that fits accordingly.
Clothing Label Material Options:
- Damask Woven Labels
- Satin Woven Labels
- Taffeta Woven Labels
- Woven Patches
- Cotten Twill Labels
- Canvas Printed Labels
- Nylon Printed Labels
- Satin Printed Labels
- Silicon Clothing Labels
- Leather Labels
- And much more
It's also important to consider which label types exist and where they can be located on the garment.
If you want to increase your brand's awareness, you may want to consider placing brand labels on the outside of your clothing items such as on hems or cuffs, but if you want to maintain relatively inconspicuous brand placement, you may just want to include the labels on the inside of your garments.
The types of clothing labels you can include on your garments include:

- Manhattan Fold Labels: These are quite similar to Center Fold Labels in their appearance, except that the top of the label is folded over to give a more finished and high-quality look. This type of label is typically sewn into the collar of a garment.
- The End Fold Labels: These have more of a finished and high-quality look to them because the edges are tucked in at the sides. These types of labels are typically printed with brand logos and they're quite small.
- Straight Cut Labels: These have no folds at all, which means they're typically sewn on flat—straight onto the garment. They're commonly also placed on the outside of a garment as a decorative patch, usually with a brand logo printed on them.
- Center Fold Labels: These are the most common type of apparel labels. They're usually made of woven materials and commonly attached to the inside of garment collars.
- The Mitre Fold Label: These are similar to the End Fold Label as they're quite small, shaped like a thin rectangle, and are typically printed just with a brand logo. This type of label, however, hangs down a bit farther than the End Fold Label instead of going straight across.
- Loop Fold Labels: These labels are commonly sewn on the inside of garments, typically close to the hemline in shirts or the waistband in some trousers. This type of label is usually reserved for care and size information, not brand logos.
Clothing Tags
Where to Source Clothing Labels and Tags:
- Custom Labels 4 U
- Uline: Hanging Tags
Step 13: Create Your Online Clothing Store
If you're serious about building a brand or learning more about digital marketing, search engine optimization, and conversion rate strategies, you need to build your clothing store on a customizable ecommerce platform. We can't recommend Shopify enough. Not only is Shopify one of the easiest platforms to get started with, but its app store is the most robust and has a host of print-on-demand clothing printers and dropshippers if you choose to go that route (read our Shopify Review to learn more about why we recommend it so highly).
Shopify enables you to build your own online clothing store wherever you are, with the ability to sell to customers all over the world. Setting up your store with Shopify is easy, and you don't have to worry about your website's security so you can be sure that you and your customers' sensitive information is protected when shopping on your site.
Overall, Shopify is the most recommended ecommerce platform out there, and it's your best option when it comes to starting your own clothing store online.
When setting up your clothing store on Shopify you'll want to take your brand into consideration and make use of all your brand visuals. Implement your color palette, use your logo, take effective product and lifestyle photos of your garments, and create a glowing “About Page” so your customers can learn more about who your brand is and what you stand for.
These are the types of things that will make your clothing store stand out to your customers, so they'll be more trusting when it comes time for them to make a purchase. You want your website to install confidence in your customers, so take that into consideration when setting up your online clothing store.
 Bonus: Still not sure about which ecommerce platform to choose? Check out our exclusive Ecommerce Platform Recommendation Tool. This tool will ask you a series of questions to help you narrow down and choose the best ecommerce platform for your specific needs.
Your Store's Theme
Another aspect of your online clothing/apparel store to take into serious consideration is your store's theme. Themes are the general outward look and feel of your website, and depending on the products you sell, some themes may display your products better than others.
Since you'll be starting a clothing/apparel store, you'll want a theme that shows off your garments to their full potential so choose a theme that enables you to post lots of images.
Shopify offers plenty of free and premium themes to choose from (see them all in action on the Shopify Theme Store) but if you're looking for more theme options, Out Of The Sandbox creates premium Shopify themes and they are one of the best, if not the best, place to get them.
Step 14: Create a Shipping Strategy for Your Clothing Company
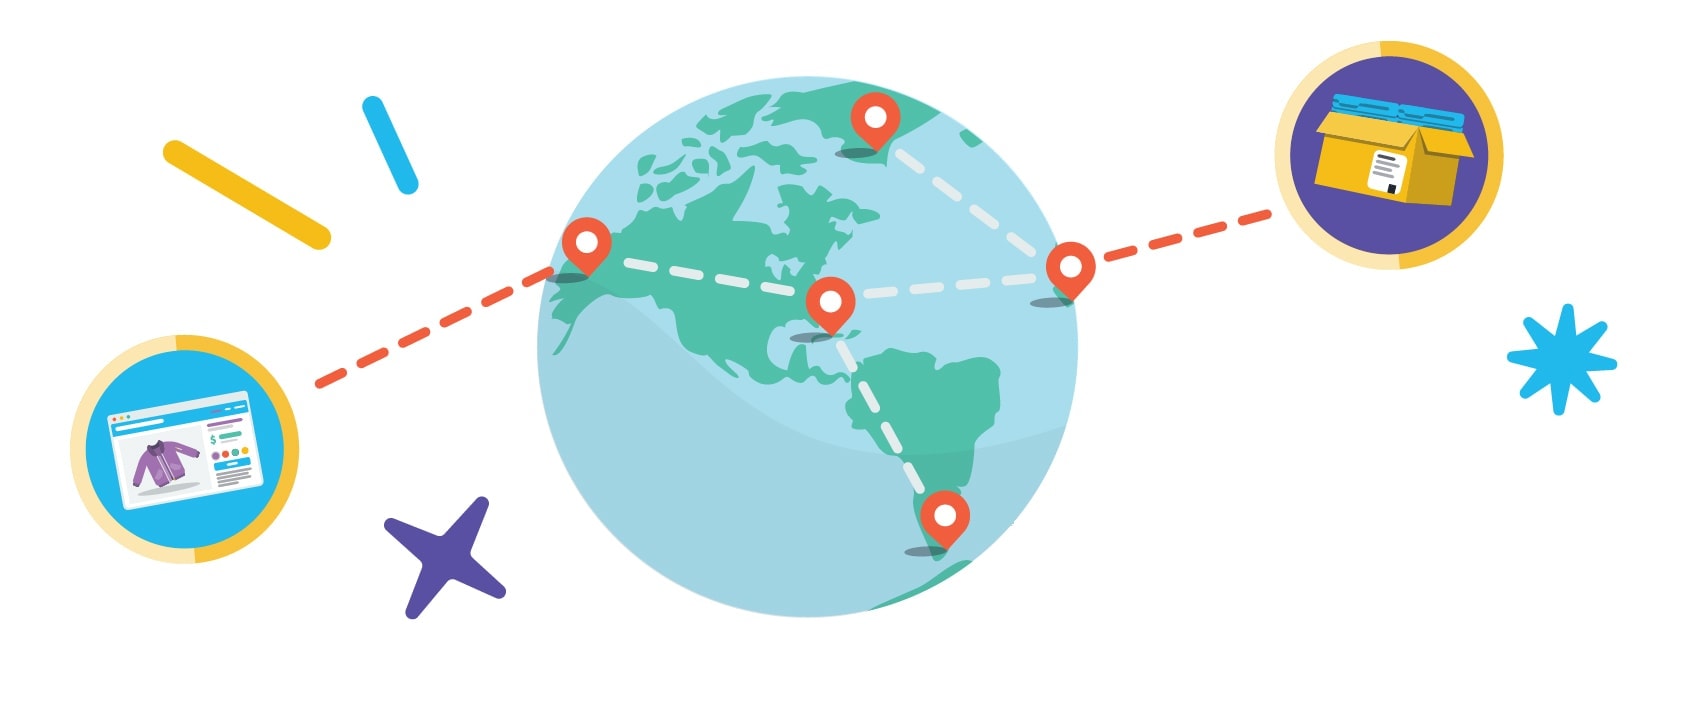
Figuring out how to ship your products to your customers can be a confusing and daunting process if you've never done it before as there's a lot to take into consideration.
What should you charge for shipping? How much does shipping cost? What about returns? What shipping carrier should you use? Should you start off with a shipping and fulfillment warehouse? Will your customers get charged duty and customs fees? What about shipping labels? What about tracking and insuring your packages?
All these questions, and more, are valid questions to be asking yourself—and we'll dive into them now:
How to Charge Your Customer for Shipping
これらはあなたのオプションです:
- Charge Your Customers the Exact Shipping Fee: This means that your customers will be made aware of the shipping costs while they're checking out and they'll have to pay the exact amount it costs to get their order shipped to them.
- Charge Your Customers a Flat Shipping Fee: This means that you can instate a flat shipping fee such as $6 for domestic orders and $12 for international orders, no matter how many items each customer orders and no matter where they're located domestically or internationally. Some orders will cost you more to ship and some will cost you less, but if you budget it correctly it should even out.
- Offer Your Customers Free Shipping Over a Certain Threshold: For example, you could offer all customers free shipping if they spend over $100. This encourages customers to purchase enough products to meet that amount so they don't have to pay for shipping. By making sure they spend a certain monetary amount, it makes it more worthwhile for you to ship their package for “free” because the cost of shipping is absorbed into your profit margin on the order. Check out our article on How to Offer Free Shipping & Calculating Your Free Shipping Threshold for more information.
- Offer Your Customers Free Shipping Based on their Location: In this case, you could offer free shipping for all domestic destinations and any international locations will have to pay a calculated rate or a flat fee. This encourages your local customers to purchase from you without having to pay any shipping fees and depending on your domestic shipping rates you should be able to absorb the cost in your profit margin, assuming you price your items accordingly. For international customers, however, you'll be able to fund the shipping cost fully or in part by their calculated or flat rate fee.
- Offer Your Customers Free Shipping on Any Order: Some businesses choose to offer free shipping to all customers because it's easier for them to calculate, more attractive to customers, and results in fewer cart abandonments. The cost of shipping will be absorbed by your profit margin, so take that into consideration when pricing your items.
Shipping is never free. No matter what it says on any website, “free shipping” is not free for the business—the cost is just being absorbed in some other way. It's also no secret that shipping costs are one of the most likely reasons for shopping cart abandonments, so in order to combat that, many ecommerce stores offer free shipping to decrease shipping cart abandonments.
Take both of these things into consideration when pricing your products so you can gauge whether you'll need to charge higher prices for your items so you can afford to offer free shipping, or at least a subsidized shipping rate.
Calculating Shipping Costs
The cost of shipping depends on your carrier, where you're shipping to, and where you're shipping from. There are also other variables involved like the weight and size of the package as well, so your best bet is to use a shipping calculator to determine how much it would cost you to ship your packages. Many carriers have shipping calculators available on their websites so you can price out the cost of your packages on there.
- USPS Postage Price Calculator
- UPS Shipping Calculator
- DHL Shipping Calculator
- FedEx Shipping Calculator
- Canada Post Shipping Calculator
- UK Royal Mail Shipping Calculator
- Australia Post Shipping Calculator
How to Handle Returns
You basically have two options when it comes to handling returns for your customers: You can provide your customers with pre-paid postage in case they need to return an item, or you don't provide your customers with pre-paid postage and they will have to assume the responsibility to pay for postage in the event that they need to return an item to you.
Providing pre-paid postage for customers offers them a seamless shopping experience with your company, however not offering free returns can actually affect customer's decision to purchase from you at all.
Check out this blogpost from Shopify that discusses shipping returns in more detail to learn more about it and how it affects your business.
Which Shipping Carrier to Use
Most popular shipping carriers offer a business account program so businesses can get perks such as better order management, discounts on shipping, and/or free shipping supplies. Basically, it makes it a little bit easier and less expensive for you than just shipping packages without a business account.
Check out these popular shipping carrier's business accounts:
- USPS Customer Gateway
- UPSビジネスソリューション
- DHLビジネスアカウント
- フェデックスビジネスセンター
- Canada Post Business Account
- 英国ロイヤルメールオンラインビジネスアカウント
- オーストラリア郵政公社のクレジットアカウント
Using a Shipping & Fulfillment Warehouse
Shipping and fulfillment warehouses can be a tricky service to use for clothing stores as there are usually many different SKUs (stock-keeping units) such as different sizes and colors for each item of clothing. Although shipping and fulfillment warehouses may be convenient services to use since they handle the entire picking, packing, and shipping service for you, there can be some drawbacks, including:
- Inability to Use Your Own Branded Packaging: Some warehouses require that you use their own shipping packaging, so you won't be able to use any boxes, poly mailers, tissue paper, stickers, etc. that have your own branding on them. It can also be difficult to add other extras such as promotional inserts, custom notes, samples, etc.
- Cost: Shipping and fulfillment warehouses can take the shipping process off your hands but at what cost? It costs you to store your SKUs on your warehouse's shelf space so depending on how quickly your product ships out to customers and how much product you're selling, it may or may not be a worthwhile cost for you.
- Handling Returns: Since your business is just one of many at a shipping and fulfillment warehouse, returned items may be handled in an inefficient manner, depending on the warehouse. Make sure you look into each warehouse's return policy before you work with them.
However, there are also advantages to using shipping and fulfillment warehouses:
- Shipping Costs: Shipping and fulfillment warehouses generally have to pay less to ship packages, so you'll likely pay less too.
- Simplified Process: No need to wait in line at the post office or deal with couriers to get your packages shipped.
- Saves You Time: All the time that it takes you to pick, package, and send packages can be put to other uses such as managing customer inquires, advertising, or just growing your business in general.
Generally speaking, if you're just starting your online clothing store: Handle the shipping and fulfillment process yourself, initially.
This gives you the chance to learn the best practices for shipping your own products, you can put your own personal touch on each package and you can use your own branded packaging materials. If you're just sending out a few parcels a day, it won't take up too much of your time to send them through post offices or couriers.
If you anticipate having a large customer base to start off with and predict that you may not be able to keep up with packing and shipping orders yourself, have a look into shipping and fulfillment warehouses to see what your options are.
Shipping & Fulfillment Warehouses:
These are some shipping and fulfillment options to consider, however, we encourage you to do your own research and due diligence:
- 印刷可能な倉庫保管とフルフィルメント
- Shopifyフルフィルメントネットワーク
- Fulfillment by Amazon (FBA)
- Fulfillrite
- Fulfillment.com
- レッドスタッグフルフィルメント
- ThinkLogistics
- ShipFusion
- WSI Supply Chain Solutions
To learn more about why third-party logistics providers are advantageous for your business, check out our Ultimate Guide to Utilizing a 3PL Provider for Ecommerce Fulfillment article.
Duty & Customs Fees
It's important to be aware that you as a business are not in control of the duties and customs fees your international customers may be charged on their orders. Customs and duties fees are managed and imposed on your customers by their country itself, you don't have the power to prevent them or influence their cost.
You do, however, have the ability to warn your customers about potential customs and duties fees they may face so that they're not unpleasantly surprised when their order arrives.
On your shipping information page, include a section about customs and duties fees and let your customers know that they may be charged these fees by their county and that your business has no control over that.
For more information about customs and duties declaration, required forms, and policies, check out these pages:
- USPS Postal Exporter
- UPS Import/Export Regulations
- DHL Customs and Duties
- FedEx Guide to Customs Forms
- Canada Post Customs Requirements
- UK Royal Mail Customs and Duties
- Australia Post Customs Forms & Regulations
Shipping Tracking & Insurance
Many customers now expect to have their packages tracked and expect to receive email updates on the whereabouts of the packages. If you're interested in giving your customers a streamlined and professional shopping experience, look into what tracking options your shipping carrier has available. It almost always costs extra or will mean that you'll have to upgrade to a more expensive service, but it could be very worthwhile for both you and your customers.
Most shipping carriers offer some kind of insurance, but it may not cover the entire cost of your orders—depending on the price of your items. If you sell high-priced items or just want the peace of mind that you're insured for any lost parcels, it may be worth looking into a third-party shipping insurance provider such as Shipsurance or InsureShip.
It's important to be aware that the shipping process can be complex, and it can take a while to set up and get used to all the different steps, systems, and processes. It'll probably be a learning curve at the start, especially if you've never shipped a large number of orders before or if you're launching to an eager audience, so give yourself time to set up your shipping systems properly so it doesn't affect your business too much. Once you get a system going though you'll likely get the hang of it and be able to make small improvements or scale your processes as needed.
広告
結論
We hope this post has provided you with very clear insight into the steps, systems, and processes it takes to start a clothing line. It may seem overwhelming at first if this is all new to you, however, just focus on one step at a time and grow from there. No matter what kind of clothing line you want to create—whether it's just your own line of t-shirts or an entire collection of cut and sew garments—the information, tools, resources, and experiences provided in this guide should help you get where you want to go.
Before you launch your clothing brand, don't forget to run through our Launch Checklist to make sure you don't miss anything important, and once you've launched, use our 52 Week Marketing Plan to drive traffic to your store.
