
XML 파일에서 Drupal 8(또는 9)로 콘텐츠를 마이그레이션하는 방법
게시 됨: 2021-10-05다른 소스에서 Drupal CMS로 데이터를 가져오는 것이 마이그레이션의 전부입니다. 마이그레이션 소스는 데이터베이스, 다른 CMS, CSV, XML 파일 등 무엇이든 될 수 있습니다. Drupal은 항상 어디서나 데이터를 CMS로 마이그레이션할 수 있는 유연성을 제공합니다. 우리는 데이터베이스 소스에서 마이그레이션, CSV에서 다국어 콘텐츠 마이그레이션, SQL 소스에서 마이그레이션, 마이그레이션에 대한 완전한 방법 가이드 등과 같이 이전에 Drupal 마이그레이션에 대해 광범위하게 작성했습니다! XML 파일에서 Drupal 8 또는 Drupal 9로 데이터를 마이그레이션하는 방법에 대한 가이드를 찾고 있다면 여기에서 논의할 내용이 바로 여기에 있습니다!
Drupal Feeds 모듈을 사용하여 외부 피드를 Drupal 9 웹사이트로 가져오려는 경우 이 기사를 확인하십시오.
Drupal 8/9 마이그레이션 모듈
여기에서는 전체 Drupal 마이그레이션 모듈 세트를 사용할 것입니다.
- 마이그레이션
- 드루팔 마이그레이션
- 마이그레이션 플러스
- 도구 마이그레이션
이러한 모듈을 설치한 후 마이그레이션을 위한 스크립트를 작성할 사용자 정의 모듈을 생성해야 합니다. 따라서 먼저 사용자 지정 모듈을 만든 다음 모듈의 세부 정보를 포함할 info.yml을 만듭니다. 다음으로 모듈을 활성화합니다.
name: test migration type: module description: Migrating data from the csv files. core_version_requirement: ^8 || ^9 package: Migration dependencies: - drupal:migrate_source_csv - drupal:migrate_plus - drupal:migrate_tools config_devel: install: - migrate_plus.migration_group.test_migration - migrate_plus.migration.test_migration_sessions - migrate_plus.migration.test_migration_paper - migrate_plus.migration.test_migration_userinfo.yml 파일이 생성되면 이 마이그레이션을 위한 마이그레이션 그룹을 생성해야 합니다. test_migration> config > install 경로에 이 마이그레이션 그룹을 생성해야 합니다. 마이그레이션을 실행하는 동안 다음 세부 정보가 필요합니다.
id: test_migration label: test Migration description: Migrating xml data마이그레이션 그룹을 만든 후 info.yml 파일에 이 그룹을 설치합니다.
config_devel: install: - migrate_plus.migration_group.test_migration이제 콘텐츠 유형에 대한 마이그레이션 스크립트를 작성해야 합니다. 이 스크립트는 config > install 안에 있어야 하고 파일 이름은 migrate_plus.migration.test_migration_paper.yml이어야 합니다.
id: test_migration_paper label: 'Migrate Paper data from the xml file' migration_group: test_migration source: plugin: url # Full path to the file. data_fetcher_plugin: file data_parser_plugin: xml urls: private://xml/session.xml item_selector: /program/session/papers/paper fields: - name : title lable : 'Paper title' selector : papertitle - name : abstract lable : 'Paper abstract' selector : abstract - name : first_name label : 'Author first name' selector : authors/author/name/givenname - name : last_name label : 'Author last name' selector : authors/author/name/surname - name : paper_id label : 'Paper identifier' selector : paperid - name : session_id label : 'Session identifier' selector : sessionid - name : start_time label : 'Paper presentation start time' selector : starttime - name : end_time label : 'Paper presentation end time' selector : endtime - name : author_name label : 'Author name' selector : authors/author/name/fullname - name : session lable : 'Session name' selector : session ids: session_id : type : string process : # Adding the mapping between the fields and the csv columns. title : - plugin : skip_on_empty method : process source : title field_abstract/value : abstract field_abstract/format : plugin : default_value default_value : "full_html" field_presentation_timing/value : plugin : format_date from_format : 'Ymd\TH:i:s' to_format : 'Ymd\TH:i:s' source : start_time field_presentation_timing/end_value : plugin : format_date from_format : 'Ymd\TH:i:s' to_format : 'Ymd\TH:i:s' source : end_time field_paper_identifier : paper_id field_session_identifier : session_id field_author : - plugin : skip_on_empty method : process source : author_name - plugin : paper_user_migration_import_process no_stub : true field_session : - plugin : skip_on_empty method : process source : session - plugin : node_migration_import_process no_stub : true destination : plugin : 'entity:node' default_bundle : paper migration_dependencies : required : { } dependencies : { } 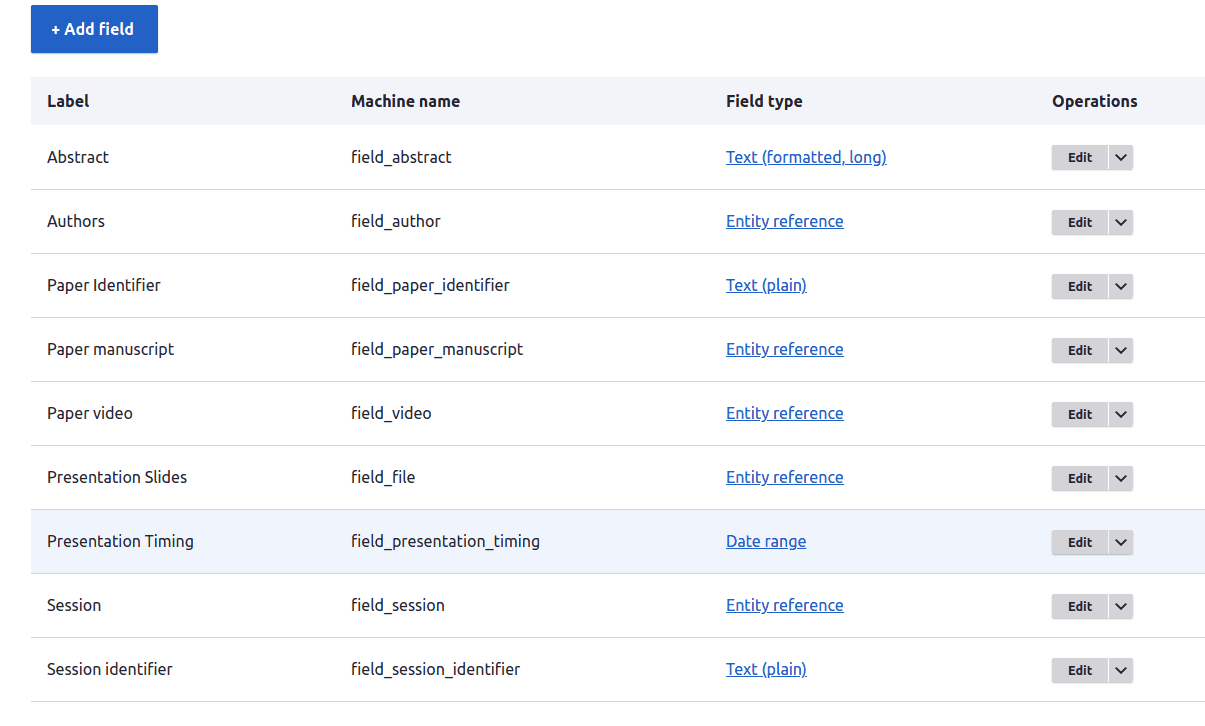

- id : 각 yaml 파일에 대해 고유하며 마이그레이션 목록에 표시됩니다.
- label : 마이그레이션에 대한 설명이 포함됩니다.
- migration_group : 모든 마이그레이션을 포함하는 기본 그룹입니다.
- source : 이 마이그레이션에 대한 모든 소스 세부 정보가 포함됩니다.
- urls : 마이그레이션을 위한 파일을 포함합니다. 위의 코드에서 소스는 private 디렉토리 안에 위치합니다.
- item_selector : 항목 선택자는 전체 데이터 집합을 가져오는 경로입니다. 기본적으로 이 태그 내부에는 하나의 데이터 세트가 있어야 합니다.
- fields : 여기에서 일부 변수에 태그 값을 할당합니다.
- name : 변수 이름을 제공합니다.
- label : 짧은 설명입니다.
- selector : 어떤 태그 값이 변수에 할당되어야 하는지 알려줍니다.
- ids : 각 콘텐츠에 대해 고유해야 합니다.
- process : 변수와 필드 머신 이름을 매핑하고 있습니다.
- destination : 데이터를 마이그레이션해야 하는 엔터티 이름을 언급하고 있습니다.
데이터를 기반으로 이제 마이그레이션용 플러그인도 작성할 수 있습니다. 위의 코드 플러그인은 field_author 필드에 대해 작성되었습니다.
구조 로 이동한 후 마이그레이션 이 표시됩니다. 이를 클릭하십시오. 이제 모든 마이그레이션 그룹을 볼 수 있습니다.
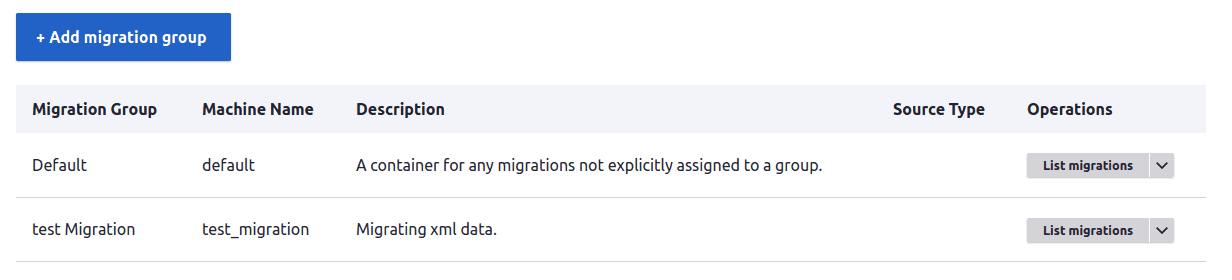
목록 마이그레이션 을 클릭합니다. 거기에서 우리가 만든 마이그레이션 yaml 목록을 볼 수 있습니다.

실행 버튼을 클릭합니다. 마이그레이션 옵션을 볼 수 있습니다.
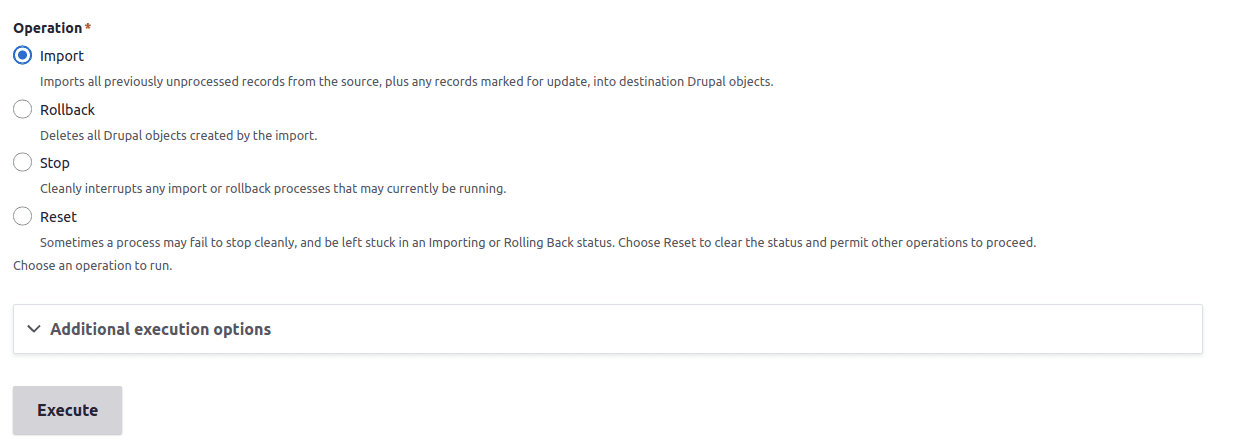
여기에서 원하는 옵션을 실행할 수 있습니다.
- 가져오기: 데이터를 마이그레이션합니다.
- 롤백: 마이그레이션된 모든 데이터를 롤백합니다.
- 중지: 프로세스 중간에 마이그레이션을 중지합니다.
- 재설정: 상태를 유휴 상태로 변경합니다.
이러한 drush 명령을 사용하여 터미널을 통해 콘텐츠를 마이그레이션할 수도 있습니다.
- drush ms - 마이그레이션 상태
- drush mim <migration_id> - 마이그레이션 가져오기
- drush mr <migration_id> - 마이그레이션 롤백
- drush mrs <migration_id> - 마이그레이션 상태를 유휴 상태로 만듭니다.