
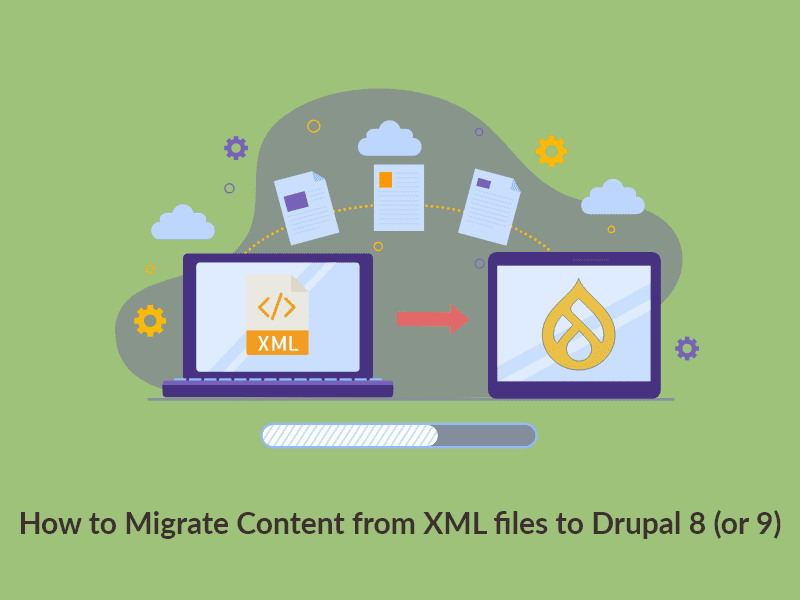
XMLファイルからDrupal8(または9)にコンテンツを移行する方法
公開: 2021-10-05さまざまなソースからDrupalCMSにデータをプルすることが、移行のすべてです。 移行ソースは、データベース、別のCMS、CSV、XMLファイルなど何でもかまいません。 Drupalは常に、どこからでもCMSにデータを移行する柔軟性を提供します。 データベースソースからの移行、CSVからの多言語コンテンツの移行、SQLソースからの移行、移行の完全なハウツーガイドなどの前に、Drupalの移行について幅広く説明しました。 XMLファイルからDrupal8またはDrupal9にデータを移行するためのガイドを探している場合は、ここで説明するので、適切な場所に到着しました。
DrupalFeedsモジュールを使用して外部フィードをDrupal9Webサイトにインポートする場合は、この記事を確認してください。
Drupal8/9移行モジュール
ここでは、Drupal移行モジュールのセット全体を使用します
- 移行する
- Drupalを移行する
- プラスを移行する
- ツールの移行
これらのモジュールをインストールした後、移行用のスクリプトを作成するカスタムモジュールを作成する必要があります。 したがって、最初にカスタムモジュールを作成してから、モジュールの詳細を含むinfo.ymlを作成します。 次に、モジュールを有効にします。
name: test migration type: module description: Migrating data from the csv files. core_version_requirement: ^8 || ^9 package: Migration dependencies: - drupal:migrate_source_csv - drupal:migrate_plus - drupal:migrate_tools config_devel: install: - migrate_plus.migration_group.test_migration - migrate_plus.migration.test_migration_sessions - migrate_plus.migration.test_migration_paper - migrate_plus.migration.test_migration_userinfo.ymlファイルを作成したら、この移行用の移行グループを作成する必要があります。 次のパスにこの移行グループを作成する必要があります: test_migration>config>install 。 移行の実行中に、次の詳細が必要になります。
id: test_migration label: test Migration description: Migrating xml data移行グループを作成したら、このグループをinfo.ymlファイルにインストールします。
config_devel: install: - migrate_plus.migration_group.test_migration次に、コンテンツタイプの移行スクリプトを作成する必要があります。 このスクリプトはconfig>install内にあり、ファイル名はmigrate_plus.migration.test_migration_paper.ymlである必要があります。
id: test_migration_paper label: 'Migrate Paper data from the xml file' migration_group: test_migration source: plugin: url # Full path to the file. data_fetcher_plugin: file data_parser_plugin: xml urls: private://xml/session.xml item_selector: /program/session/papers/paper fields: - name : title lable : 'Paper title' selector : papertitle - name : abstract lable : 'Paper abstract' selector : abstract - name : first_name label : 'Author first name' selector : authors/author/name/givenname - name : last_name label : 'Author last name' selector : authors/author/name/surname - name : paper_id label : 'Paper identifier' selector : paperid - name : session_id label : 'Session identifier' selector : sessionid - name : start_time label : 'Paper presentation start time' selector : starttime - name : end_time label : 'Paper presentation end time' selector : endtime - name : author_name label : 'Author name' selector : authors/author/name/fullname - name : session lable : 'Session name' selector : session ids: session_id : type : string process : # Adding the mapping between the fields and the csv columns. title : - plugin : skip_on_empty method : process source : title field_abstract/value : abstract field_abstract/format : plugin : default_value default_value : "full_html" field_presentation_timing/value : plugin : format_date from_format : 'Ymd\TH:i:s' to_format : 'Ymd\TH:i:s' source : start_time field_presentation_timing/end_value : plugin : format_date from_format : 'Ymd\TH:i:s' to_format : 'Ymd\TH:i:s' source : end_time field_paper_identifier : paper_id field_session_identifier : session_id field_author : - plugin : skip_on_empty method : process source : author_name - plugin : paper_user_migration_import_process no_stub : true field_session : - plugin : skip_on_empty method : process source : session - plugin : node_migration_import_process no_stub : true destination : plugin : 'entity:node' default_bundle : paper migration_dependencies : required : { } dependencies : { } 

- id : yamlファイルごとに一意であり、移行リストに表示されます。
- ラベル:移行の説明が含まれます。
- migration_group :これはすべての移行を含むメイングループです。
- source :この移行のすべてのソースの詳細が含まれます。
- urls :移行用のファイルが含まれます。 上記のコードでは、ソースはプライベートディレクトリ内に配置されています。
- item_selector :アイテムセレクターは、データセット全体が取得されるパスです。 基本的に、このタグ内には1セットのデータが必要です。
- フィールド:ここでは、いくつかの変数にタグ値を割り当てています。
- name :変数名を付けます。
- ラベル:簡単な説明。
- セレクター:変数に割り当てるタグ値を指定します。
- ids :コンテンツごとに一意である必要があります。
- プロセス:変数名とフィールドマシン名をマッピングします。
- 宛先:データの移行先のエンティティ名について言及しています。
データに基づいて、移行用のプラグインも作成できるようになりました。 上記のコードプラグインは、 field_authorフィールド用に記述されています。
この後、 Structureに移動すると、 Migrationが表示されます-それをクリックします。 これで、すべての移行グループが表示されます。
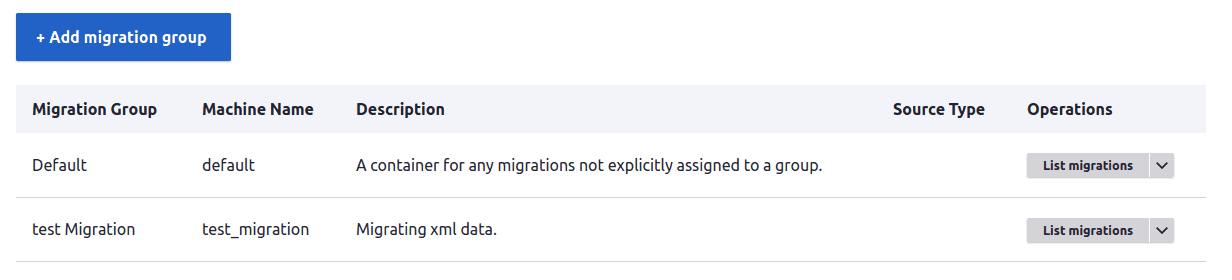
[移行のリスト]をクリックします。 そこに、私たちが作成した移行yamlのリストが表示されます。

[実行]ボタンをクリックします。 移行オプションが表示されます。
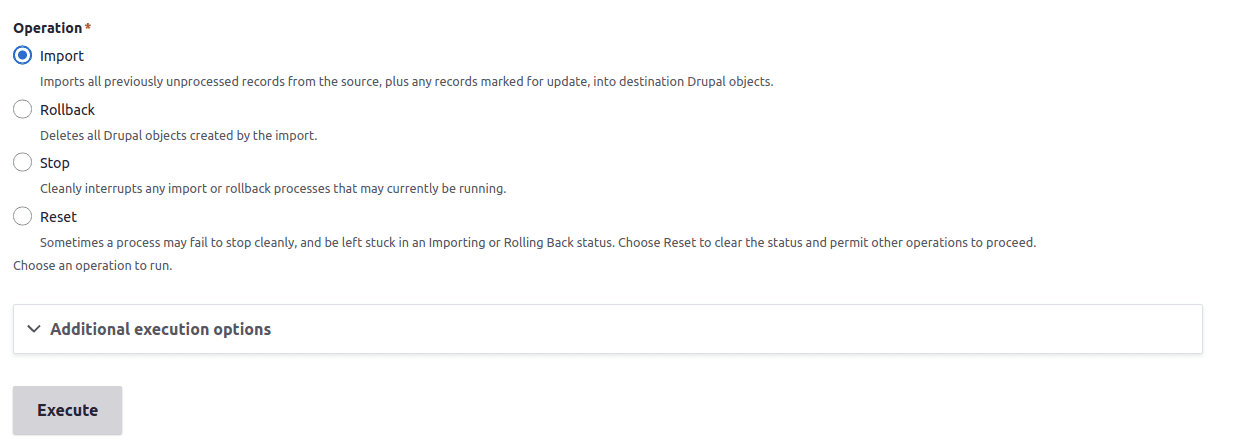
ここでは、任意のオプションを実行できます。
- インポート:これにより、データが移行されます。
- ロールバック:移行されたすべてのデータをロールバックします。
- 停止:プロセスの途中で移行を停止します。
- リセット:ステータスをアイドル状態に変更します。
これらのdrushコマンドを使用して、ターミナルからコンテンツを移行することもできます。
- drushms-移行ステータス
- drushmim <migration_id> -移行のインポート
- drushmr <migration_id> -移行のロールバック
- drushmrs <migration_id> -移行ステータスをアイドル状態にします。